
InspectERM Getting Started Guide
Set up InspectERM step by step: platform settings, the category tree, importing assets, running service and inspections, and reporting.
Getting started with InspectERM:
The Quick Overview
The InspectERM platform is used to create, manage, dispatch and review Inspections. The customizable set of questions are defined per category which the asset is a part of:
Asset Category specific questions are processed, pictures are uploaded and the inspection is marked as completed (either successfully or not):
 |  |  |
1. Platform settings
https://app.clouderm.com/settings
1.1 Roles:
https://app.clouderm.com/settings/roles/
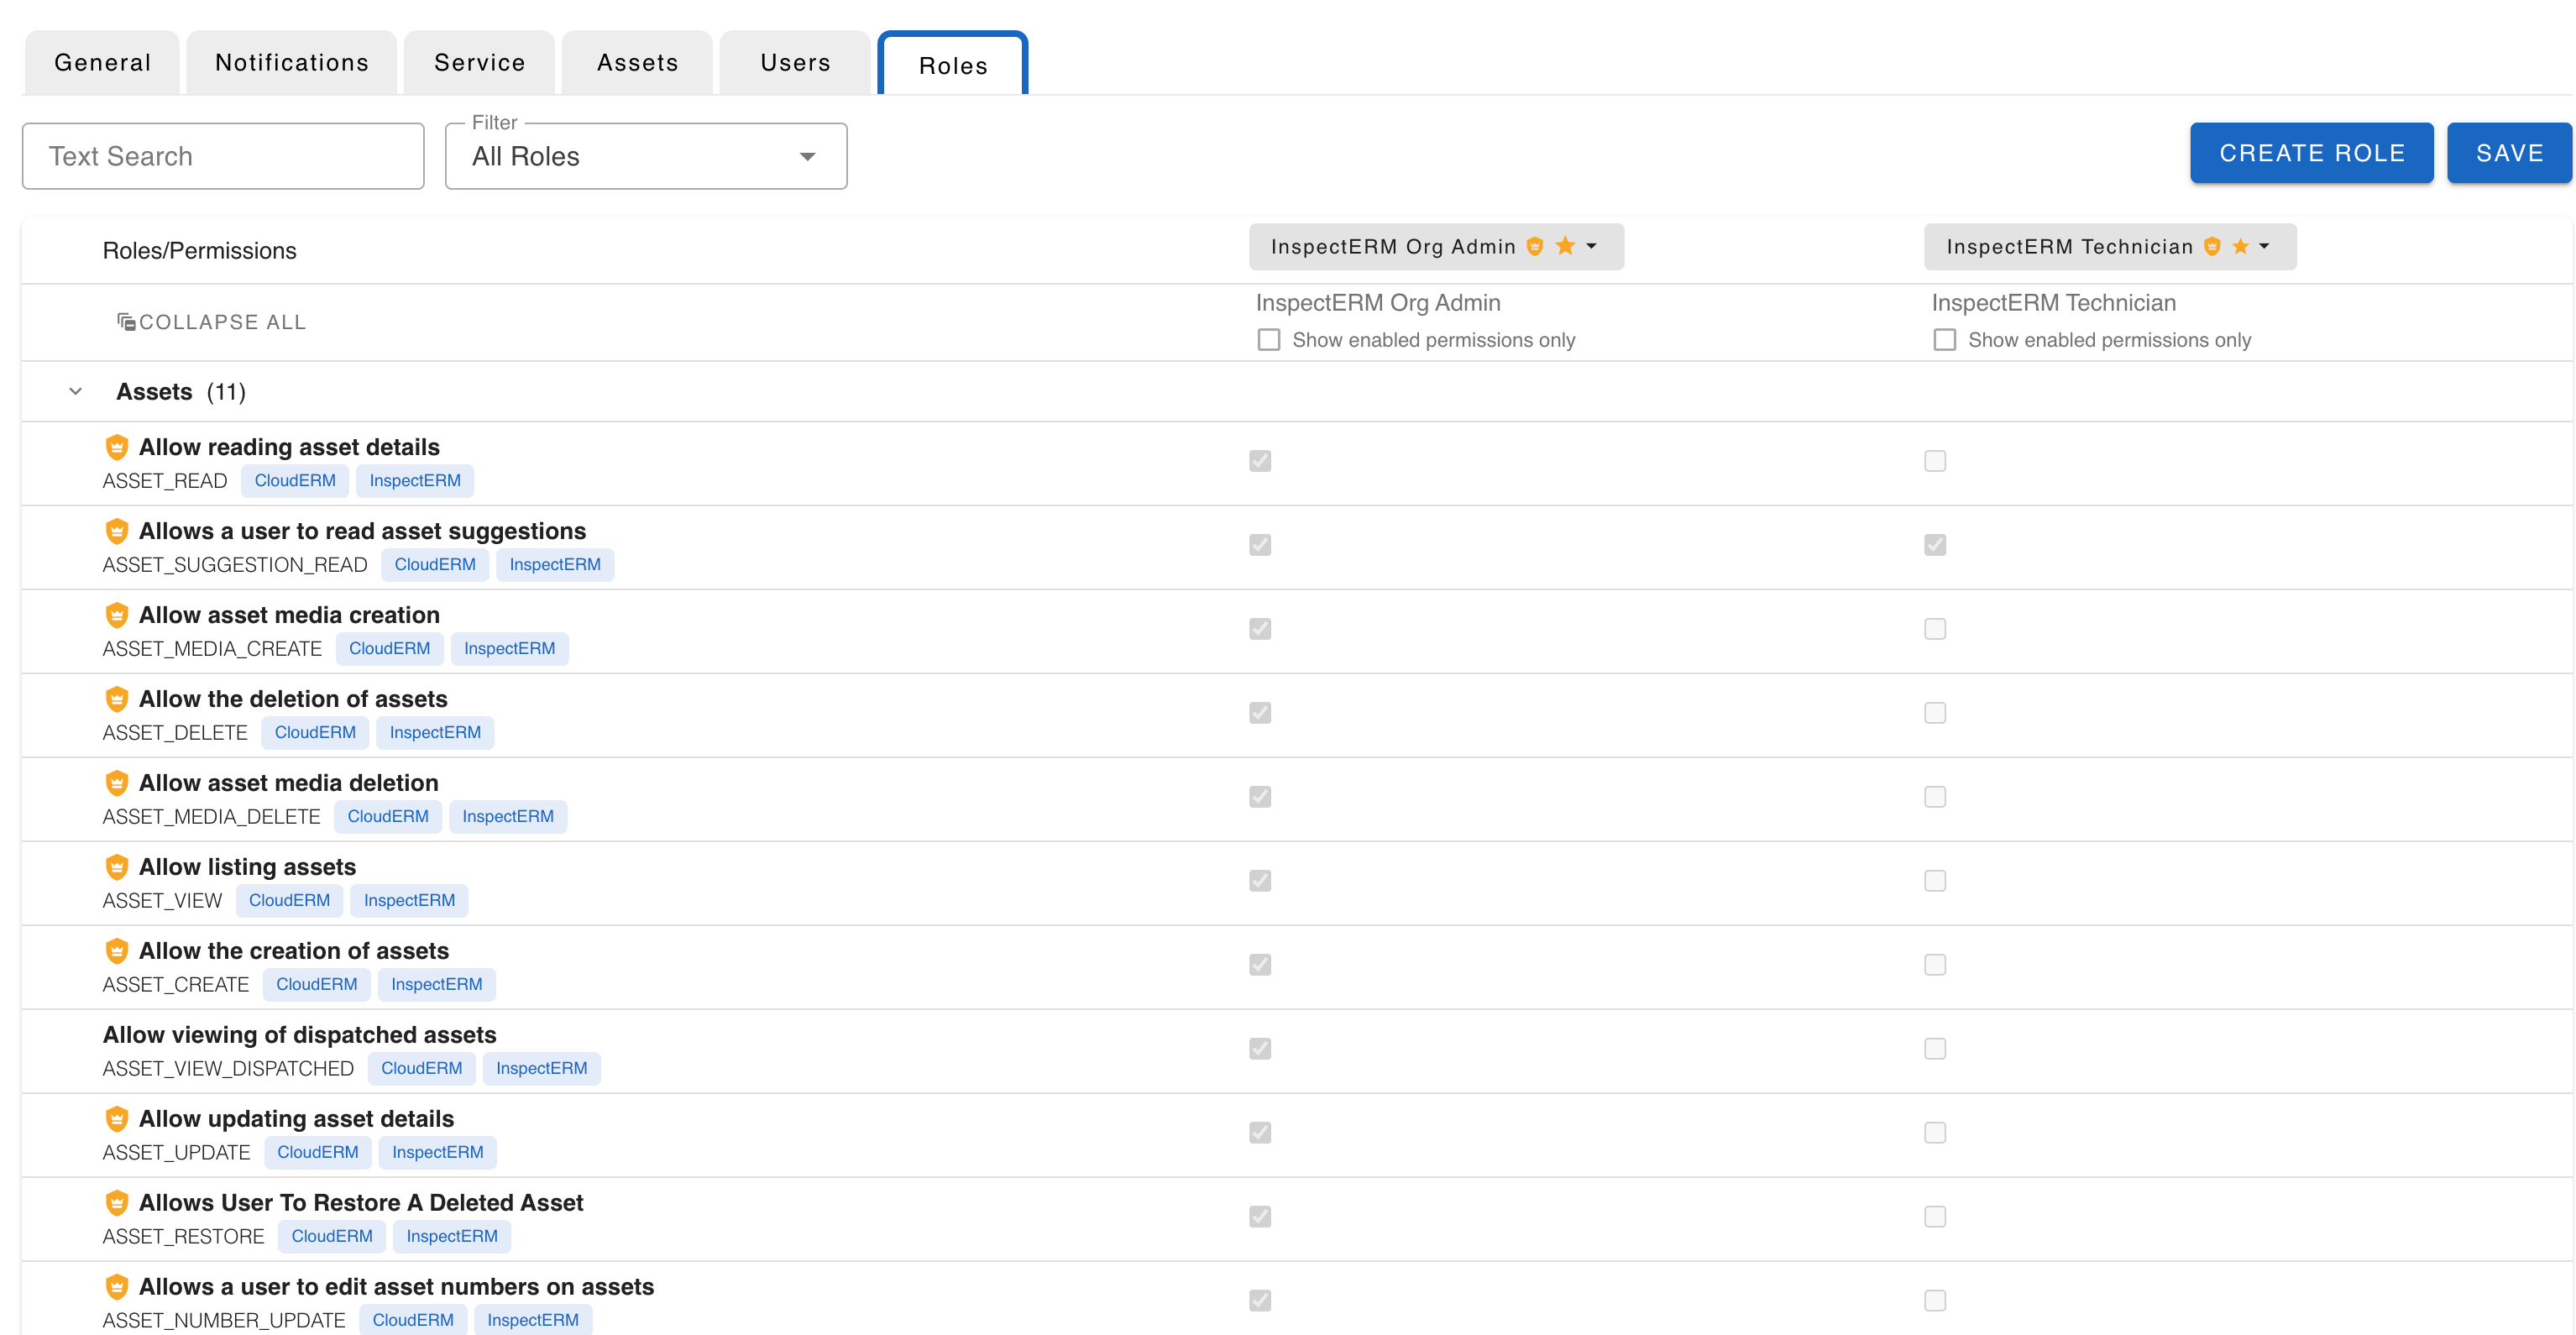
A User is assigned to one or more Roles. A Role has a set of Permissions. By default, three roles are pre-defined:
InspectERM Org Admin- Full access to every capabilityInspectERM Technician- Permissions needed to perform inspectionsInspectERM Technician No photo- When performing inspections, it is NOT required to attach photos to inspections
User | Roles |
|---|---|
admin |
|
alan |
|
andy |
|
bob |
|
carl |
|
chris |
|
New Roles can be created from scratch or a clone of an existing Role:
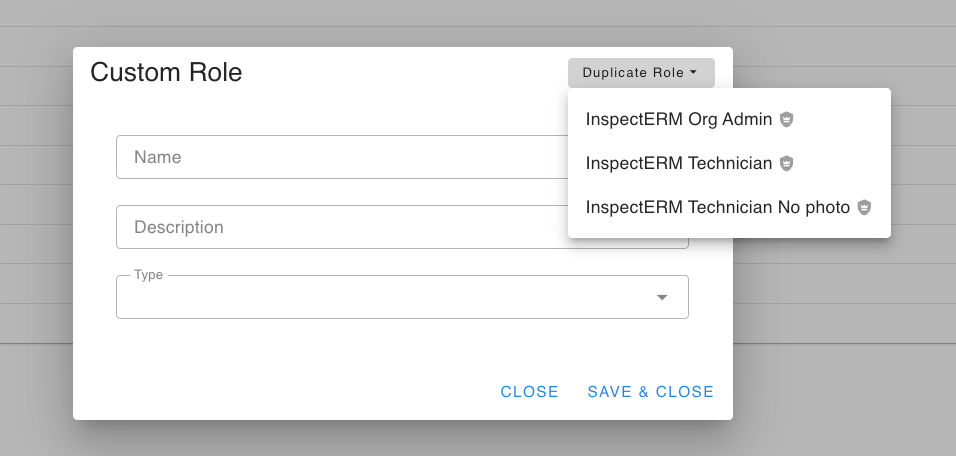
1.2 Users:
https://app.clouderm.com/settings/users/
Users can be created and assigned any appropriate Roles:
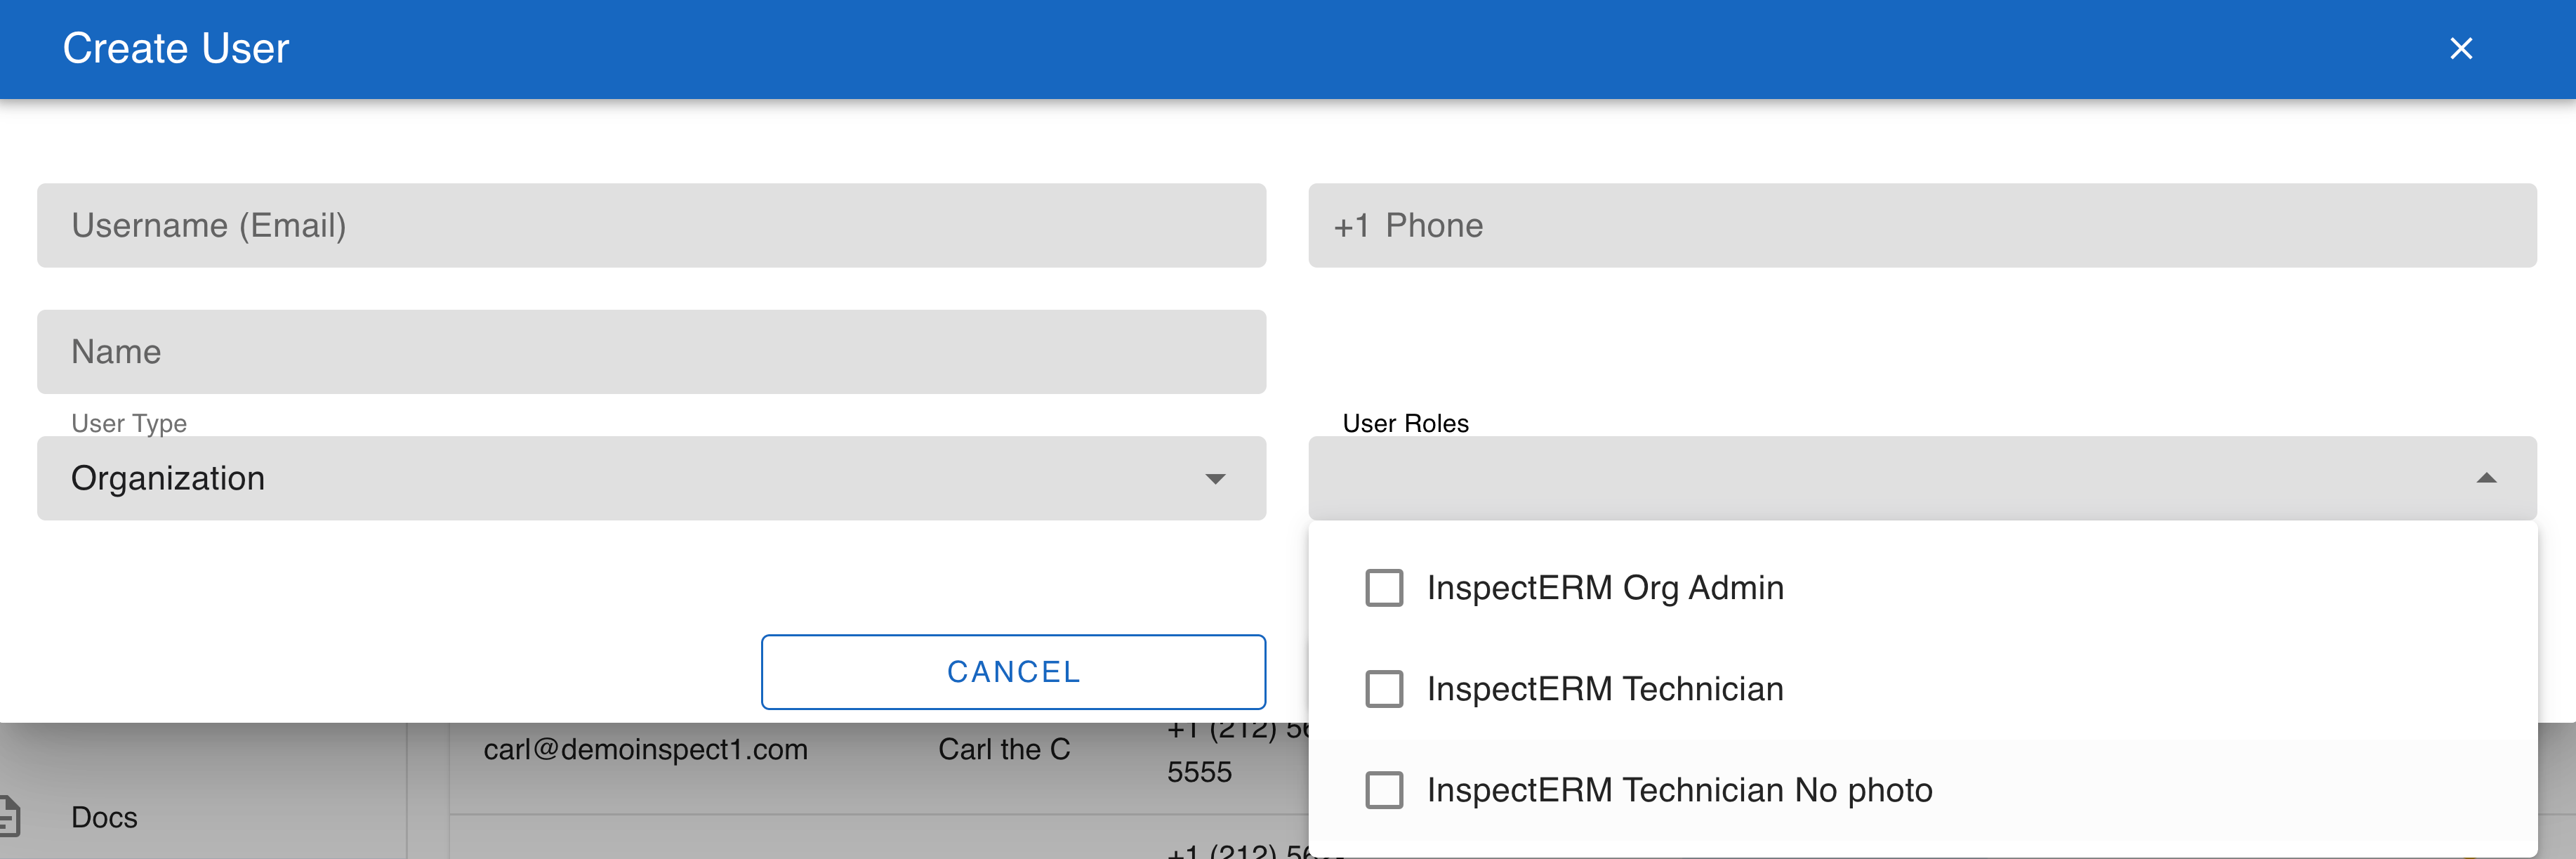
Only Users with email addresses can log in to the webpage. Only users with phone numbers can log into the mobile Inspect app
1.3 General:
https://app.clouderm.com/settings/general
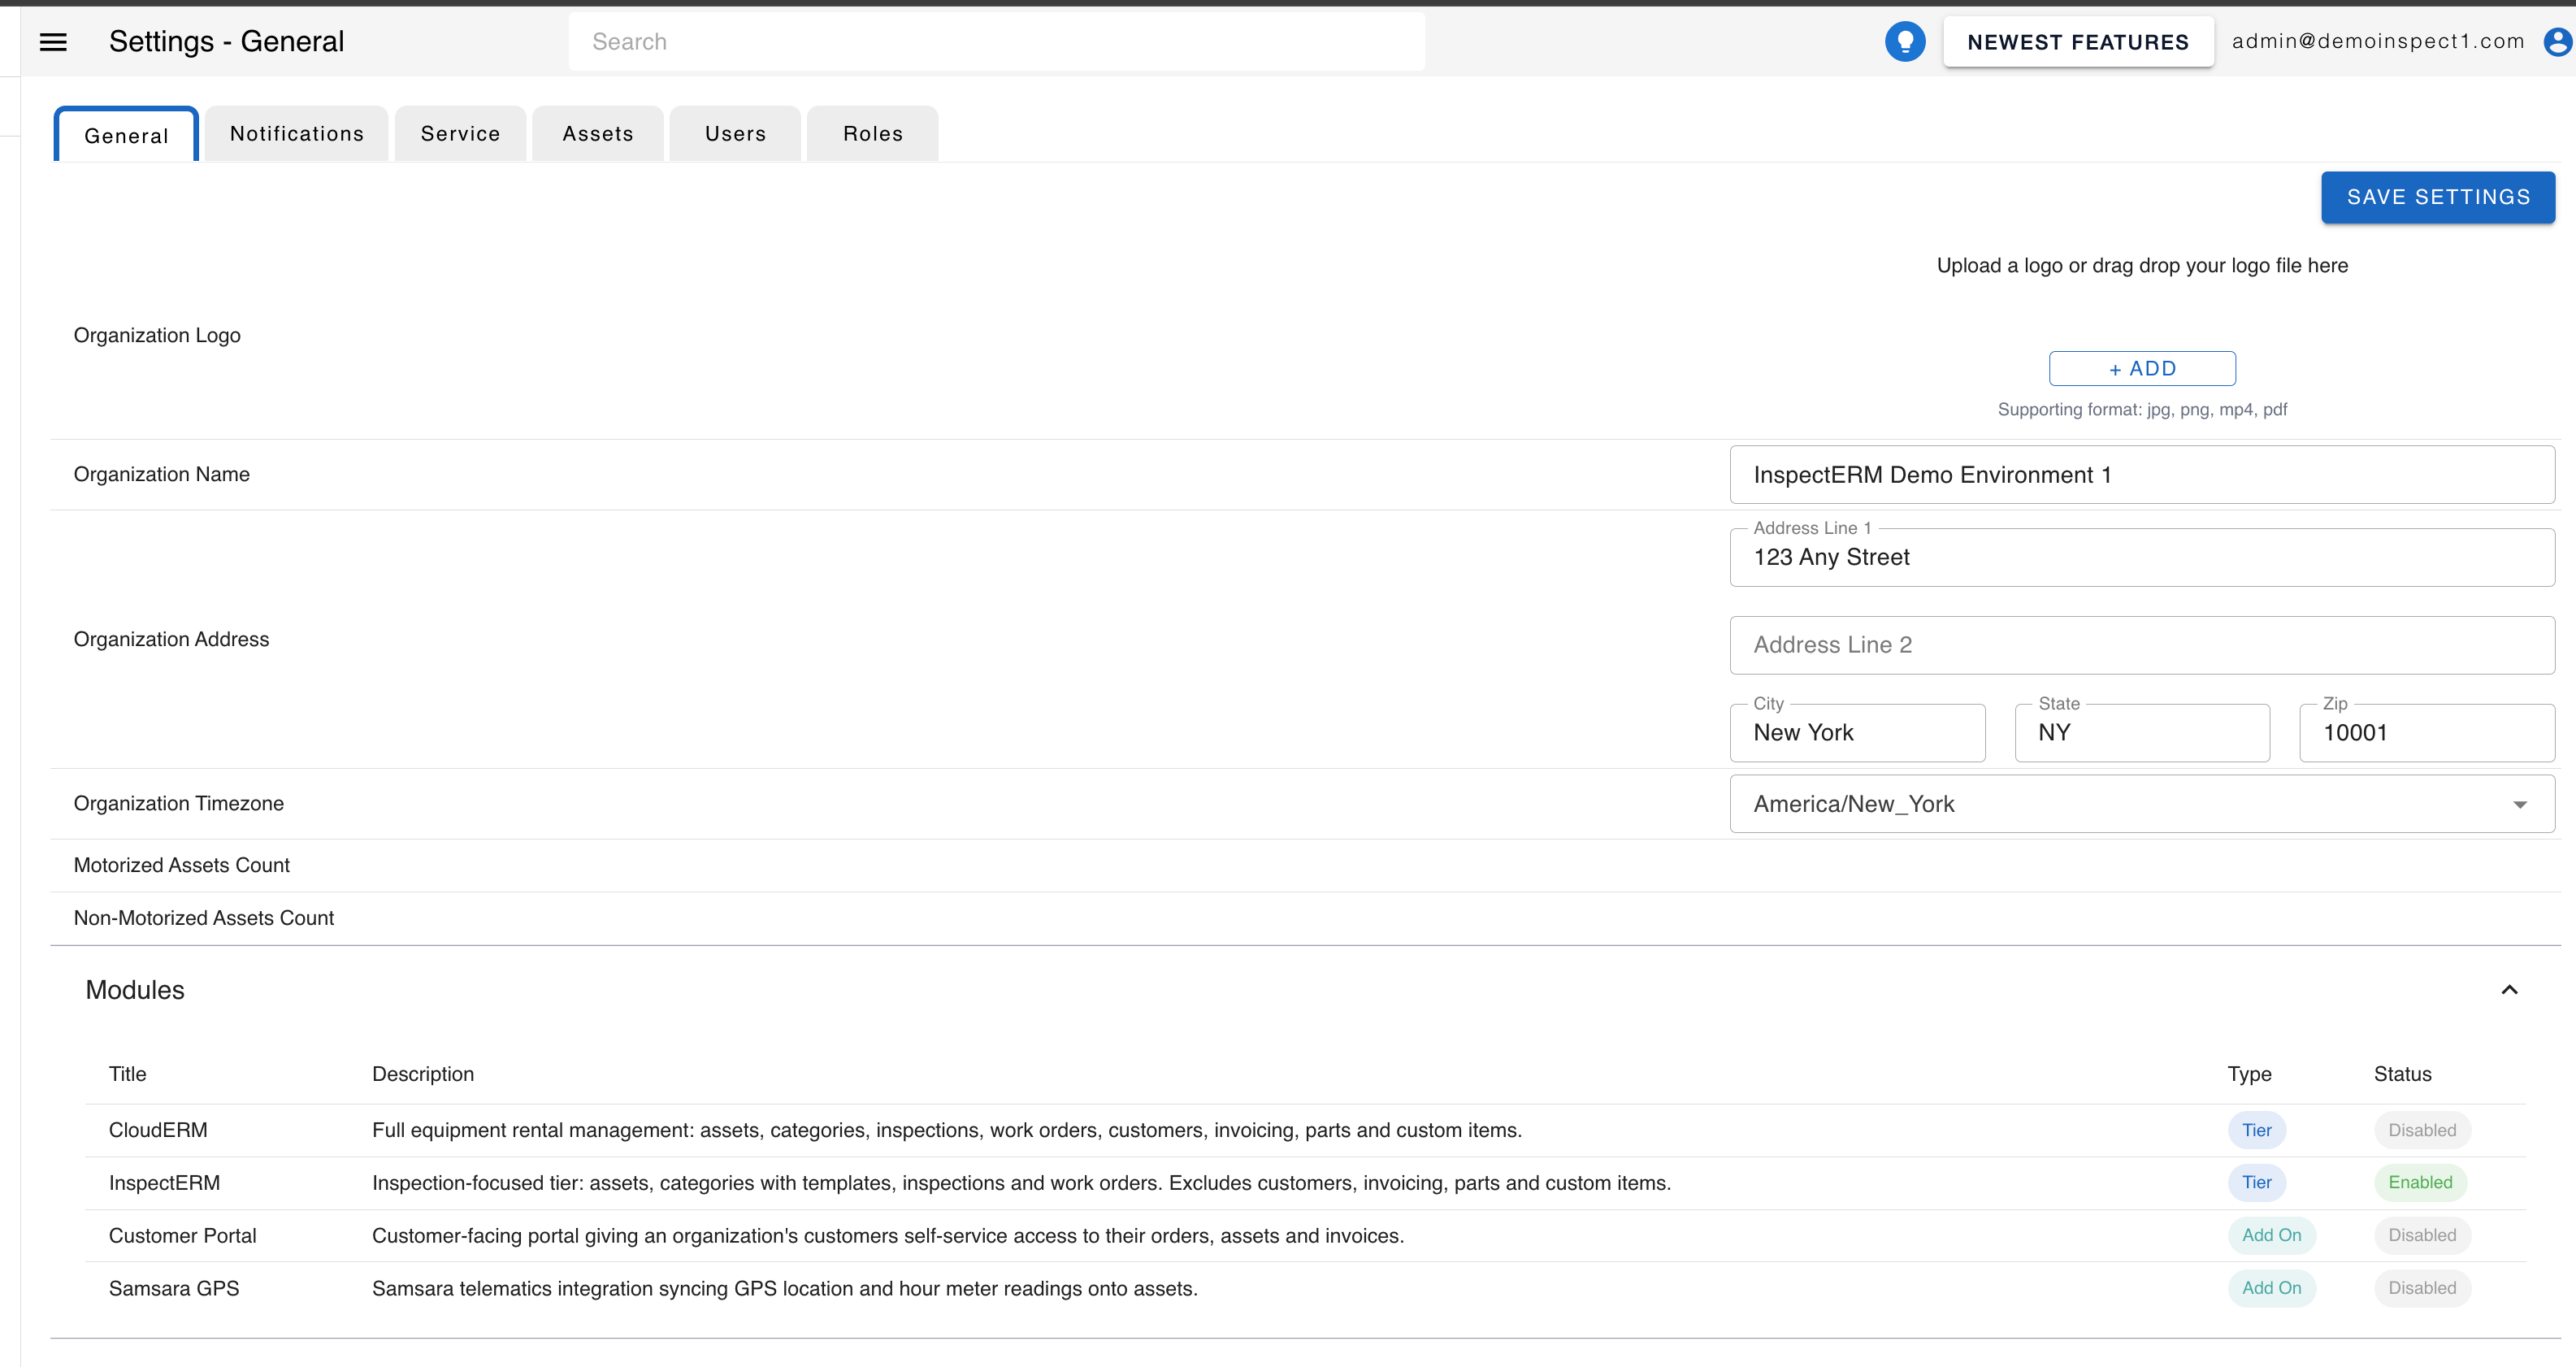
The General tab is where you save details about your Organization. Be sure to specify the correct timezone:
1.4 Notifications:
https://app.clouderm.com/settings/notifications
Each event has an email recipient list and an optional Slack webhook, independently toggleable.
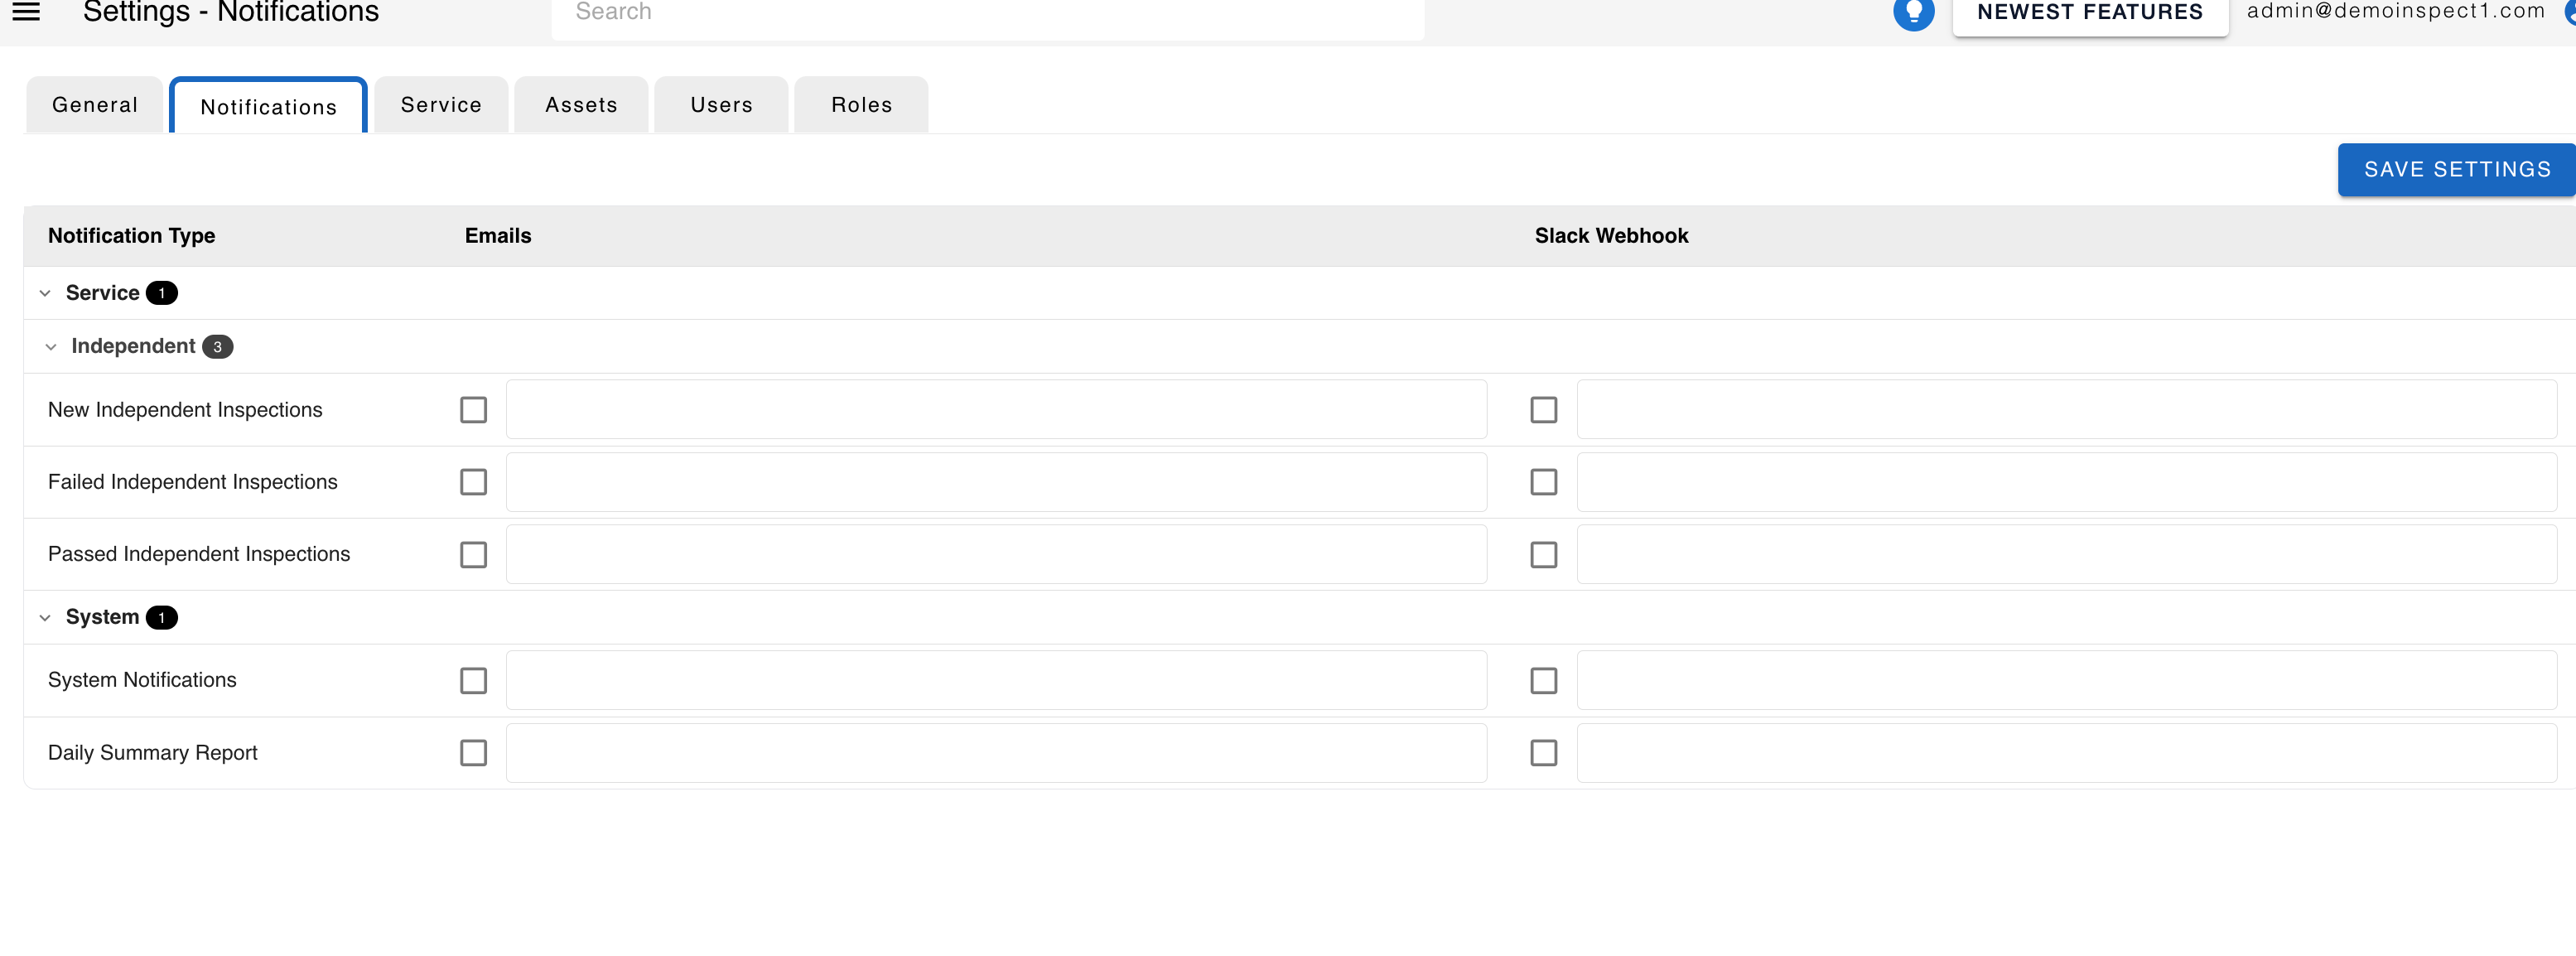
By default, no notifications are set. An onboarding decision is to decide who receives failures versus who receives everything — defaulting everyone to all inspections is the common mistake.
1.5 Assets:
1.5.1 Basics:
https://app.clouderm.com/settings/assets/basics
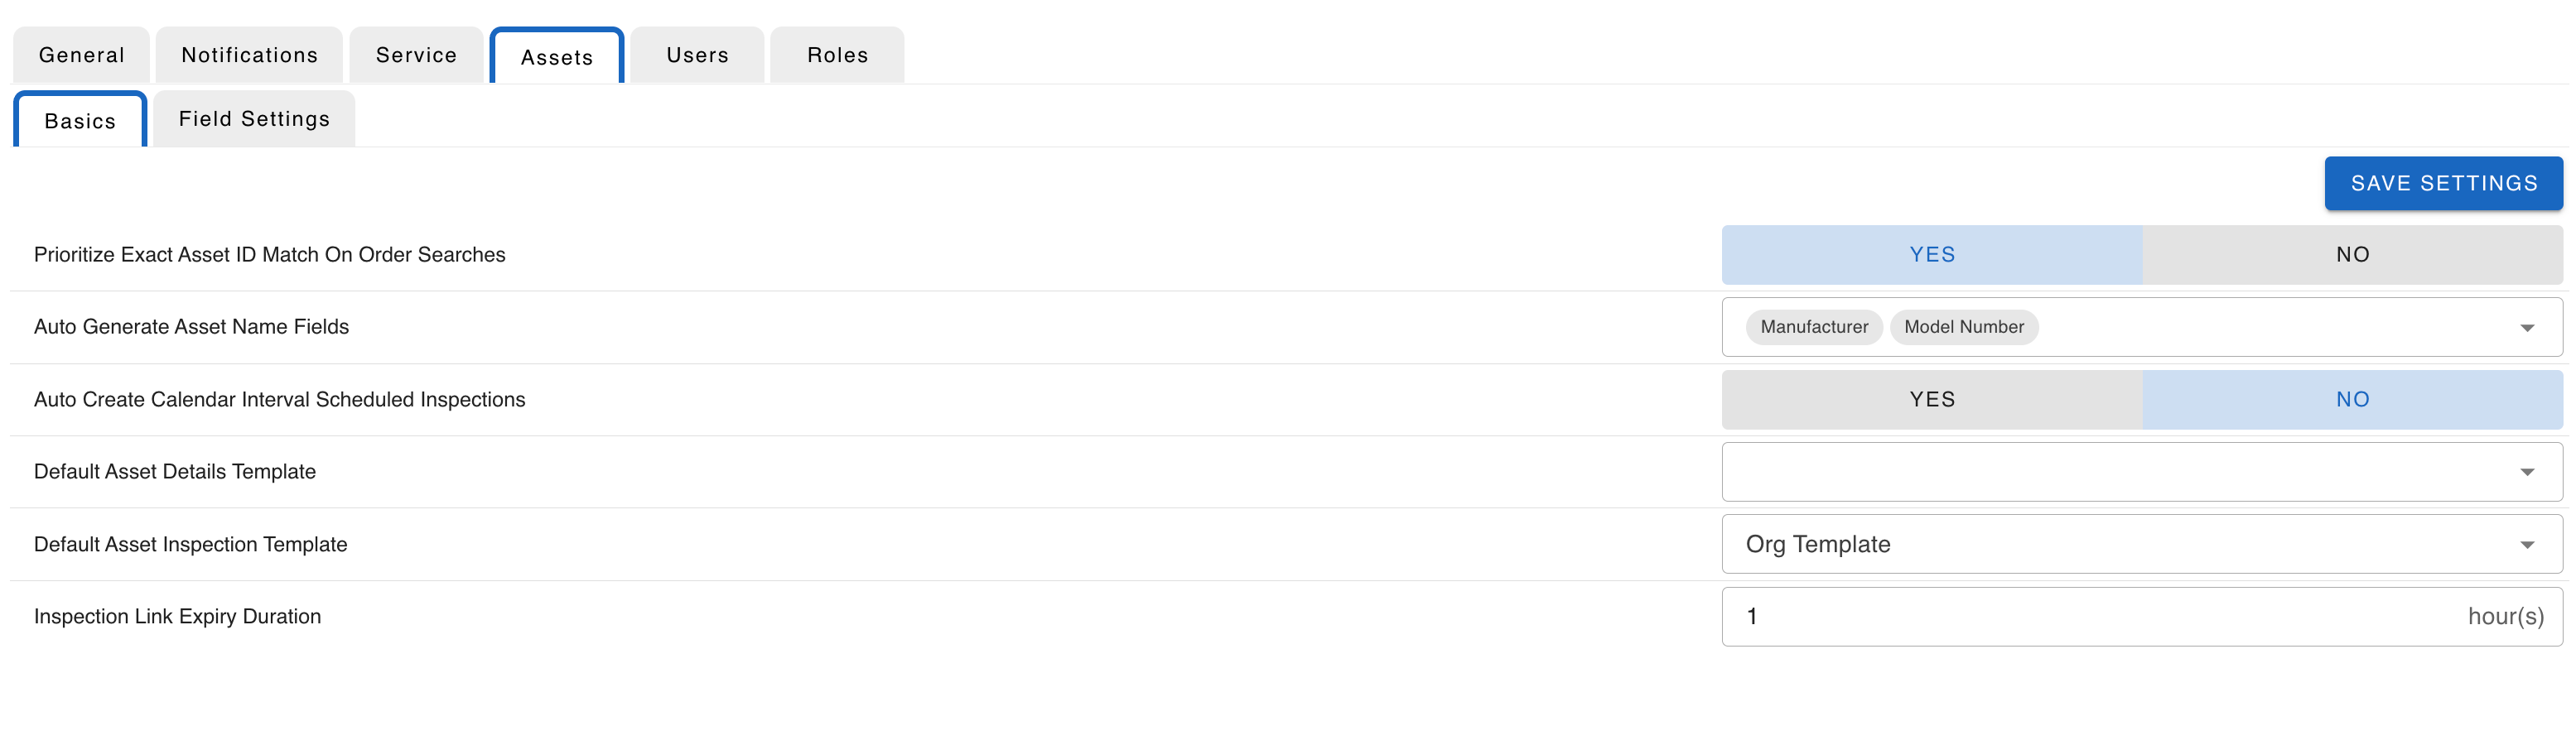
The inspection-relevant settings on this tab:
Setting | Options | Default | Notes |
|---|---|---|---|
Auto Create Calendar Interval Scheduled Inspections | Yes / No |
| Turns on recurring inspections generated on a calendar interval. Interval timing is specified on the category tree for the assets. |
Default Asset Inspection Template | Template picker | — | The inspection form applied to all assets in all categories. |
Inspection Link Expiry Duration | Number (hours) |
| Lifetime of a shared inspection link. Must be greater than zero. |
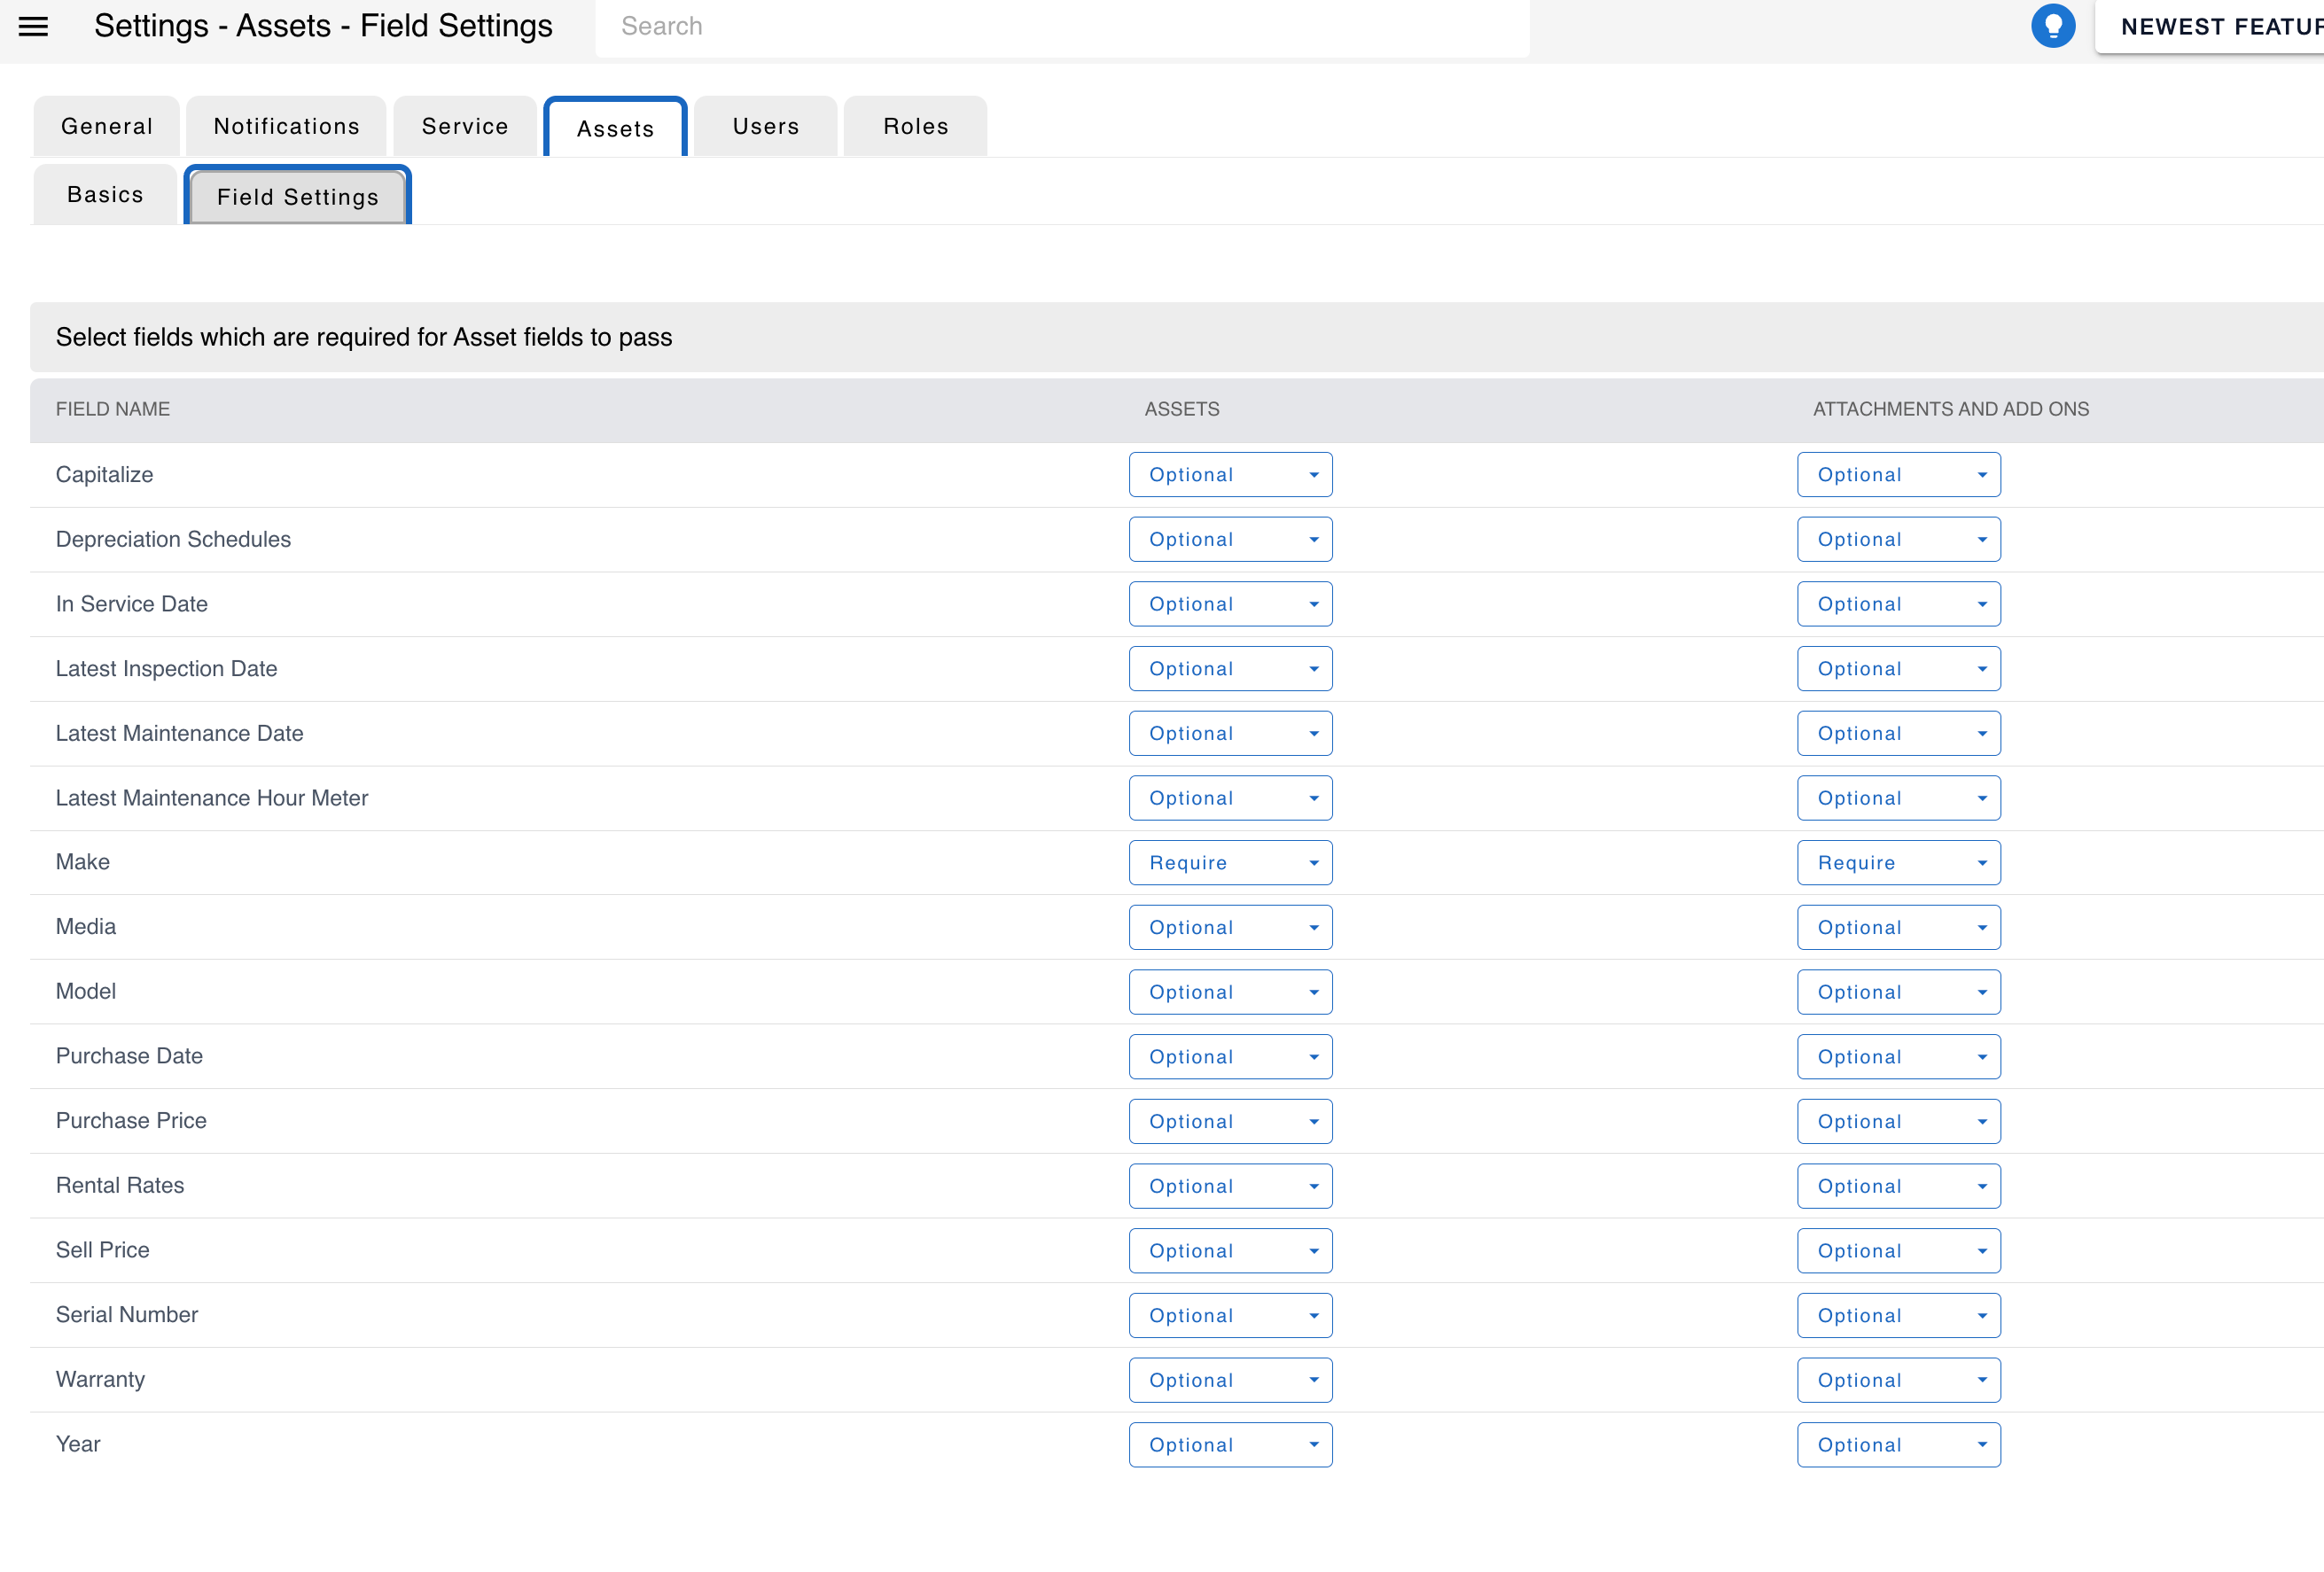
1.5.2 Field settings
https://app.clouderm.com/settings/assets/field-settings
The Field Settings for Assets control which fields are visible, required and editable. Full documentation about Fields Settings can be read here: https://docs.clouderm.com/fundamentals/field-validation#field-validation
1.5 Service
https://app.clouderm.com/settings/service
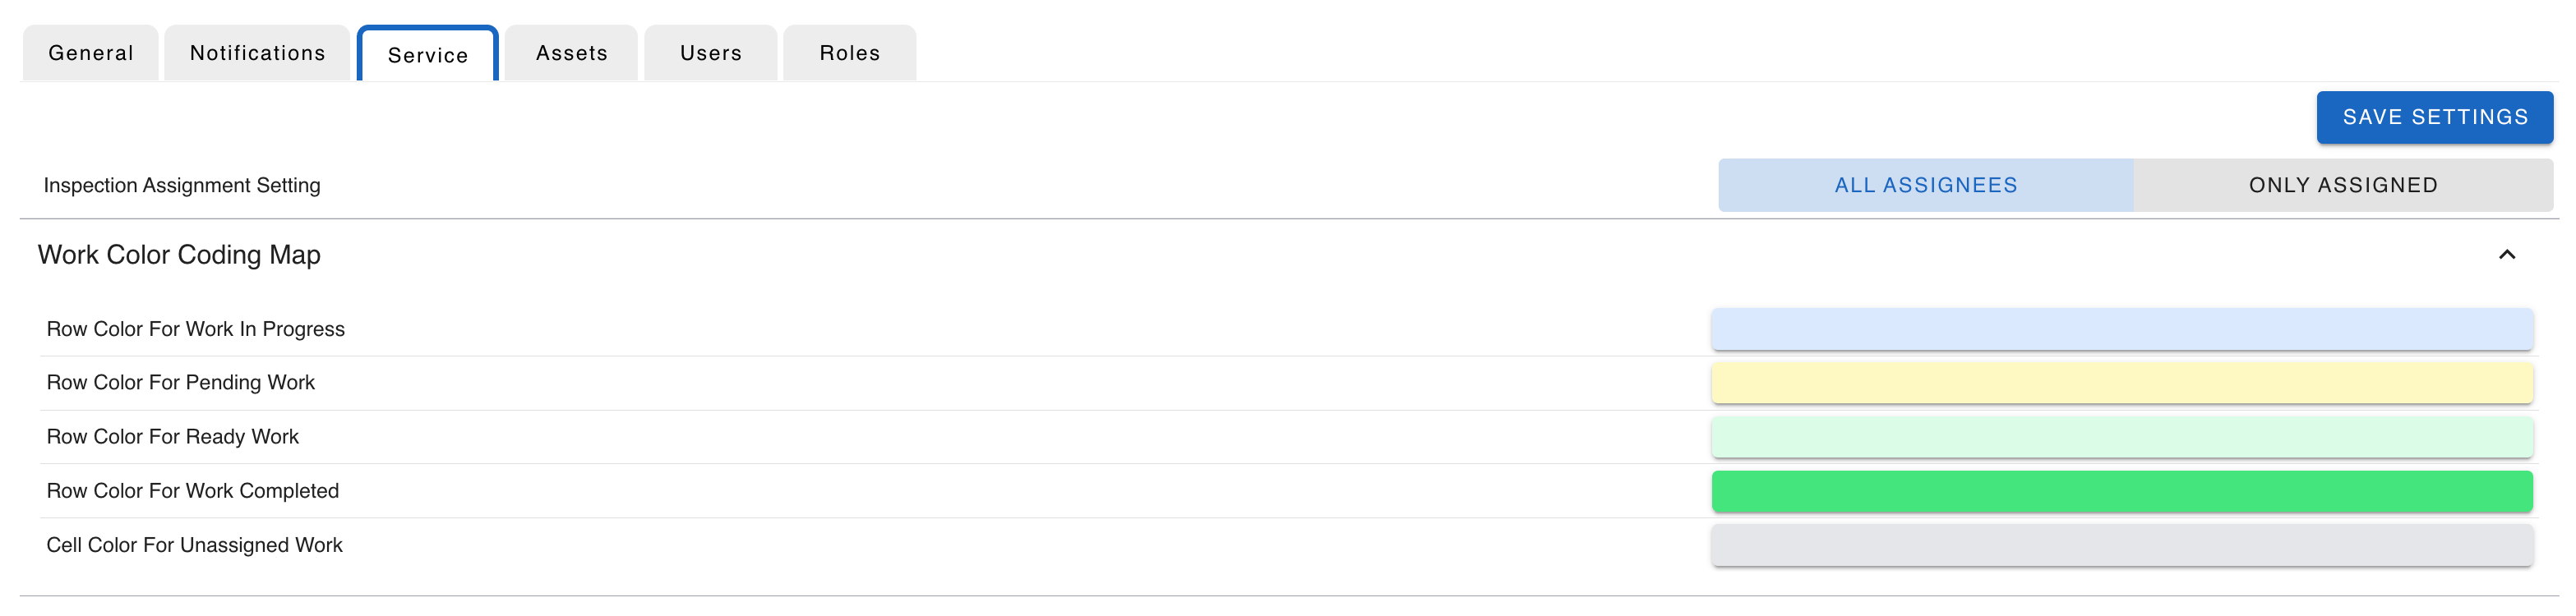
Setting | Options | Default | Notes |
|---|---|---|---|
Inspection Assignment Setting | All Assignees / Only Assigned |
| Whether any assignee can act on an inspection or only the named one. Drives who sees what on the service board. |
Work order colour coding | Colour per status | Six status colors | Status colours for pending, ready, in progress, paused, work completed and unassigned. Cosmetic, but worth aligning to the customer's existing conventions early — changing it later retrains everyone. |
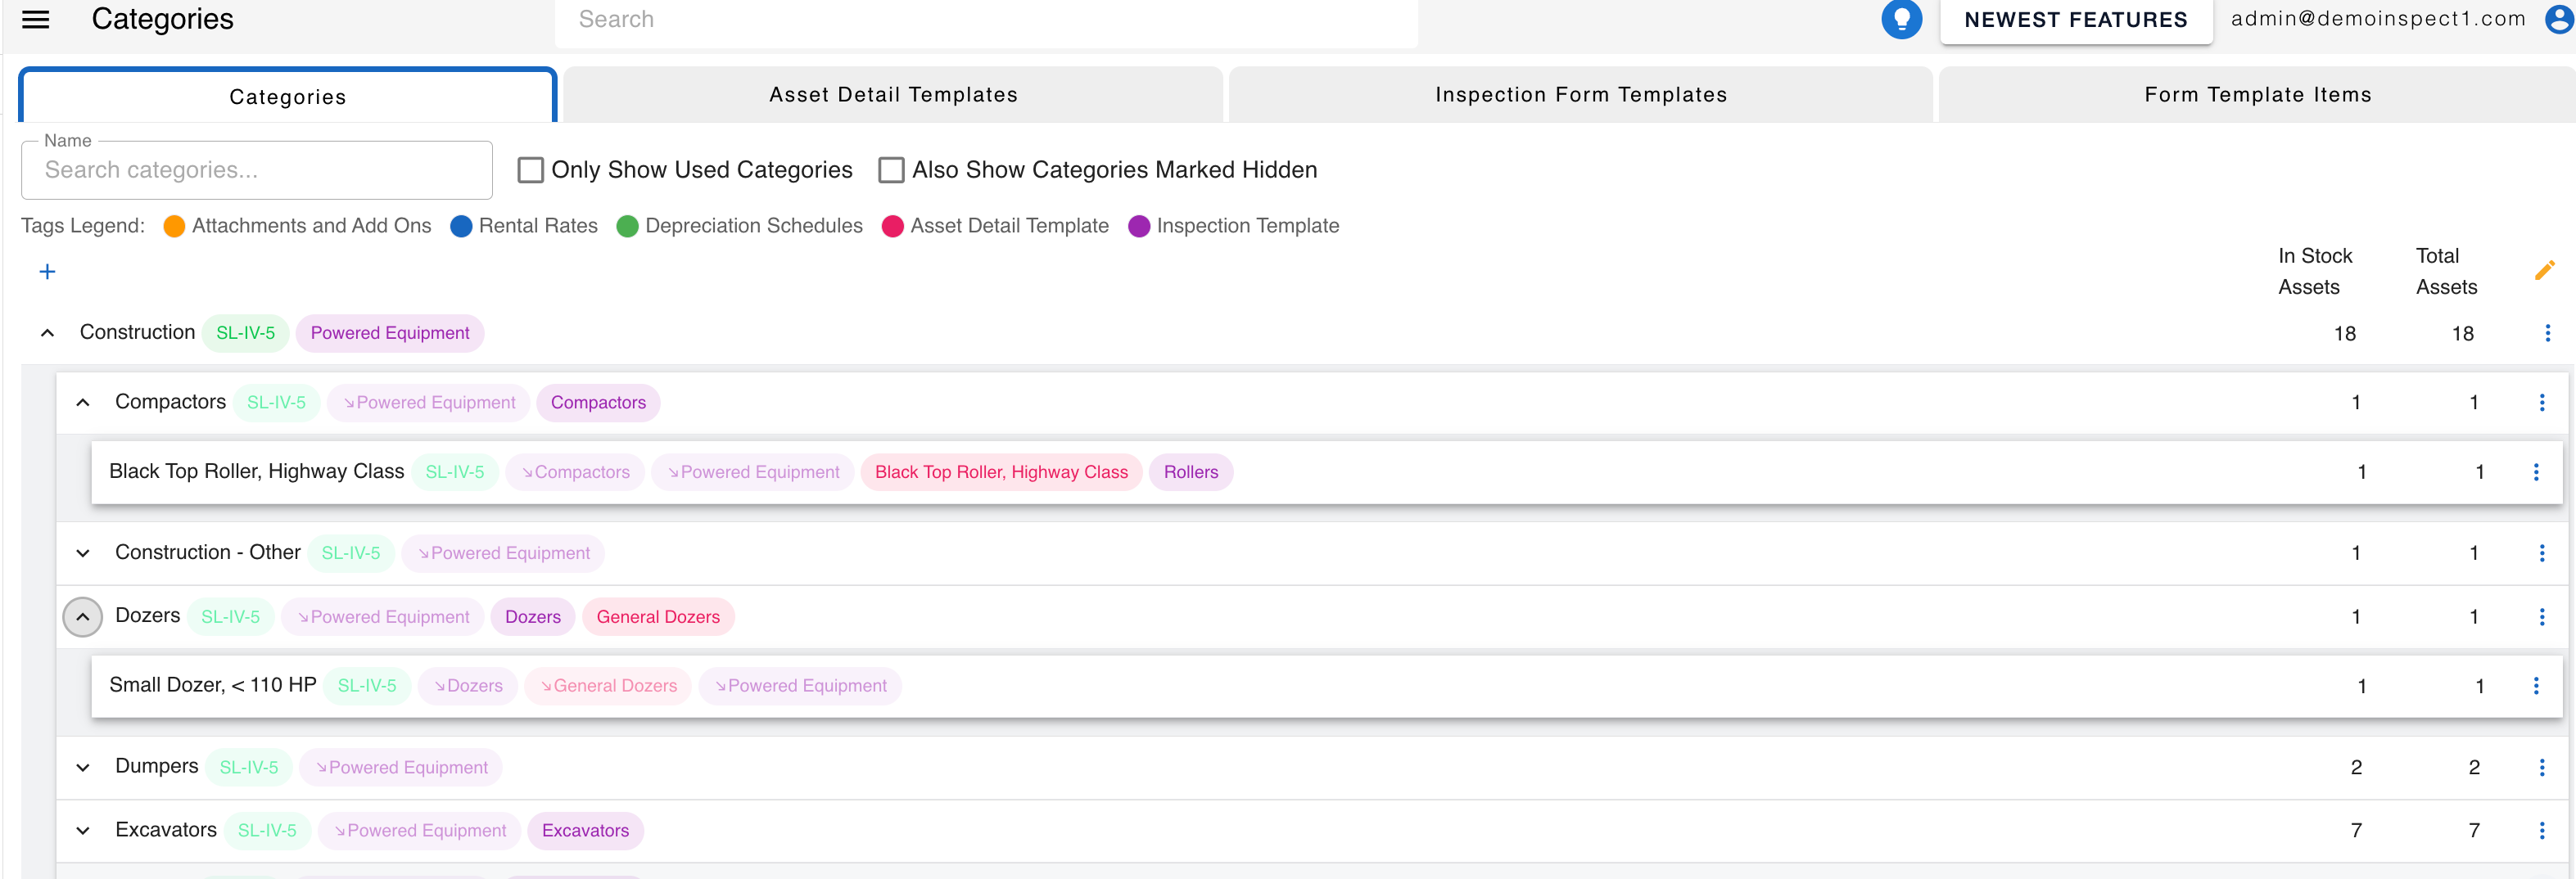
2. Review and understand the category tree
https://app.clouderm.com/schemas/categories
The category tree classifies every asset in the org. It is three levels:
Super Category — top-level grouping.
Category — child of a super-category.
Sub Category — leaf; child of a category.
Every asset is assigned to exactly one sub-category, never directly to a category or super-category. Each organization gets its own independent tree, seeded from a shared template. Anything can be renamed, added or deleted. Plan renames before import, not after. Your onboarding assistant will work with you to assign suggested categories per asset as part of the asset importing.
Inspection and Asset Detail templates
Items in the category tree can be assigned Asset Detail Templates and Inspection Templates.
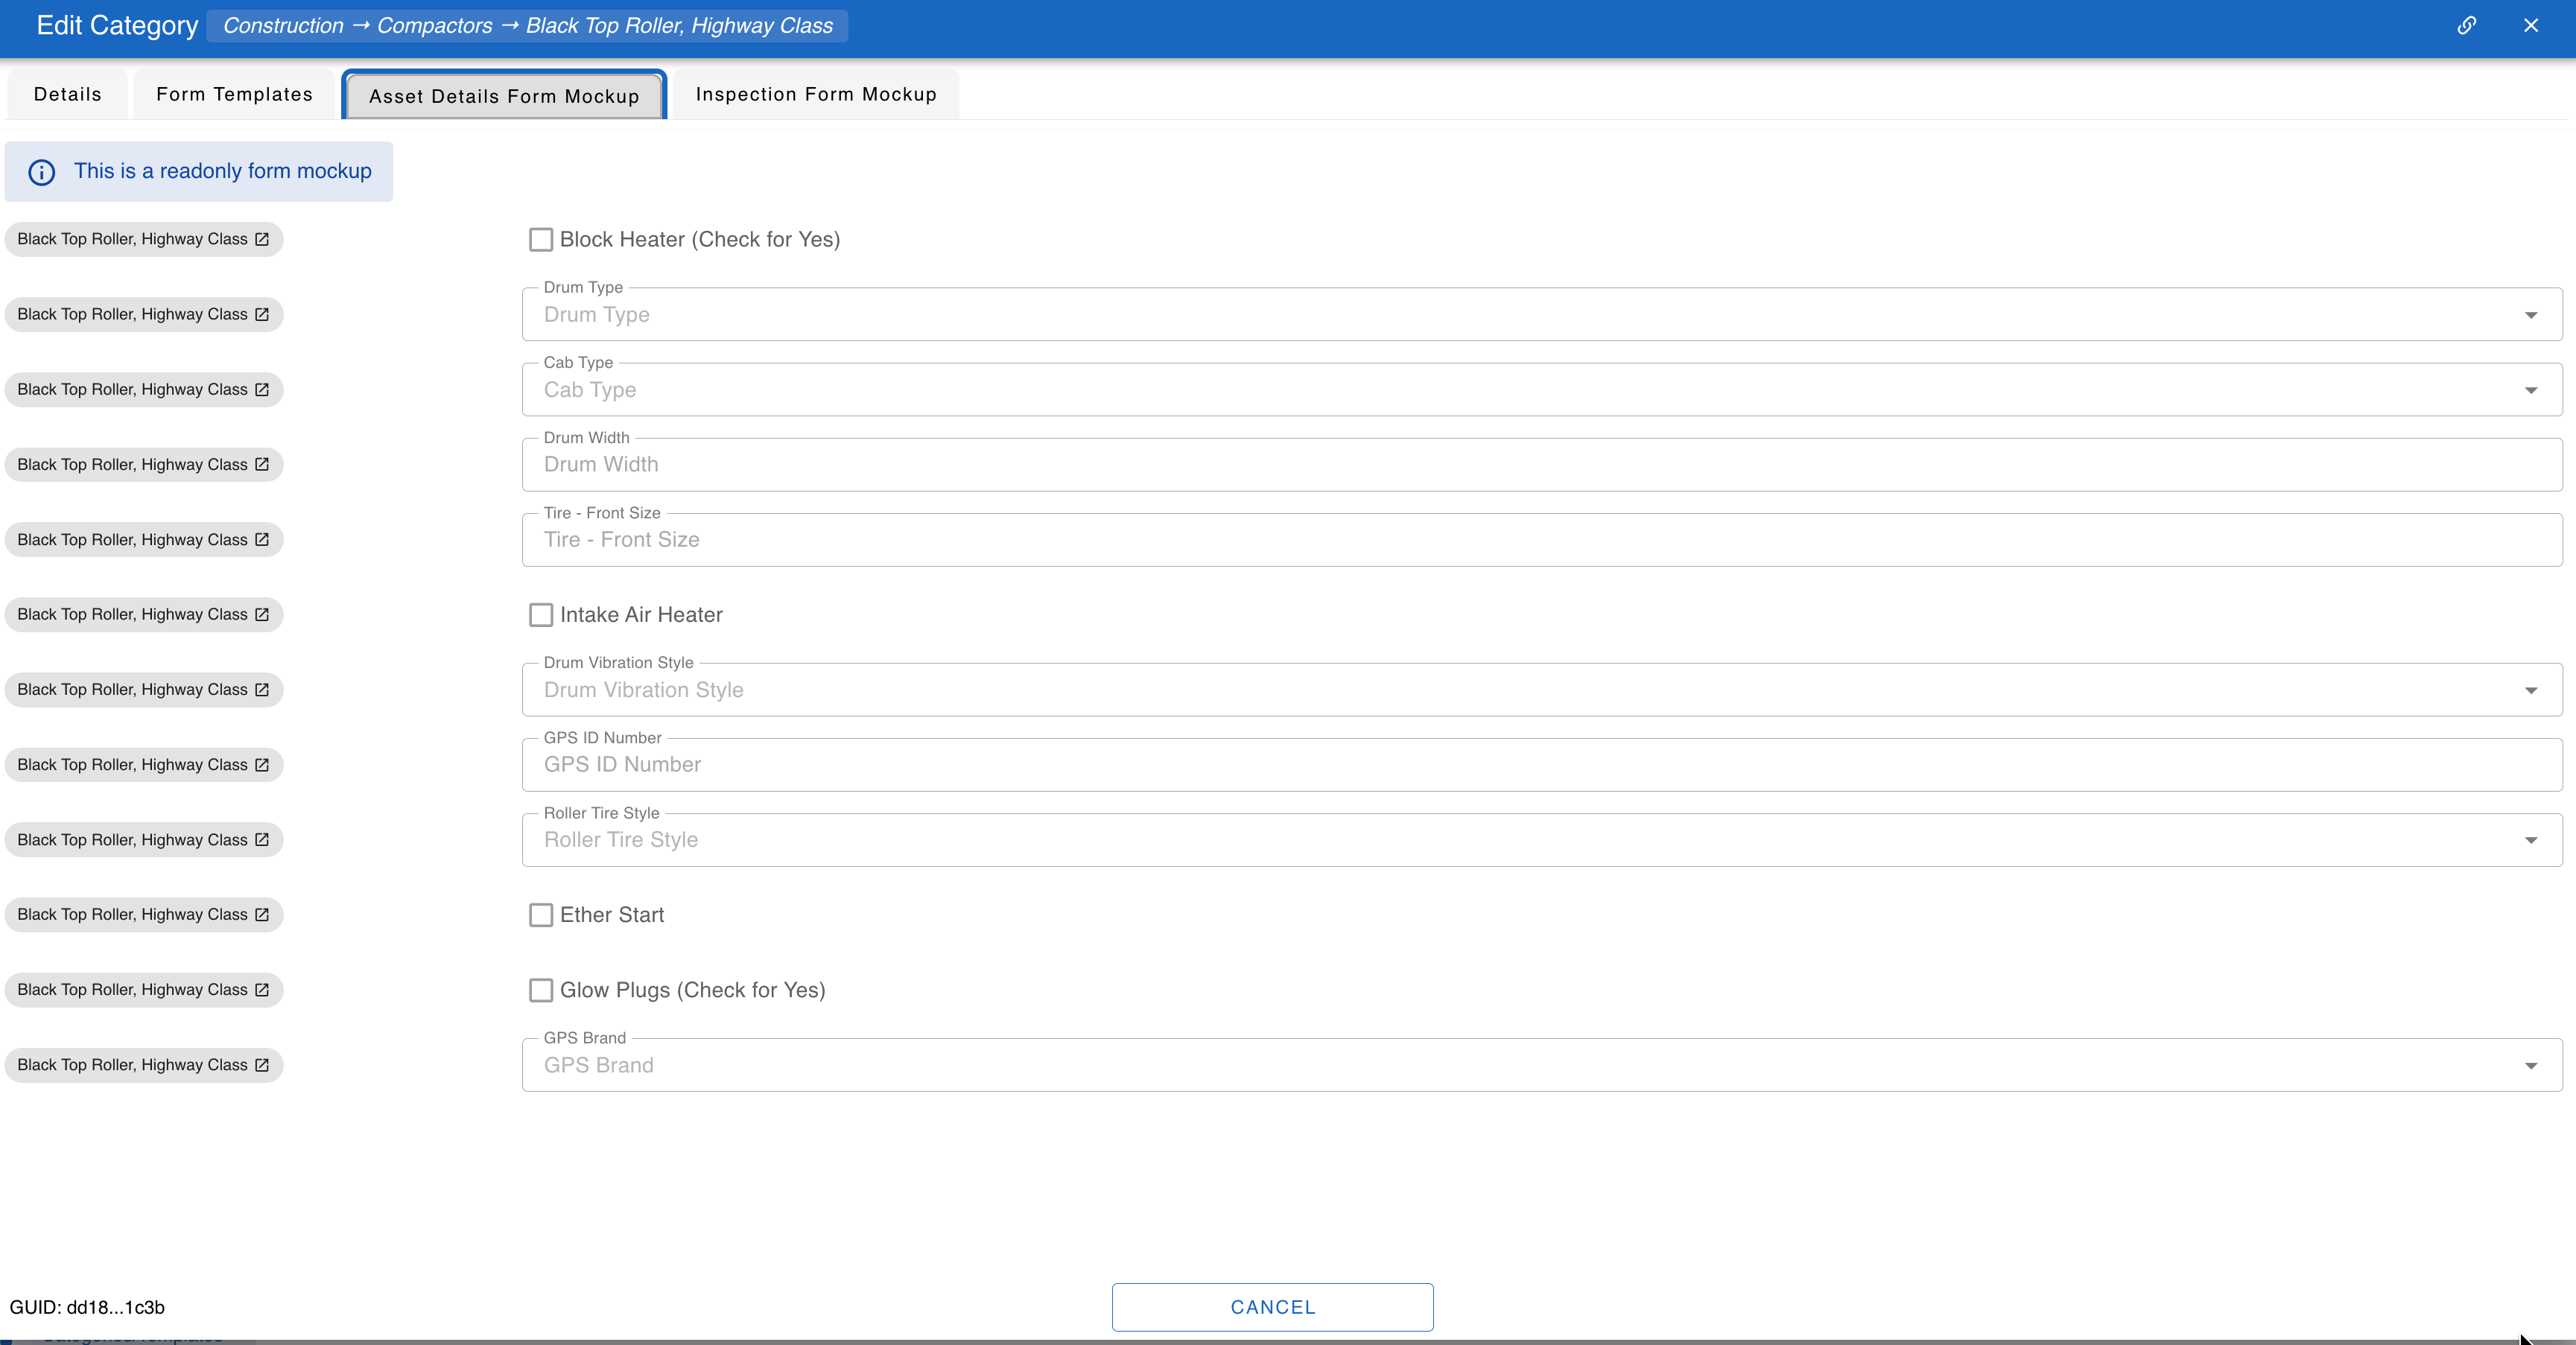
Asset Detail Templates expand on the default information collected for assets with information custom to the category.
https://app.clouderm.com/schemas/asset-detail-templates
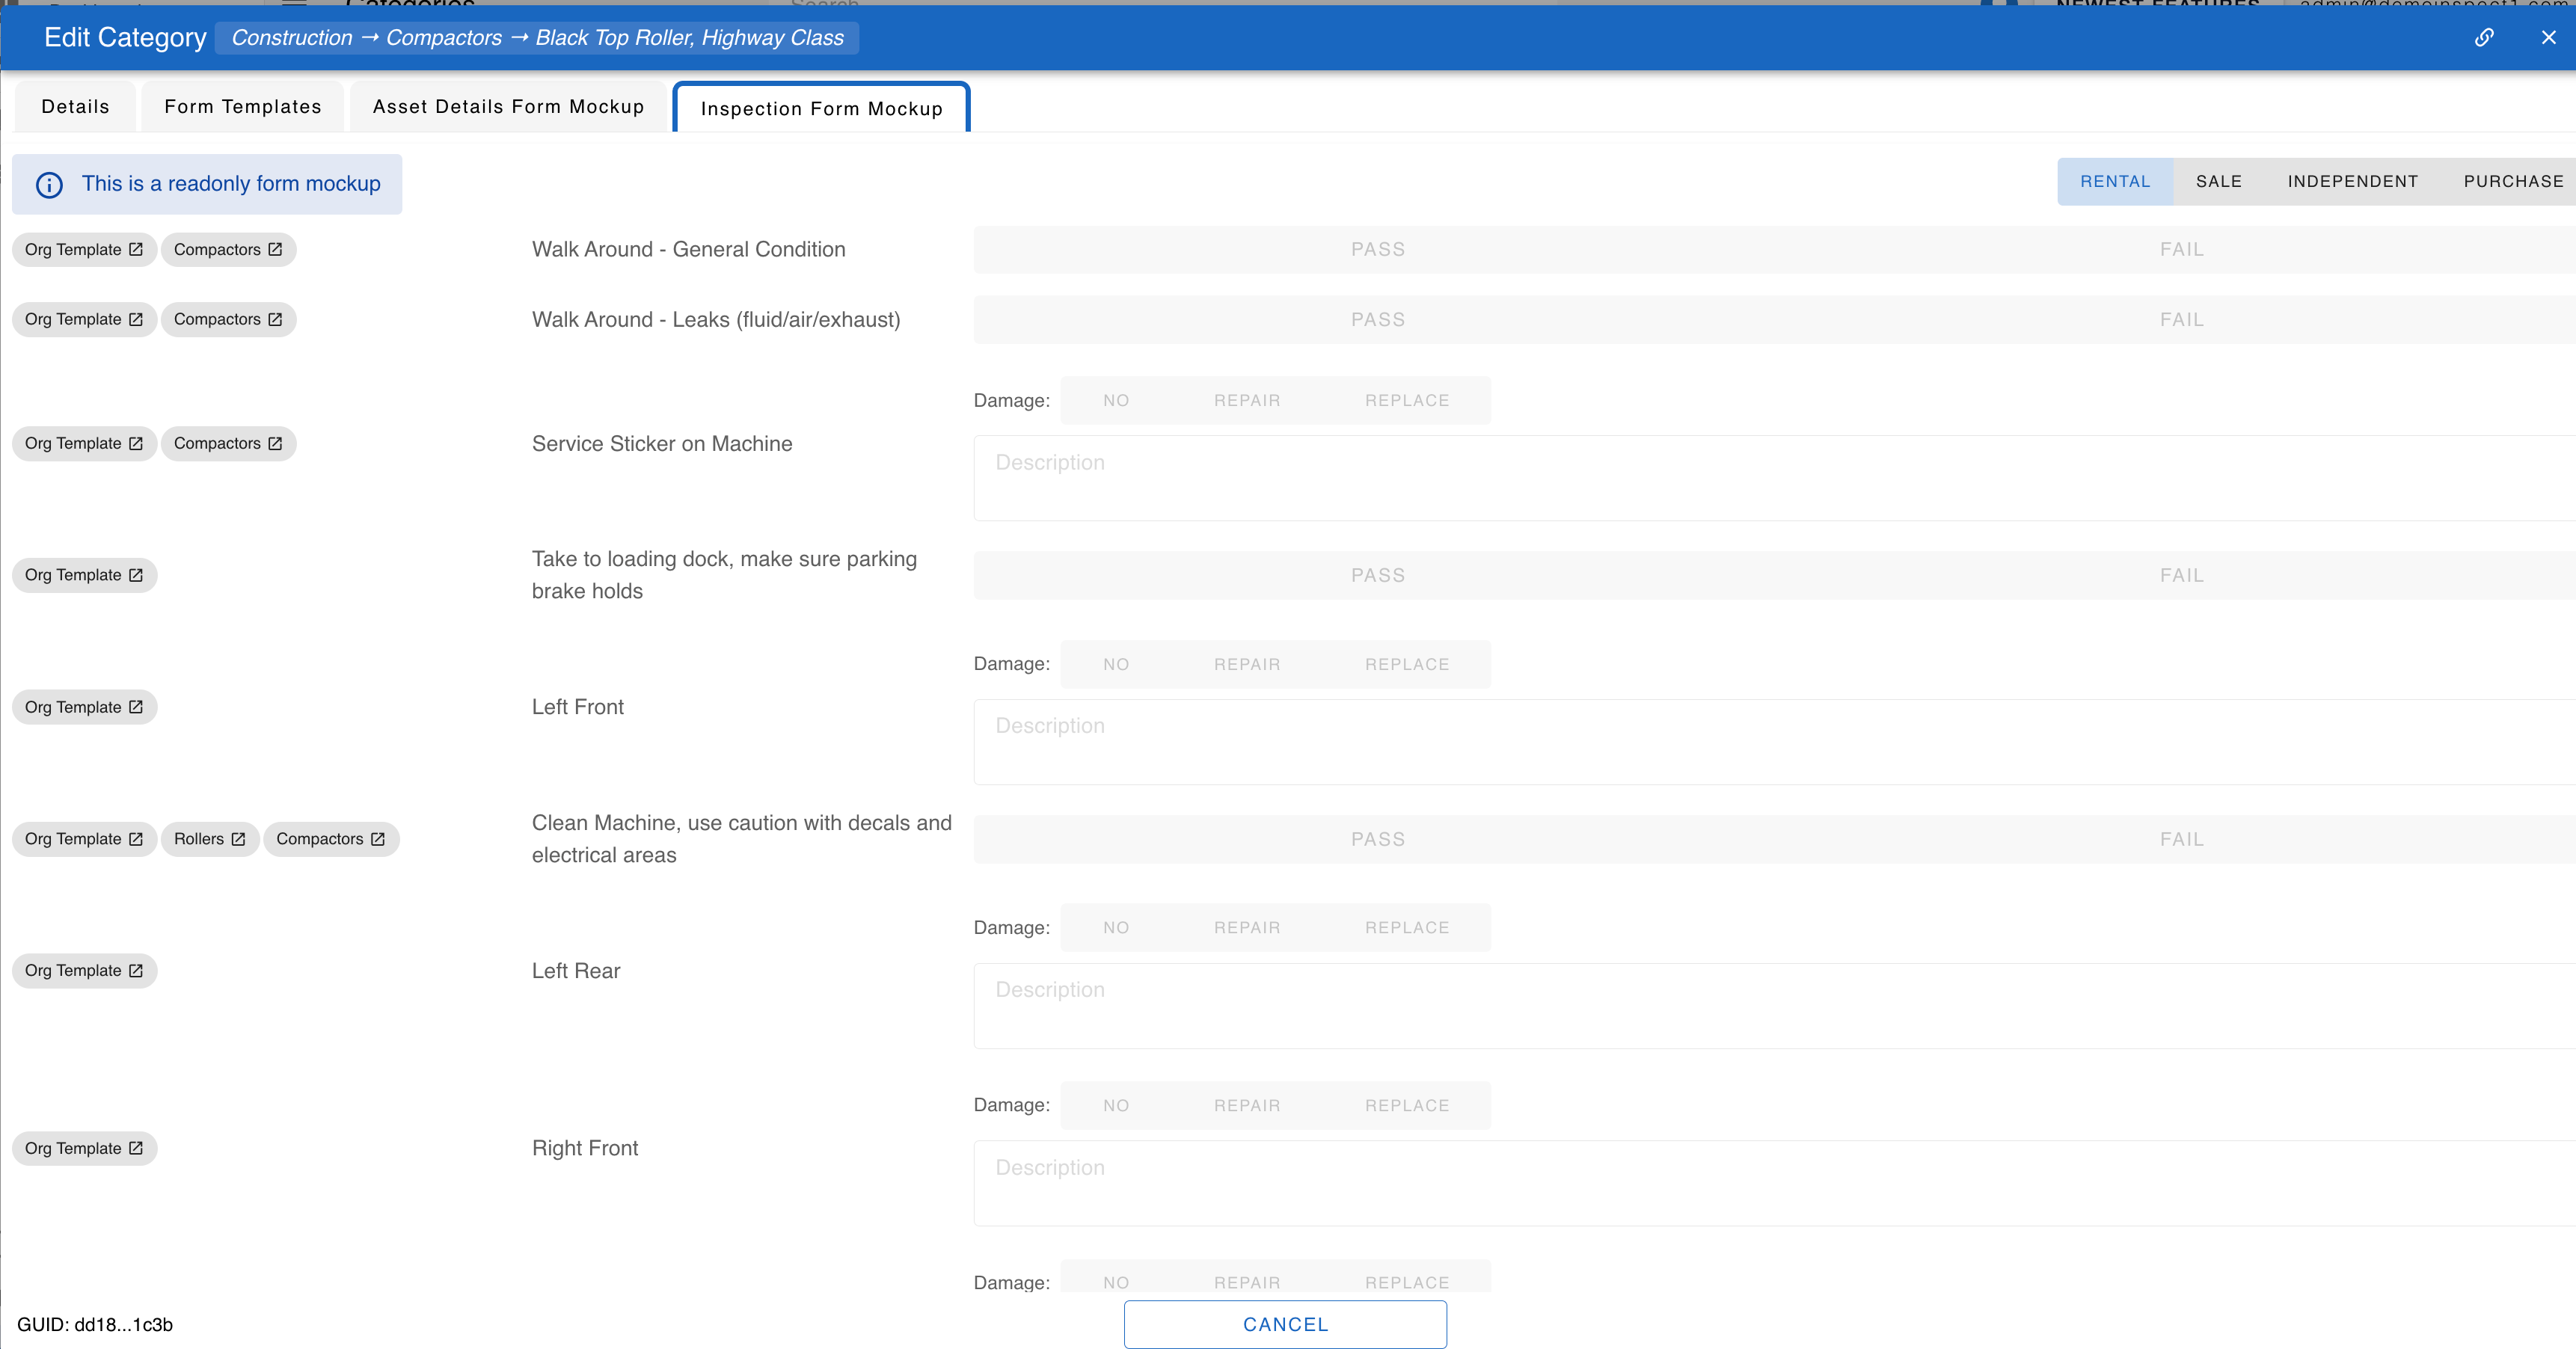
Inspection Templates are the set of questions which the technician goes through as they perform the inspection.
https://app.clouderm.com/schemas/inspection-form-templates
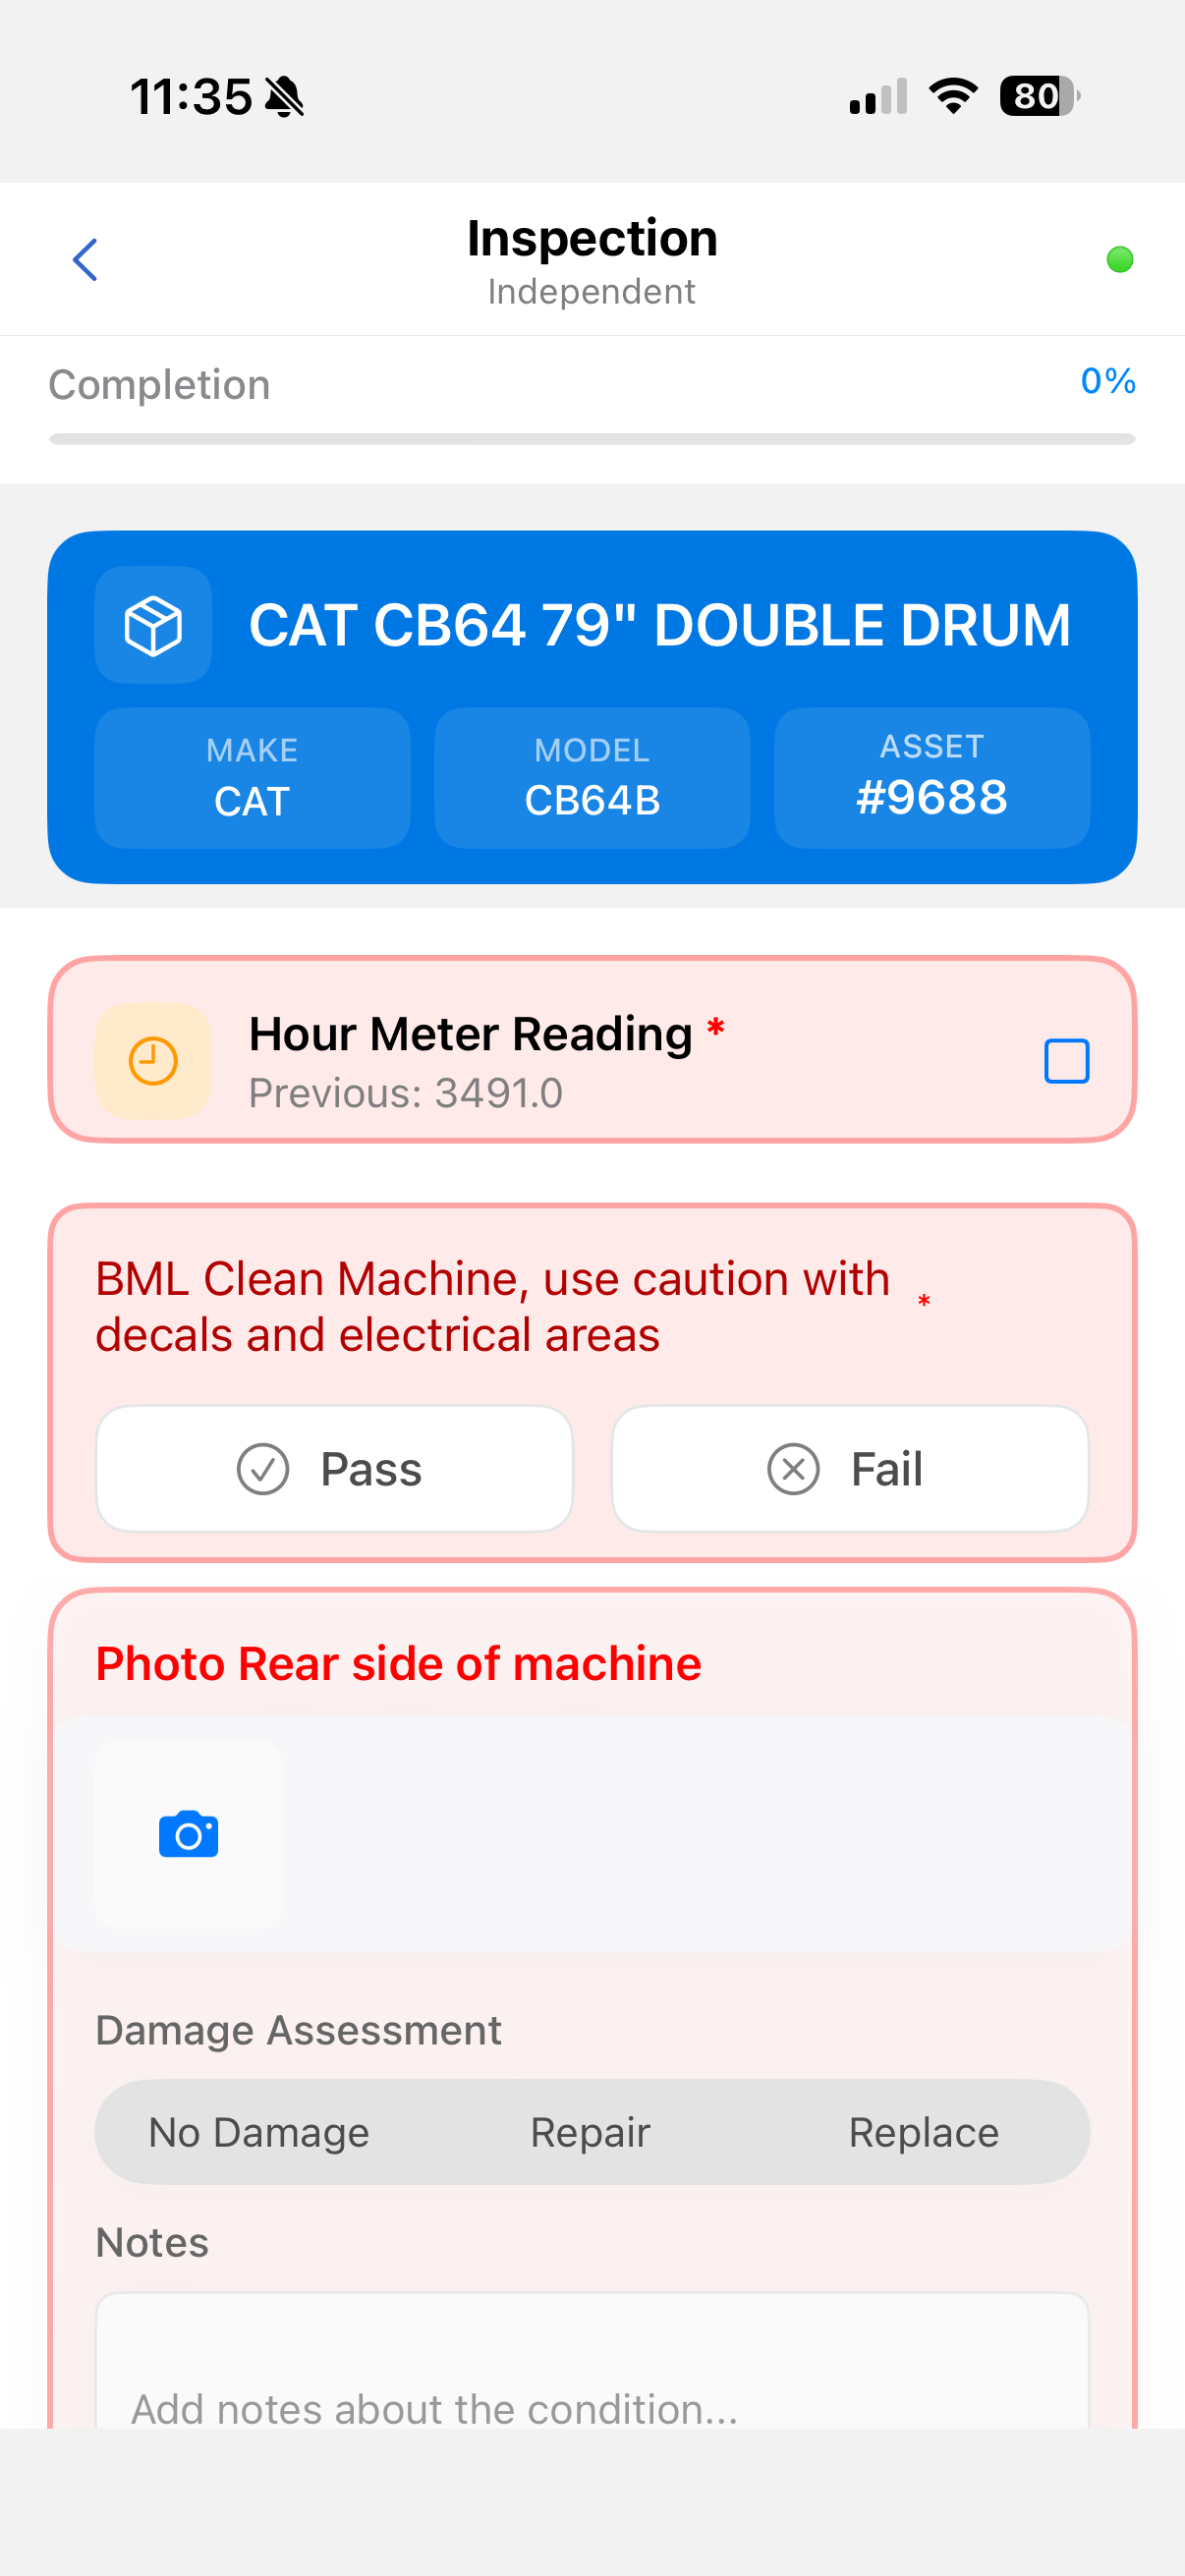
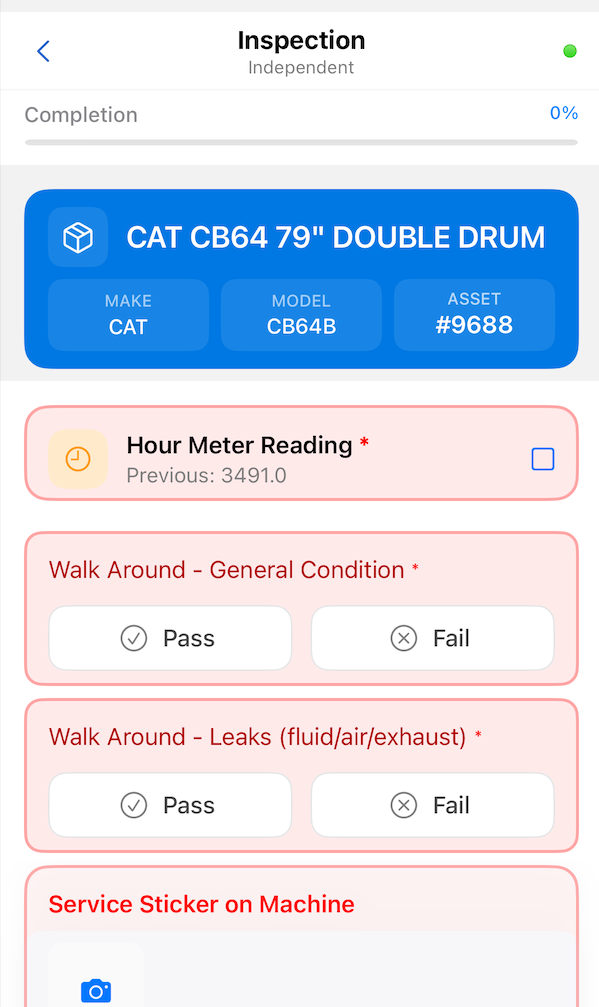
The matching set of questions can be seen in the mobile app. The Hour Meter Reading is shown because the asset is specified as having an hour meter.
Your environment ships with a set of pre-defined Asset Detail and Inspection Templates. Questions can be customized (added, removed, re-ordered, marked as required, etc) as need:
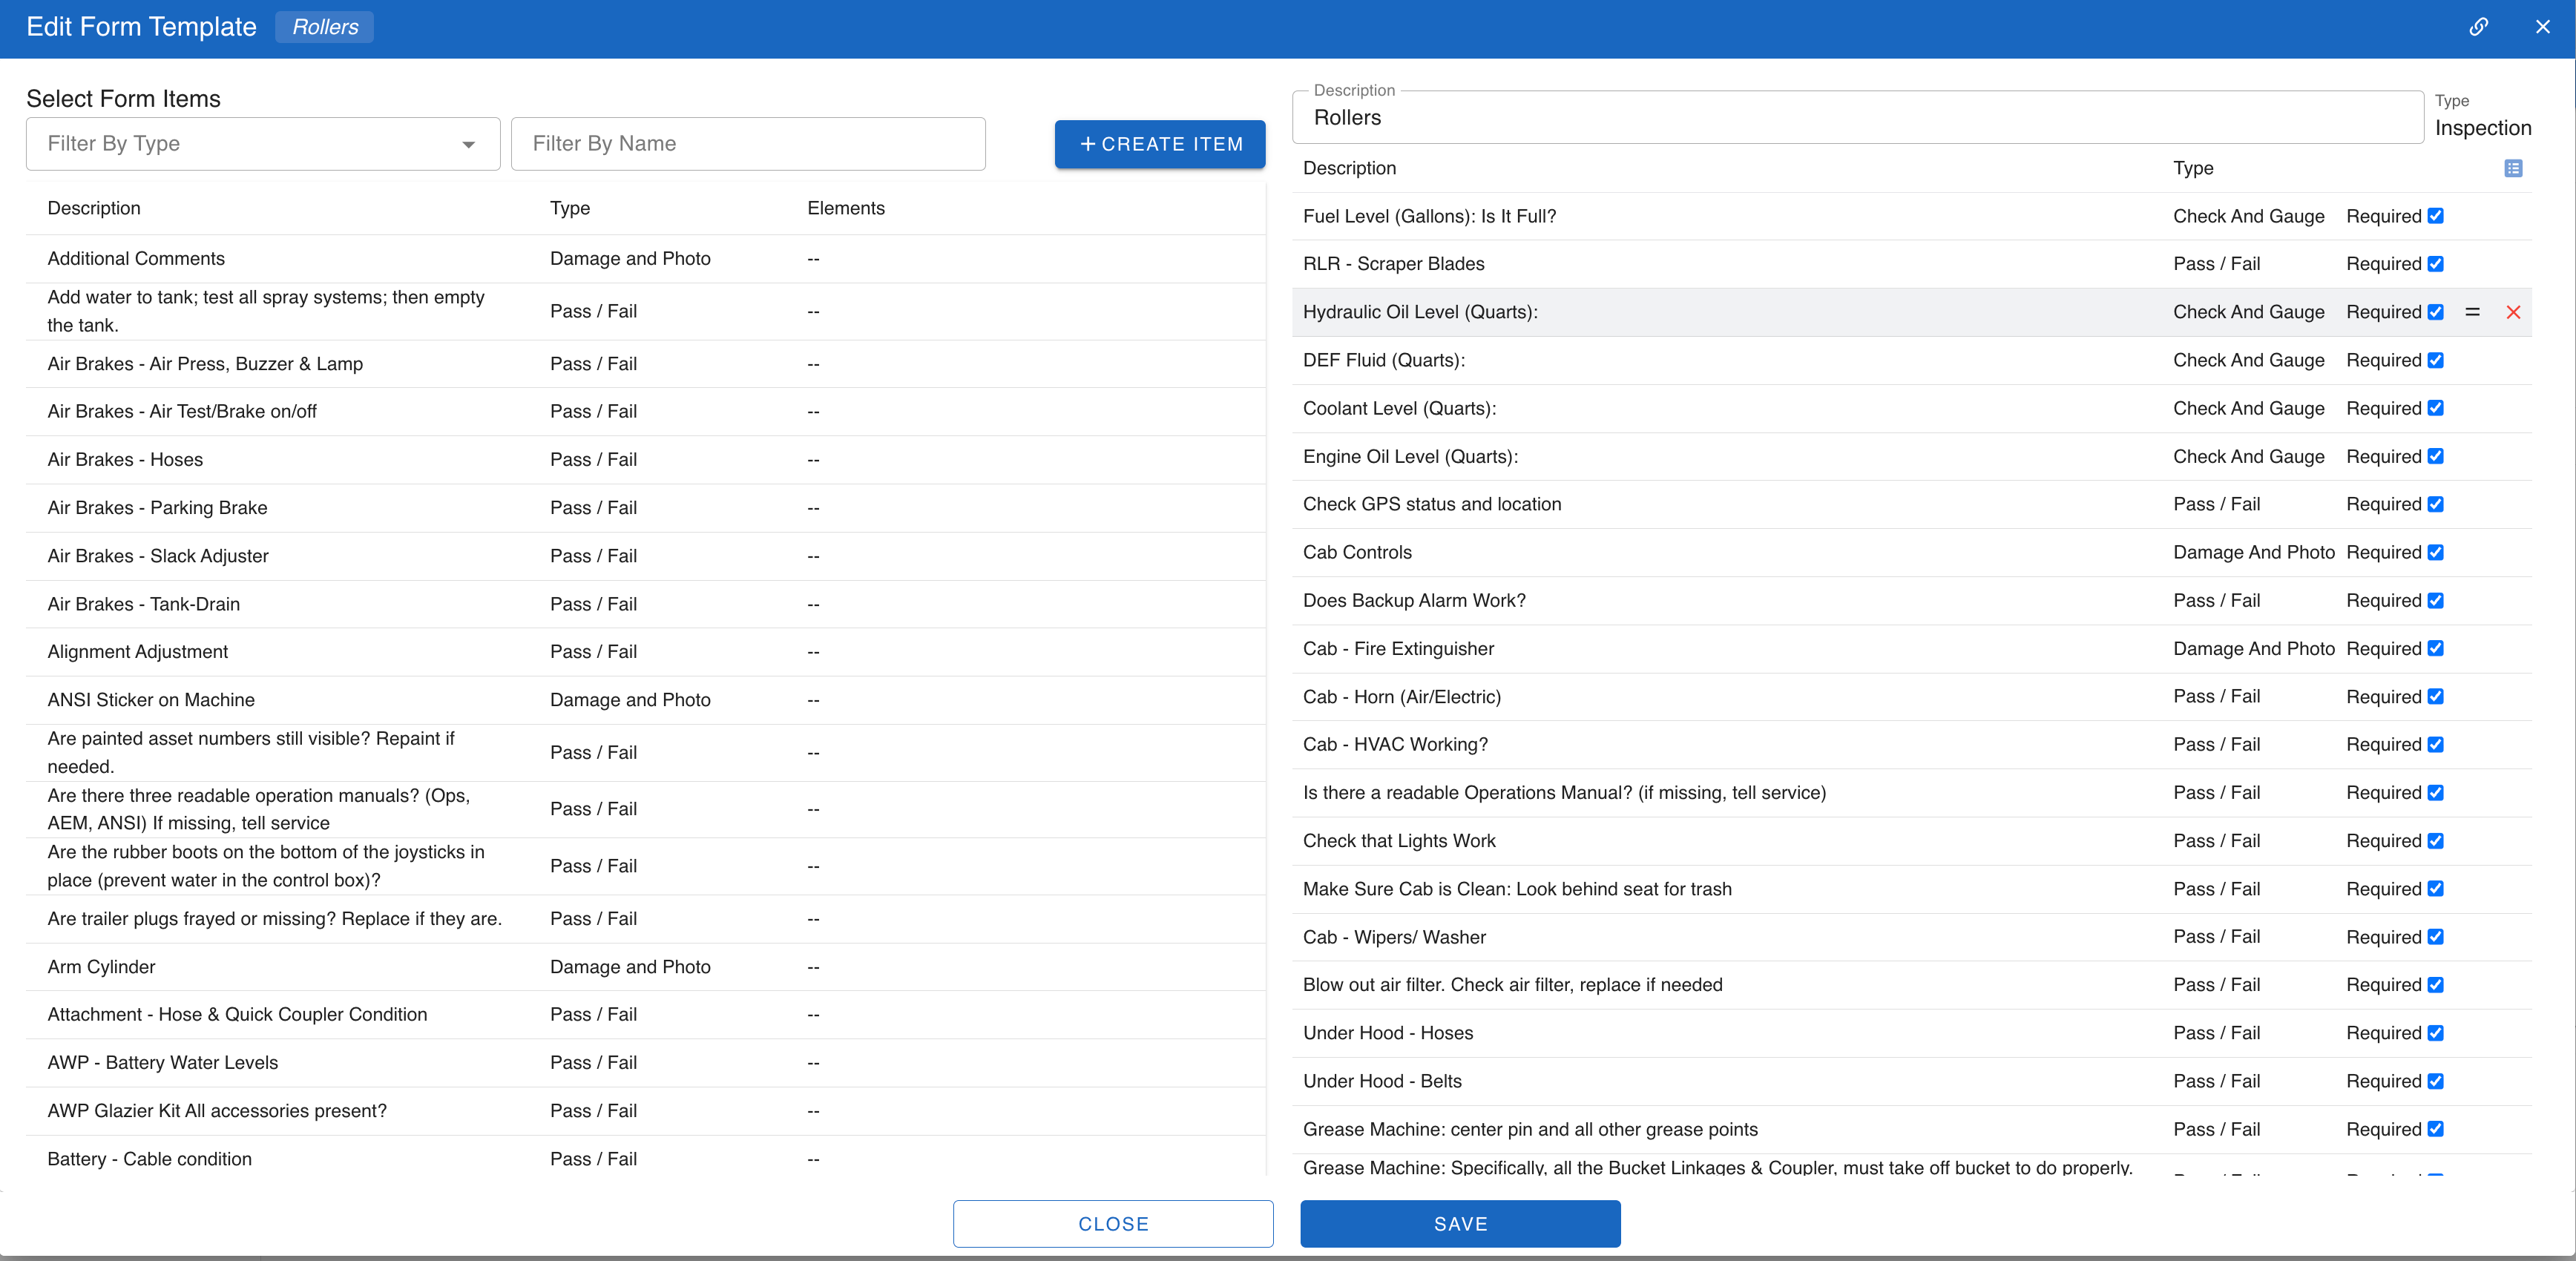
Asset Detail and Inspection questions are inherited and merged through all levels of the category tree. The final set of questions are deduplicated. More information can be found here: https://docs.clouderm.com/categories-and-form-templates/category-tree-inheritance
Org Default → Super Category → Category → Sub-Category
3. Import assets
It’s possible for you to manually add all your assets to the platform but we are happy to work with you to import an asset list from a spreadsheet. The key fields worth having in the spreadsheet are as follows:
Asset Number
Name
Manufacturer
Model Number
Model Year
Serial Number
Current Hours (if the asset has an hour meter)
Category*
* Assets need to be assigned to one sub-category from the tree. We will use your current category assignment to map the assets to our category tree as part of the import process.
* Asset names can be auto-generated from chosen fields; By default, we derive them from Manufacturer + Model Number as long as that is clean data.
4. Service
https://app.clouderm.com/service/tasks
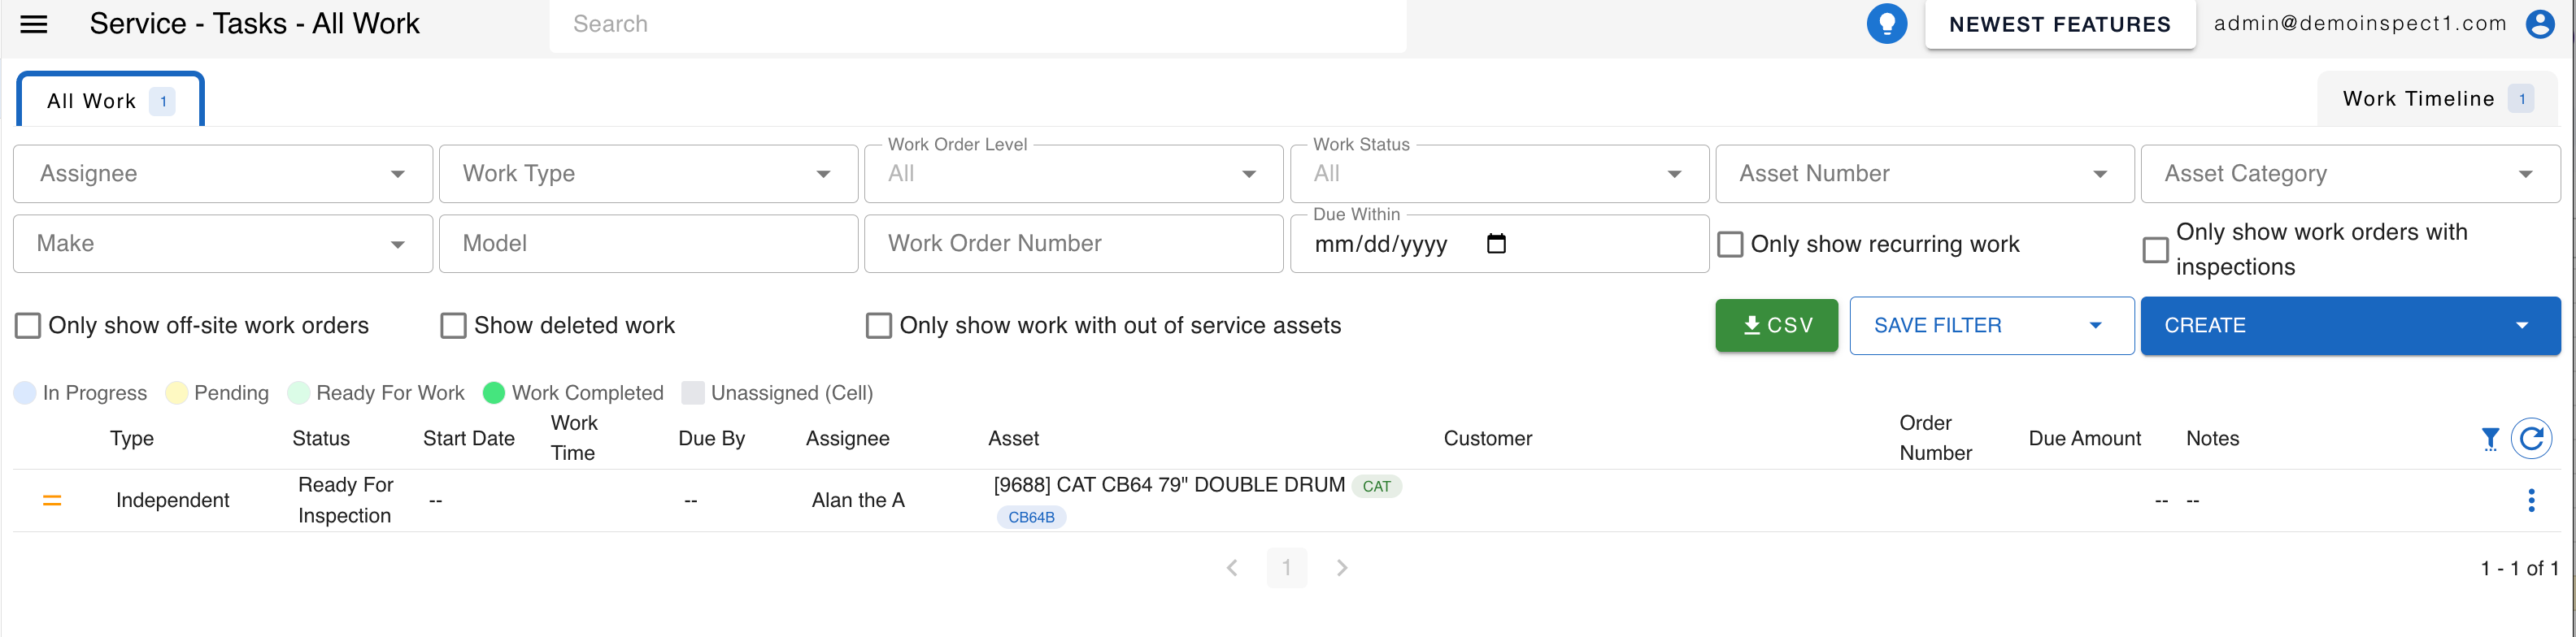
The Service tab is the main place to see and process Inspections. Filters along the top allow you to find the work you are looking for:
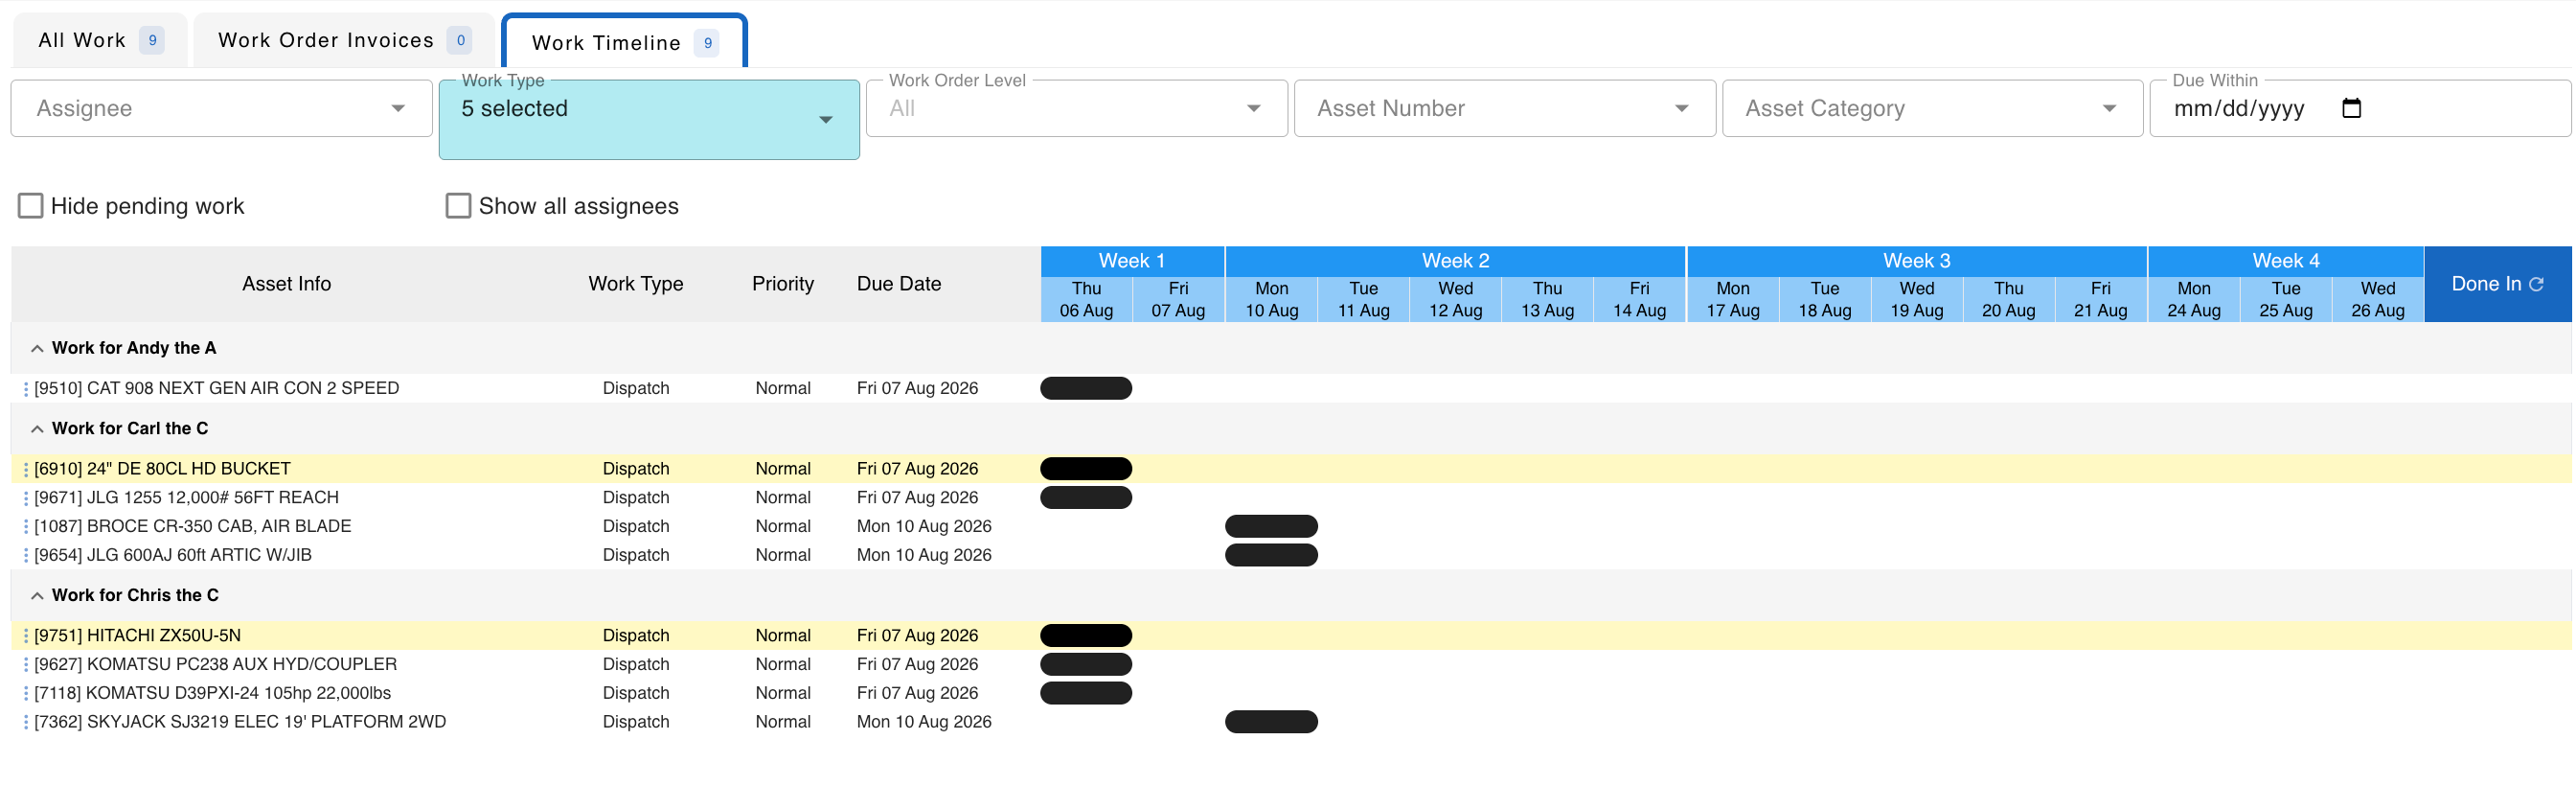
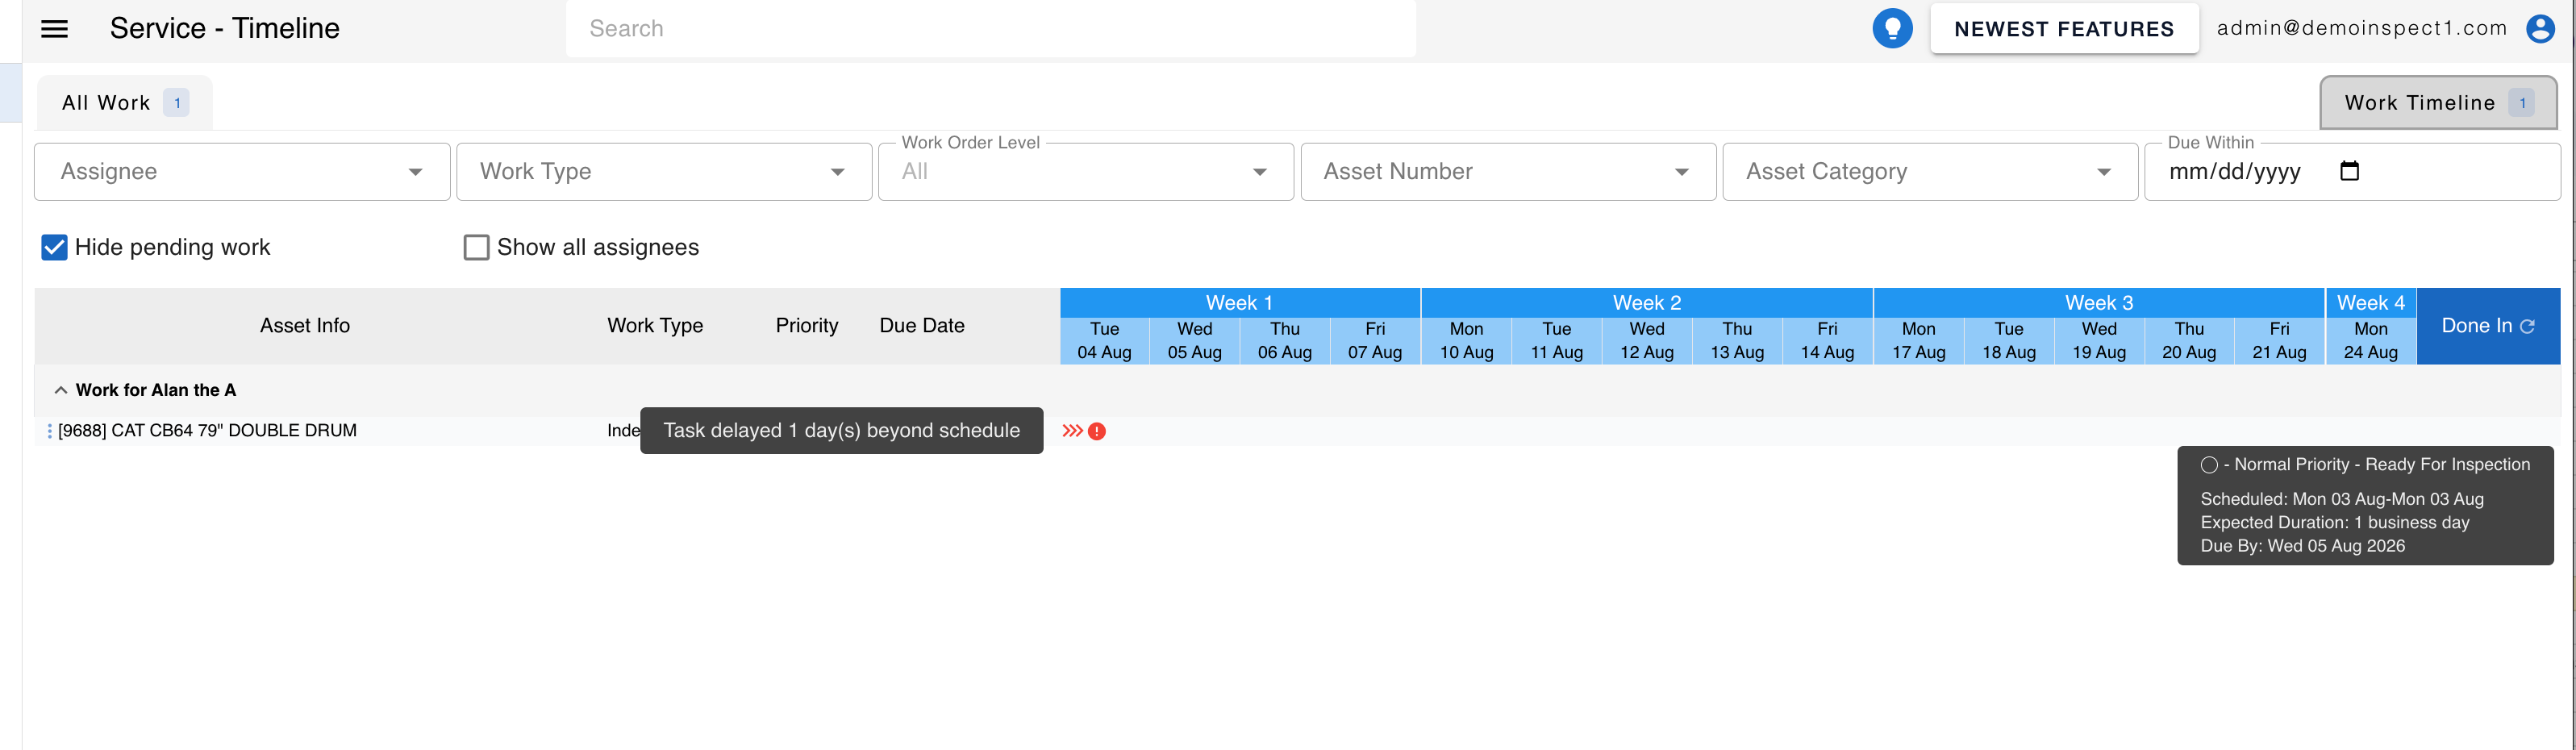
There is also a Service Timeline. This lets you see and manage all work. By default, pending work is hidden.
https://app.clouderm.com/service/timeline
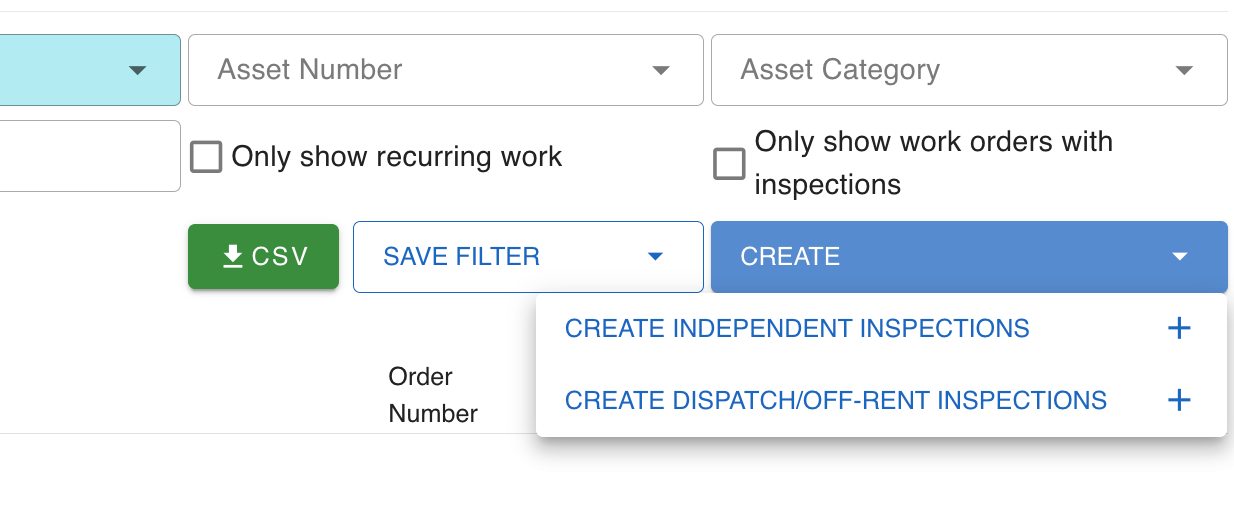
Creating inspections — independent vs paired
Two types of inspections can be created:
Independent (standalone): These inspections are for a single point-in-time inspection. When calendar based recurring inspections are scheduled, this type is created
Paired inspections are used for an outgoing and return inspection process. On the way out, the asset is given a Dispatch Inspection. When it’s returned, it is given an Off-Rent inspection. These two are linked together and the results from the Dispatch Inspection can be seen on the Off-Rent Inspection for a before-and-after comparison
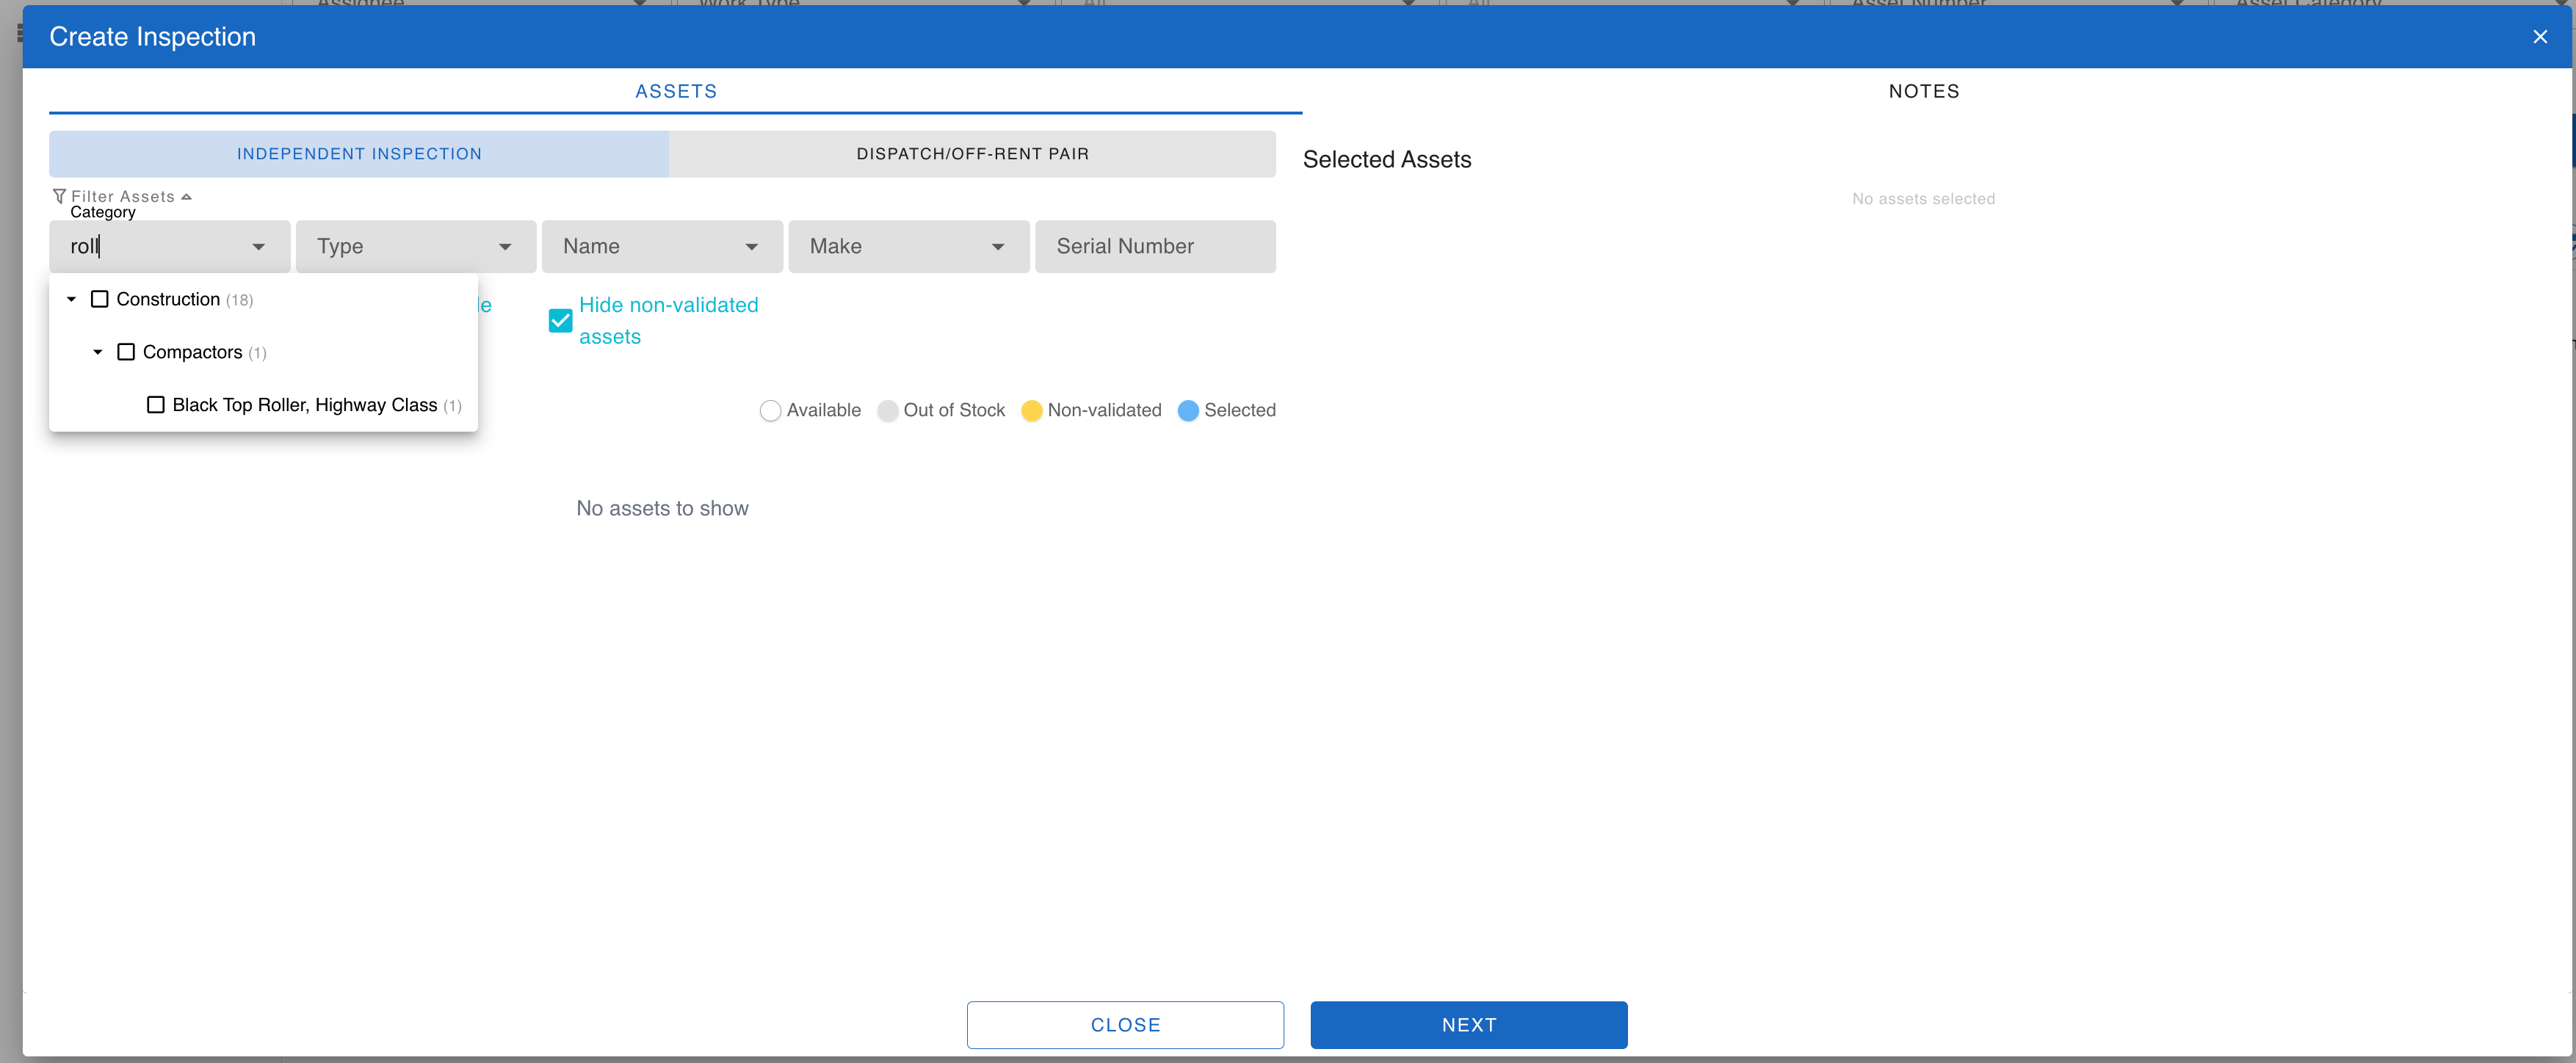
When creating either type of inspection, we can filter to find the asset we want to inspect. Nothing is shown by default. Shown below, we are searching the category tree for roll (the first letters of Roller). The menu filters down for just parts of the category tree which match that filter. We will select Black Top Roller, Highway Class here:
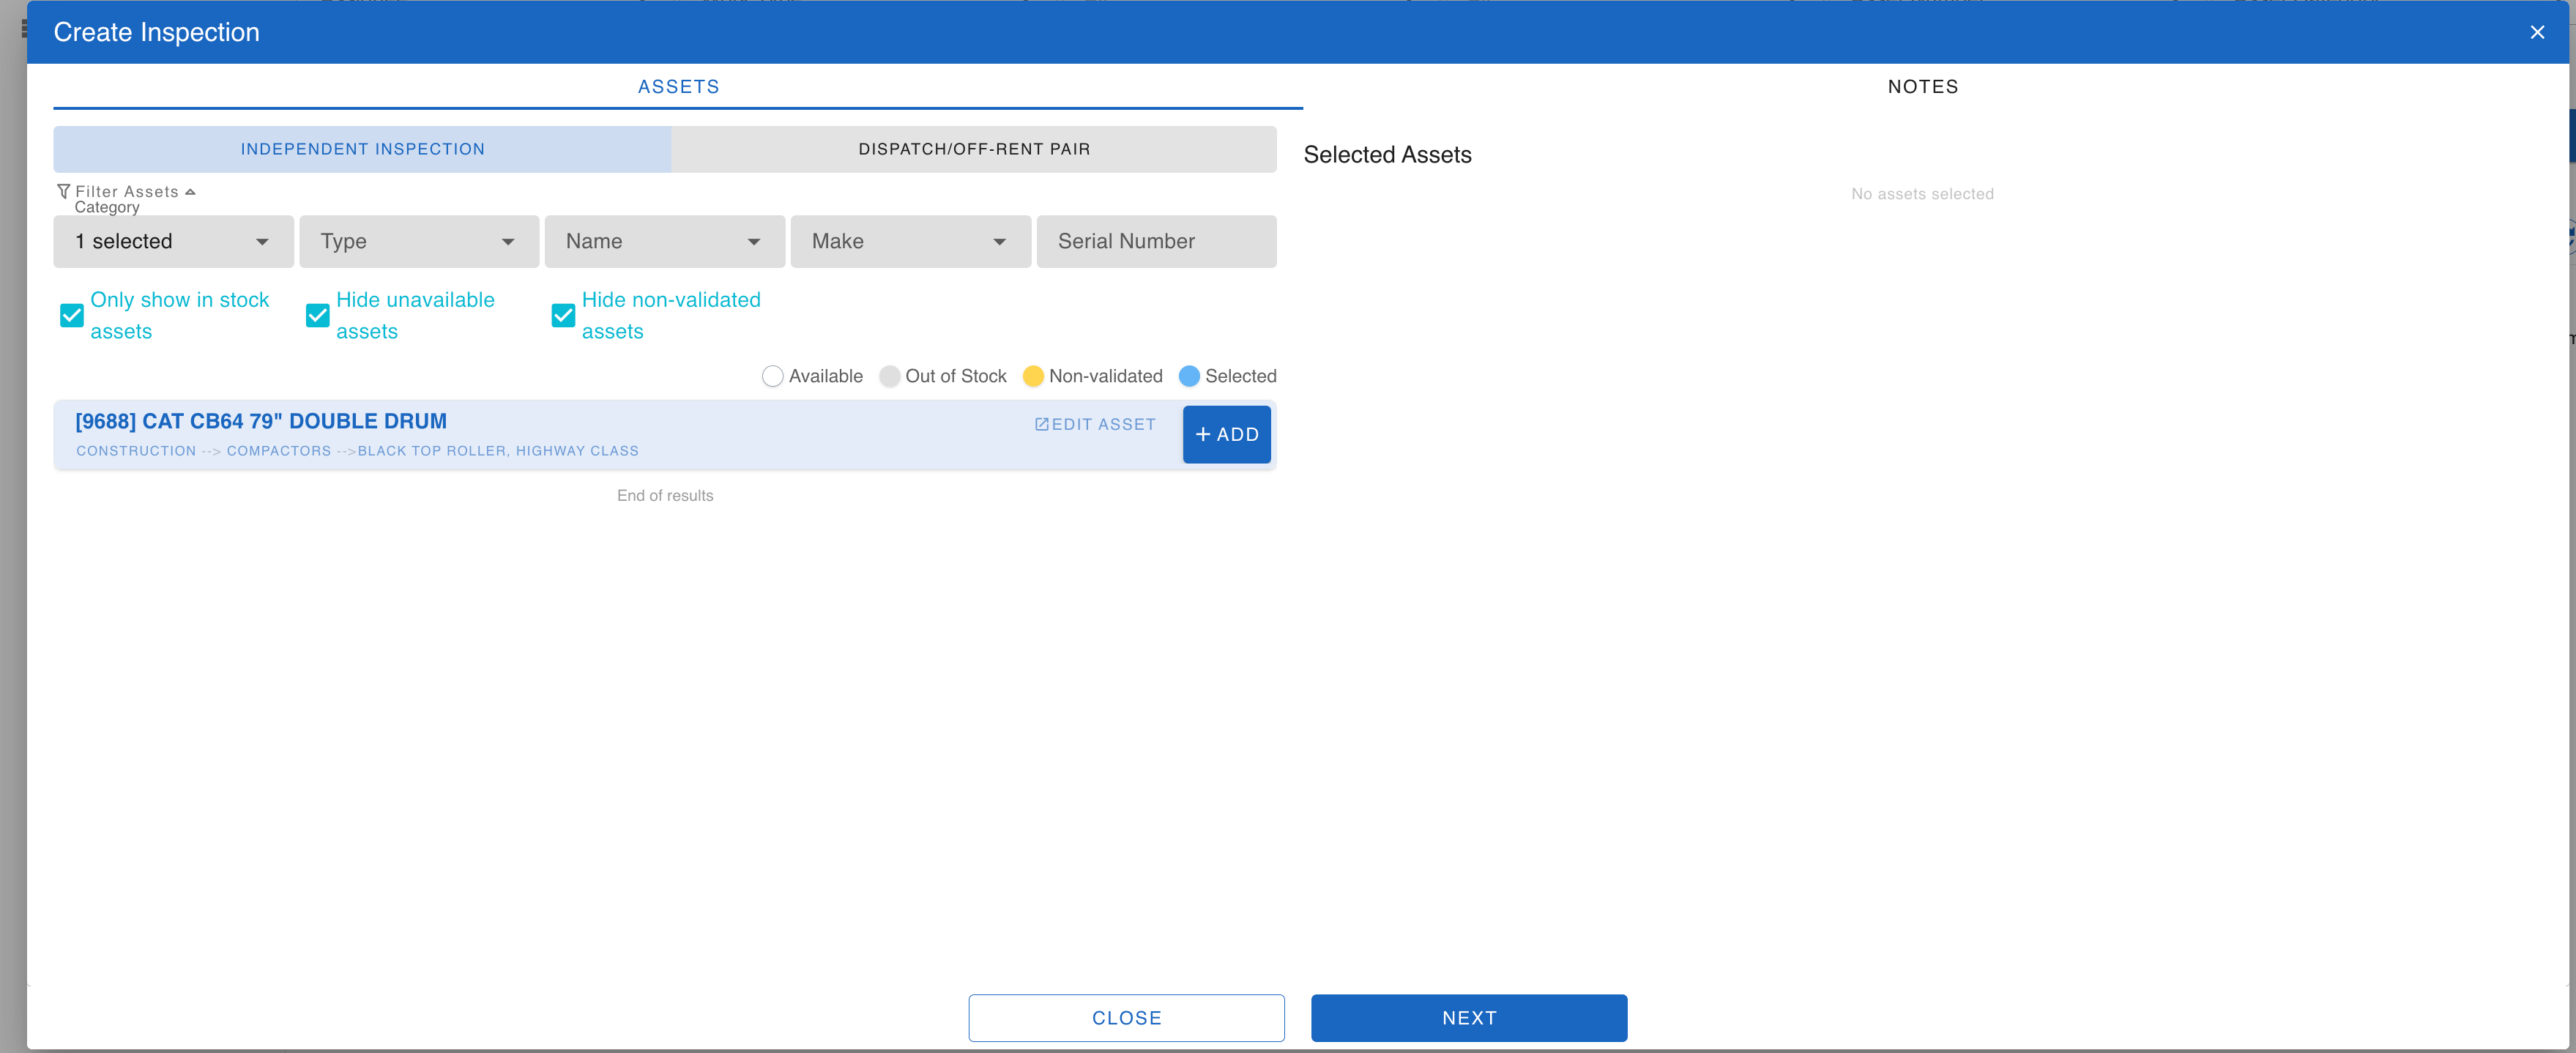
We only have one asset in that sub-category and it’s shown. We will Add that to be the Selected Asset. Only one asset is allowed per inspection.
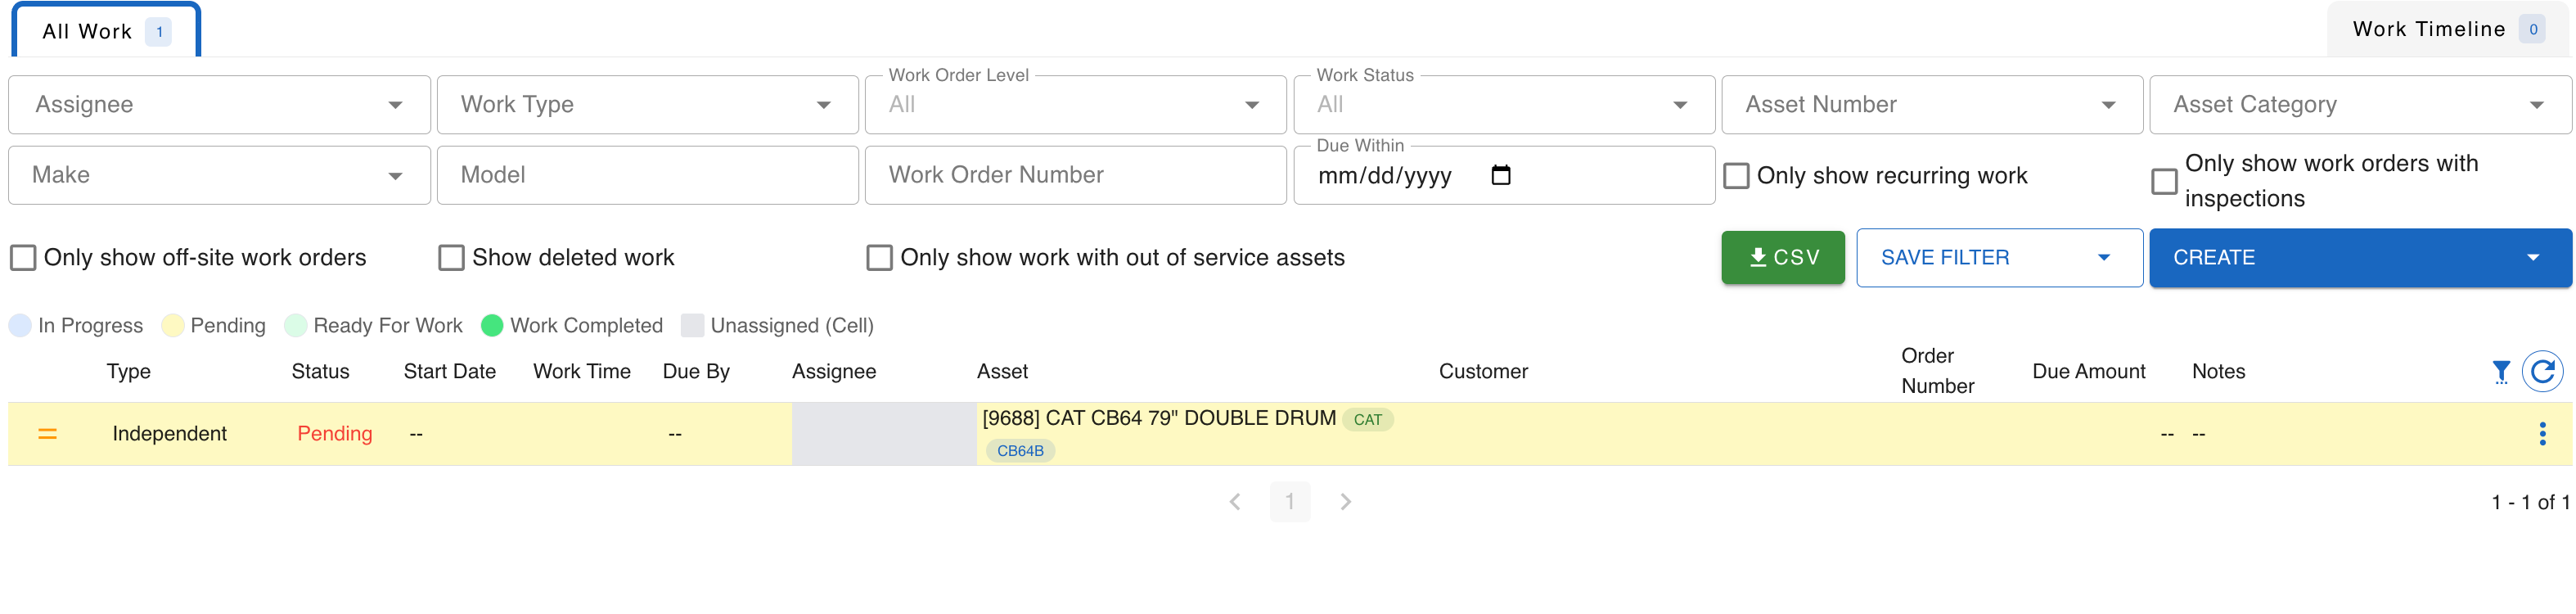
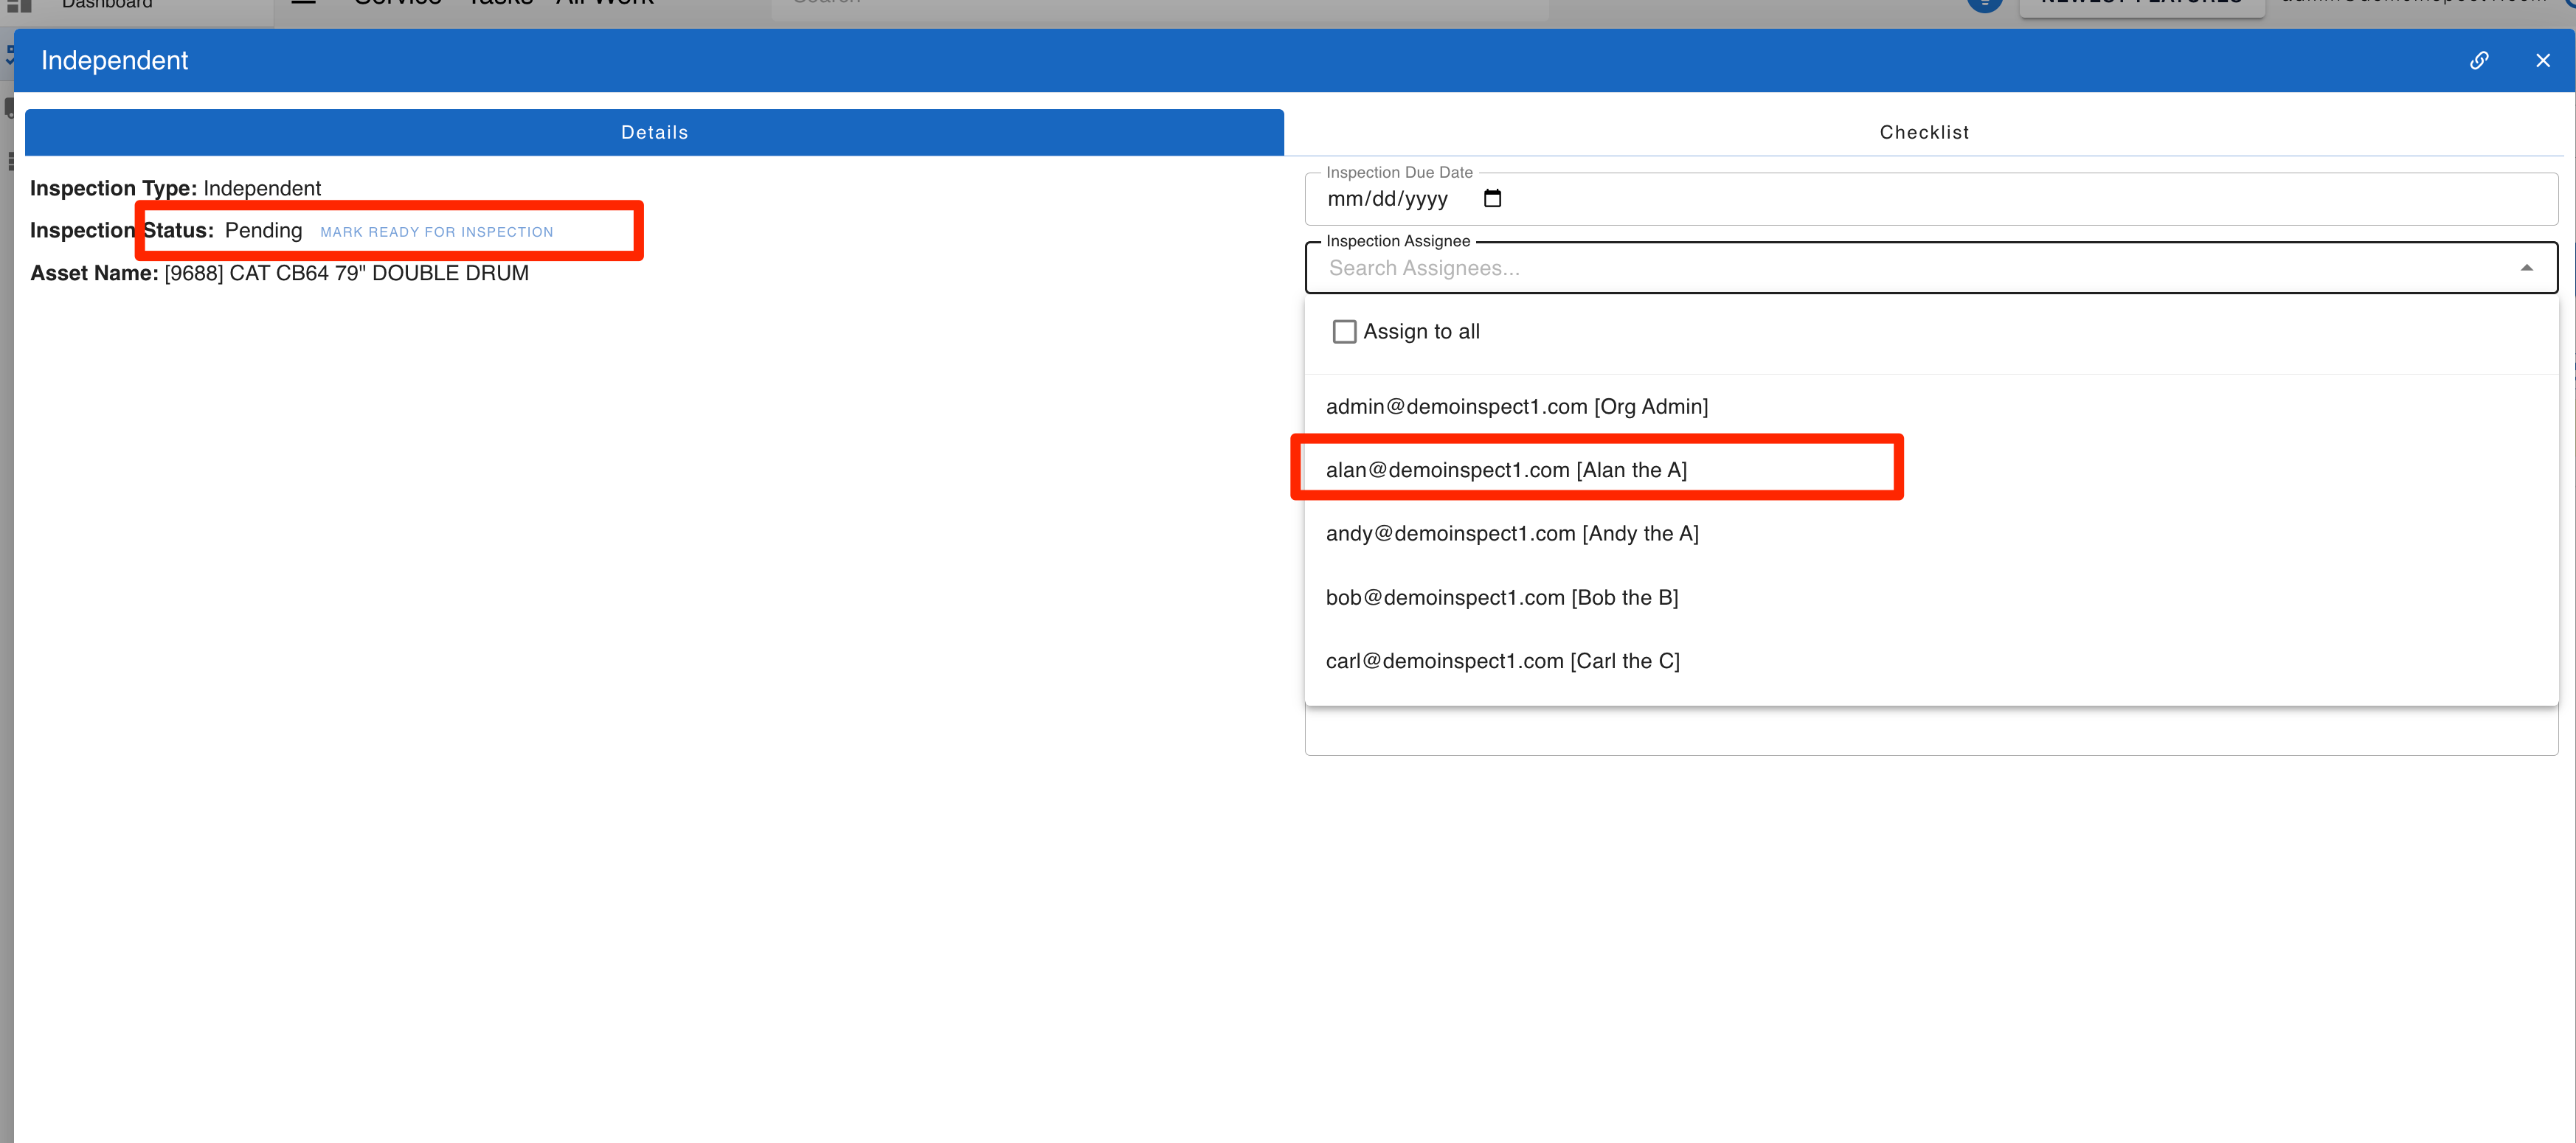
Once the inspection has been created, by default it’s set as Pending and needs to be marked as Ready and assigned to an Assignee:
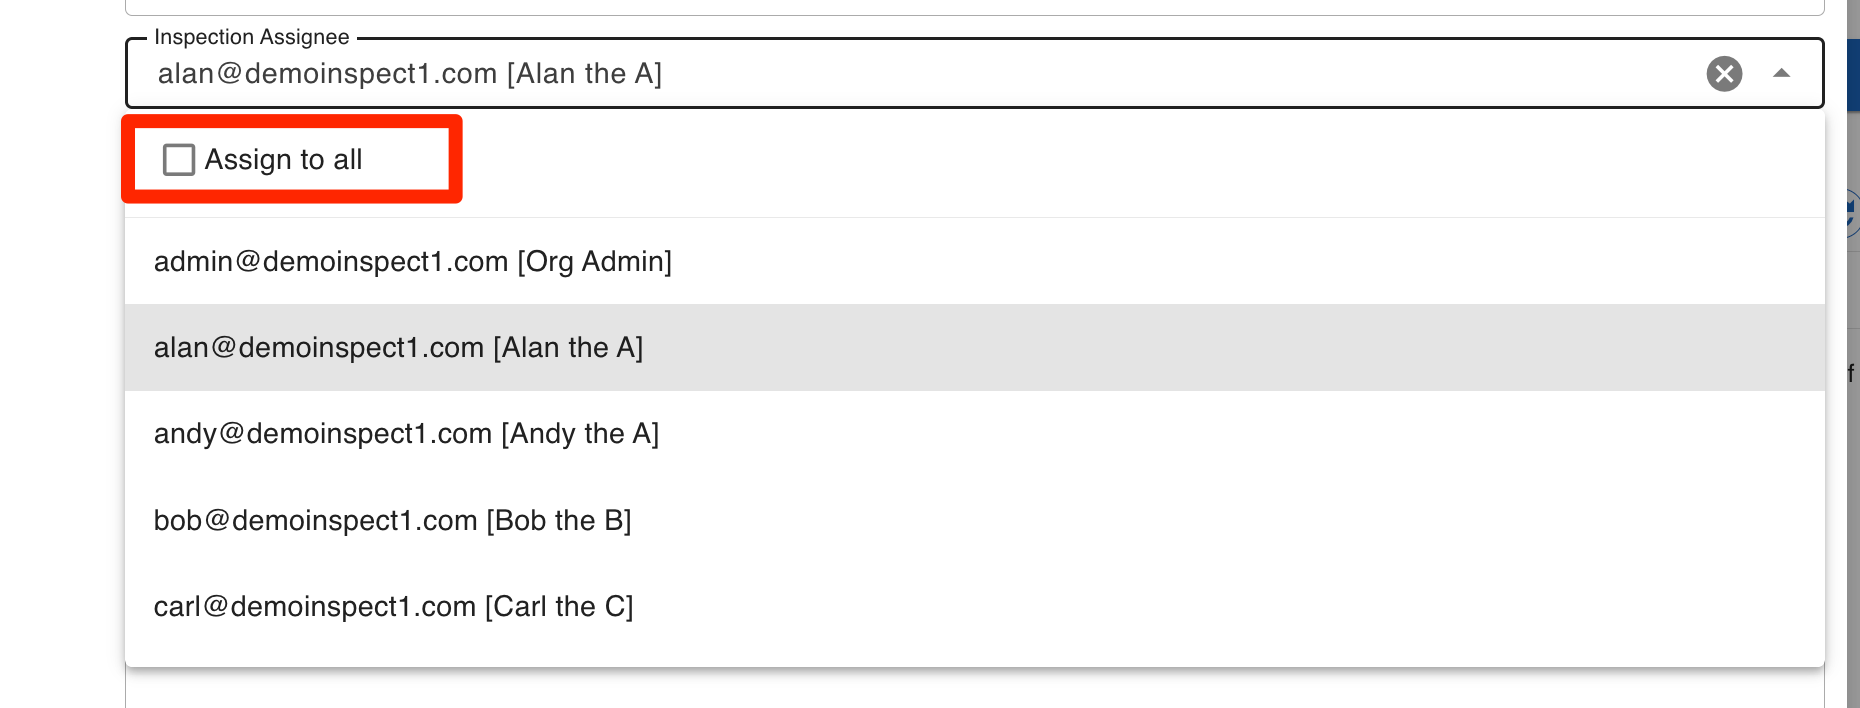
The inspection can be assigned to an Assignee:
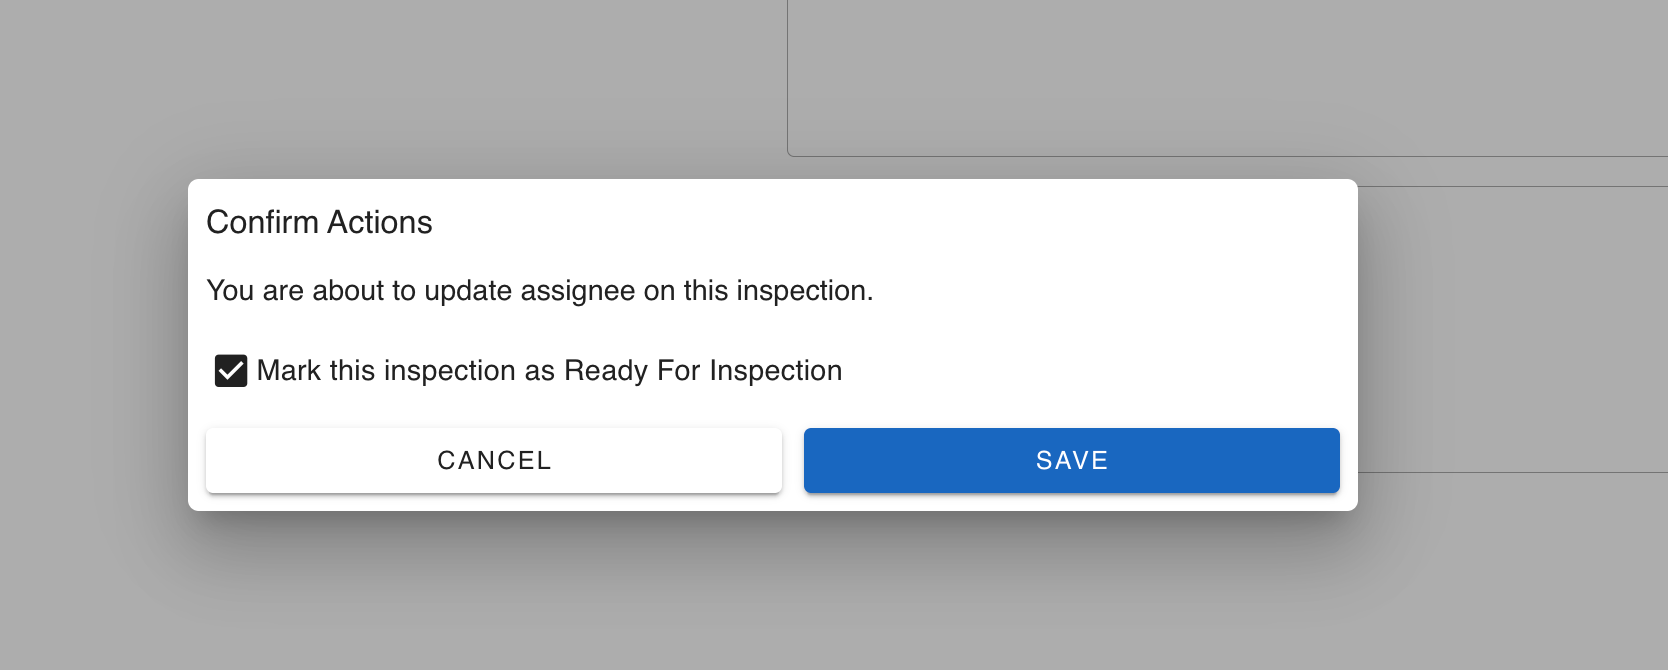
If the inspection assignment is chosen first, the user will be prompted if they want to also mark it as Ready:
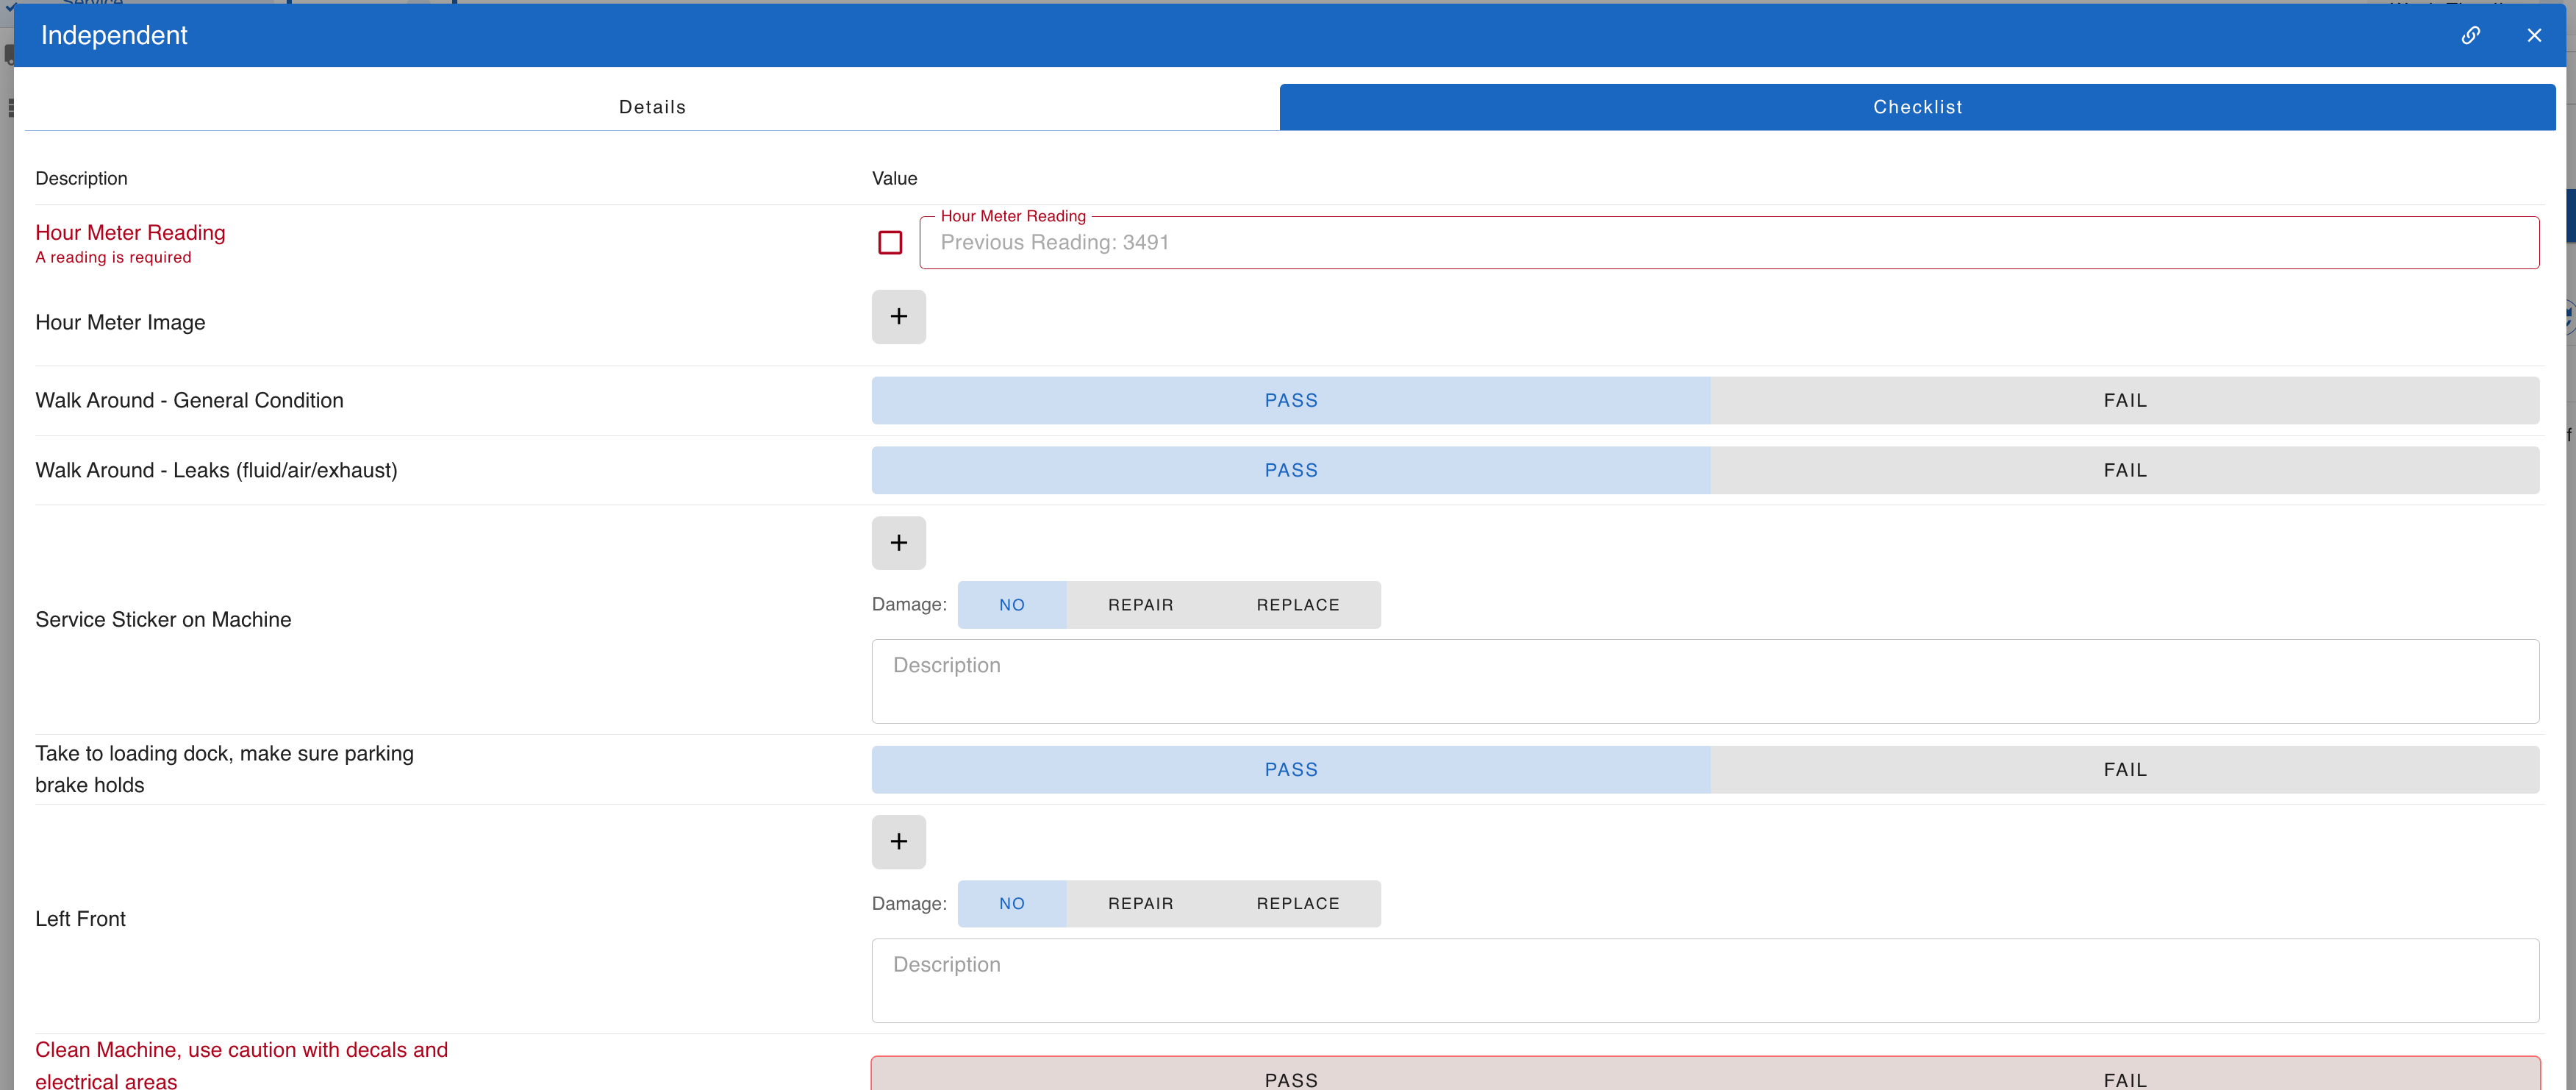
Although Inspections are designed to be processed using the mobile app, it’s also possible to see the inspection questions via the web interface:
Note: In the mobile application, only inspections which are marked as Ready and Assigned to an Assignee (or assigned to all) are shown:
5. Using the Mobile Application
Users download the InspectERM Application from the respective stores:
Users log into the application using the phone number saved with the user. Only users with a saved phone number are allowed to login:
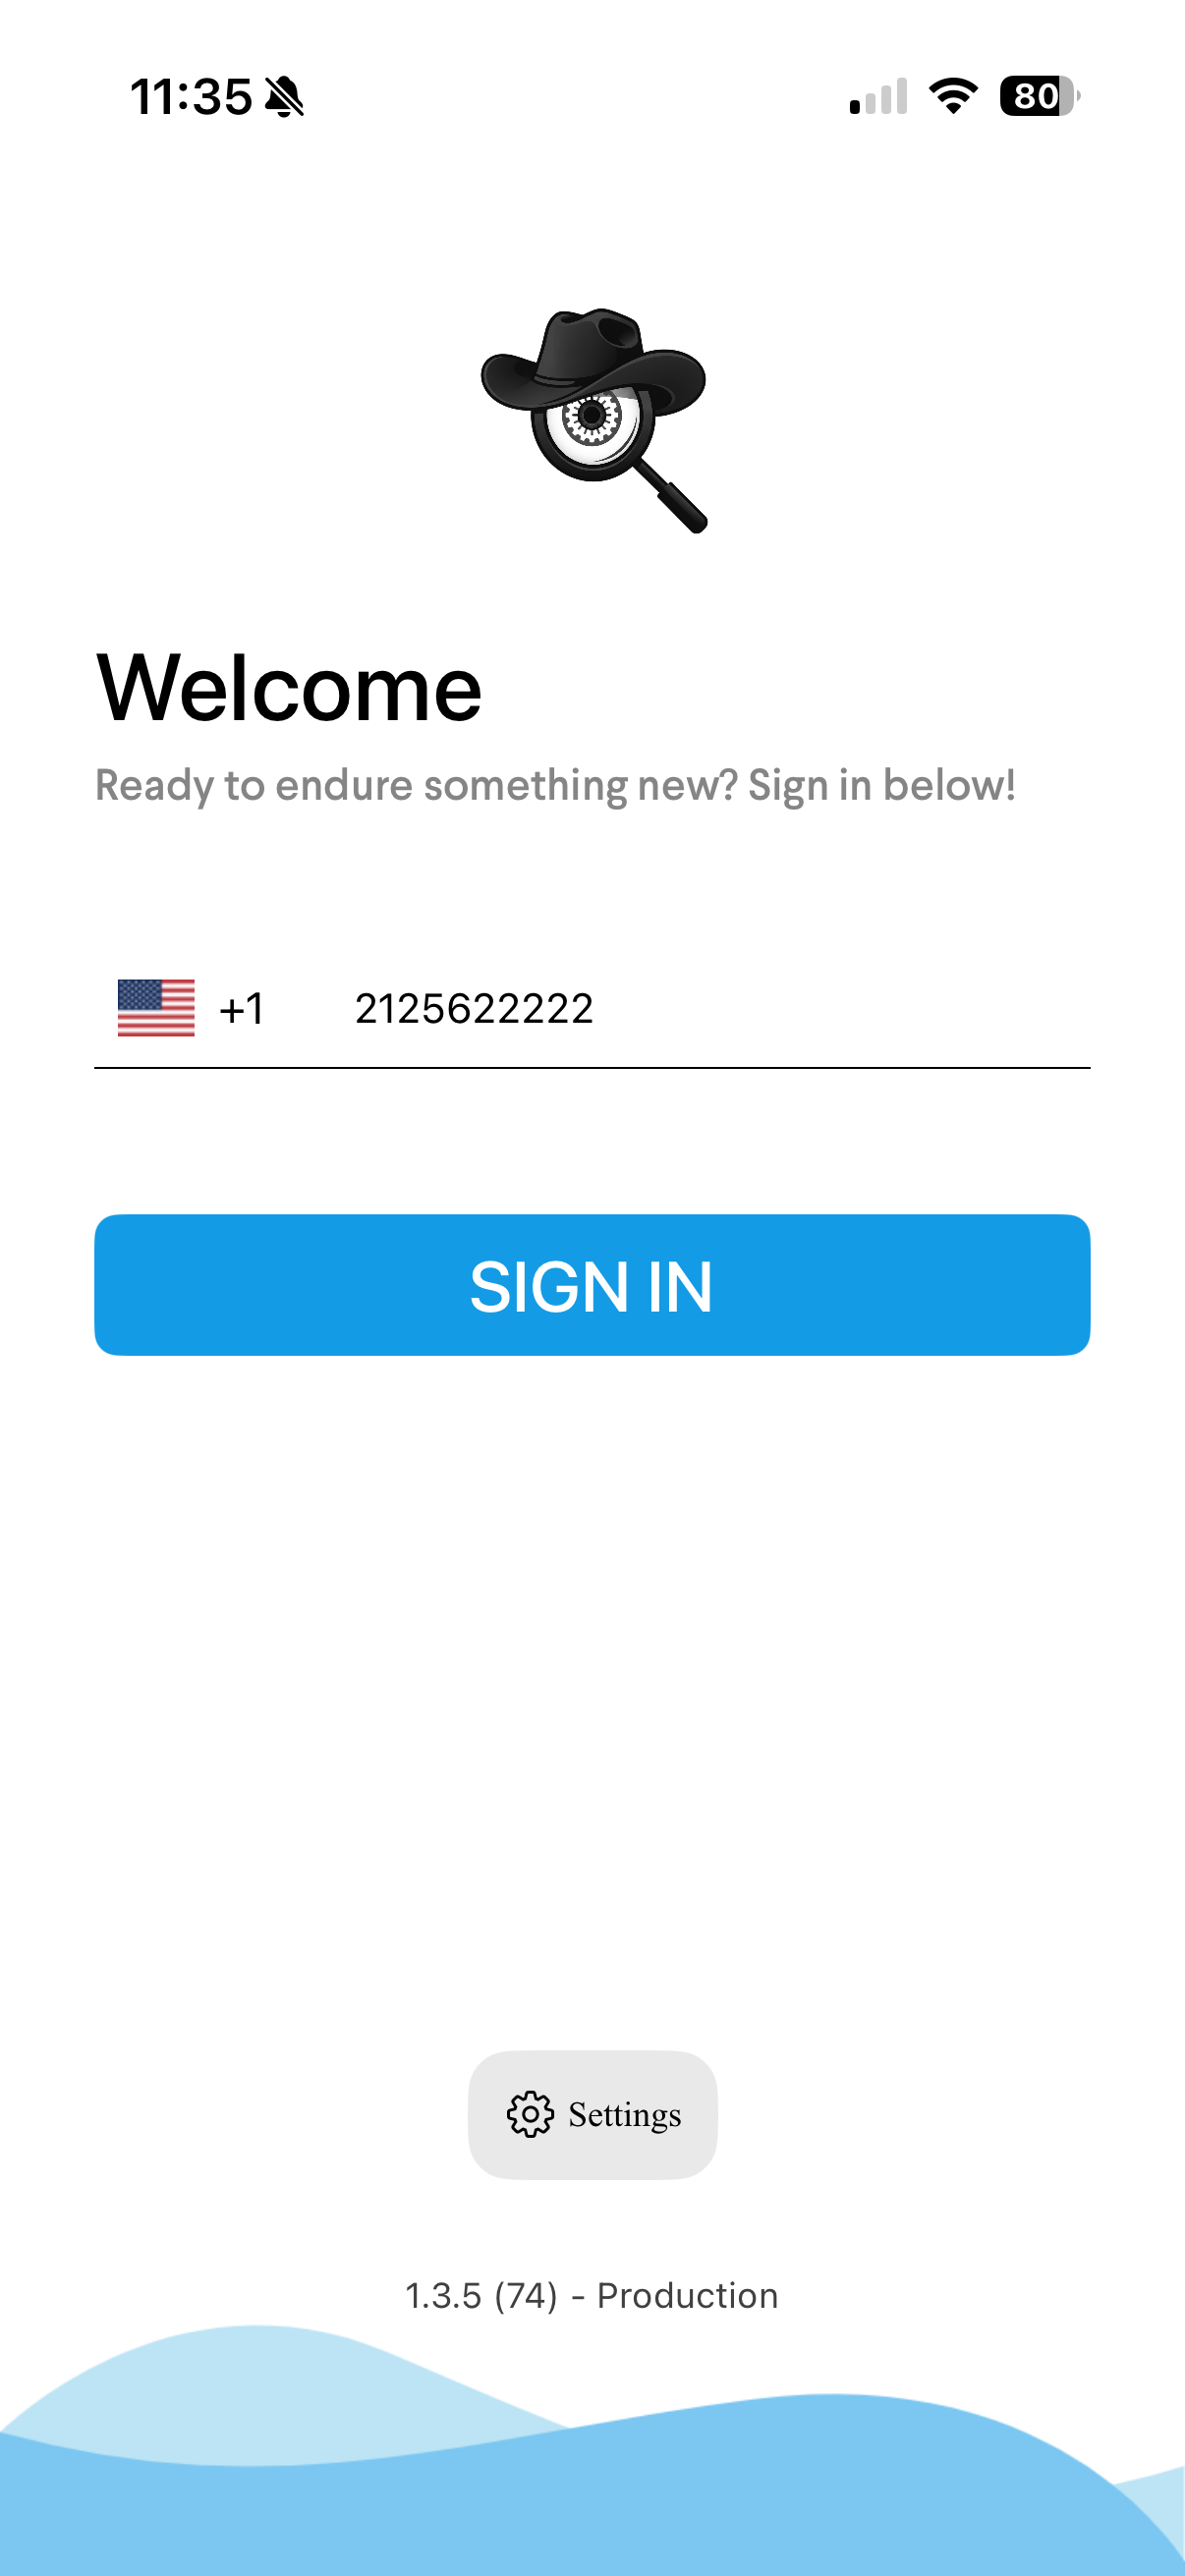
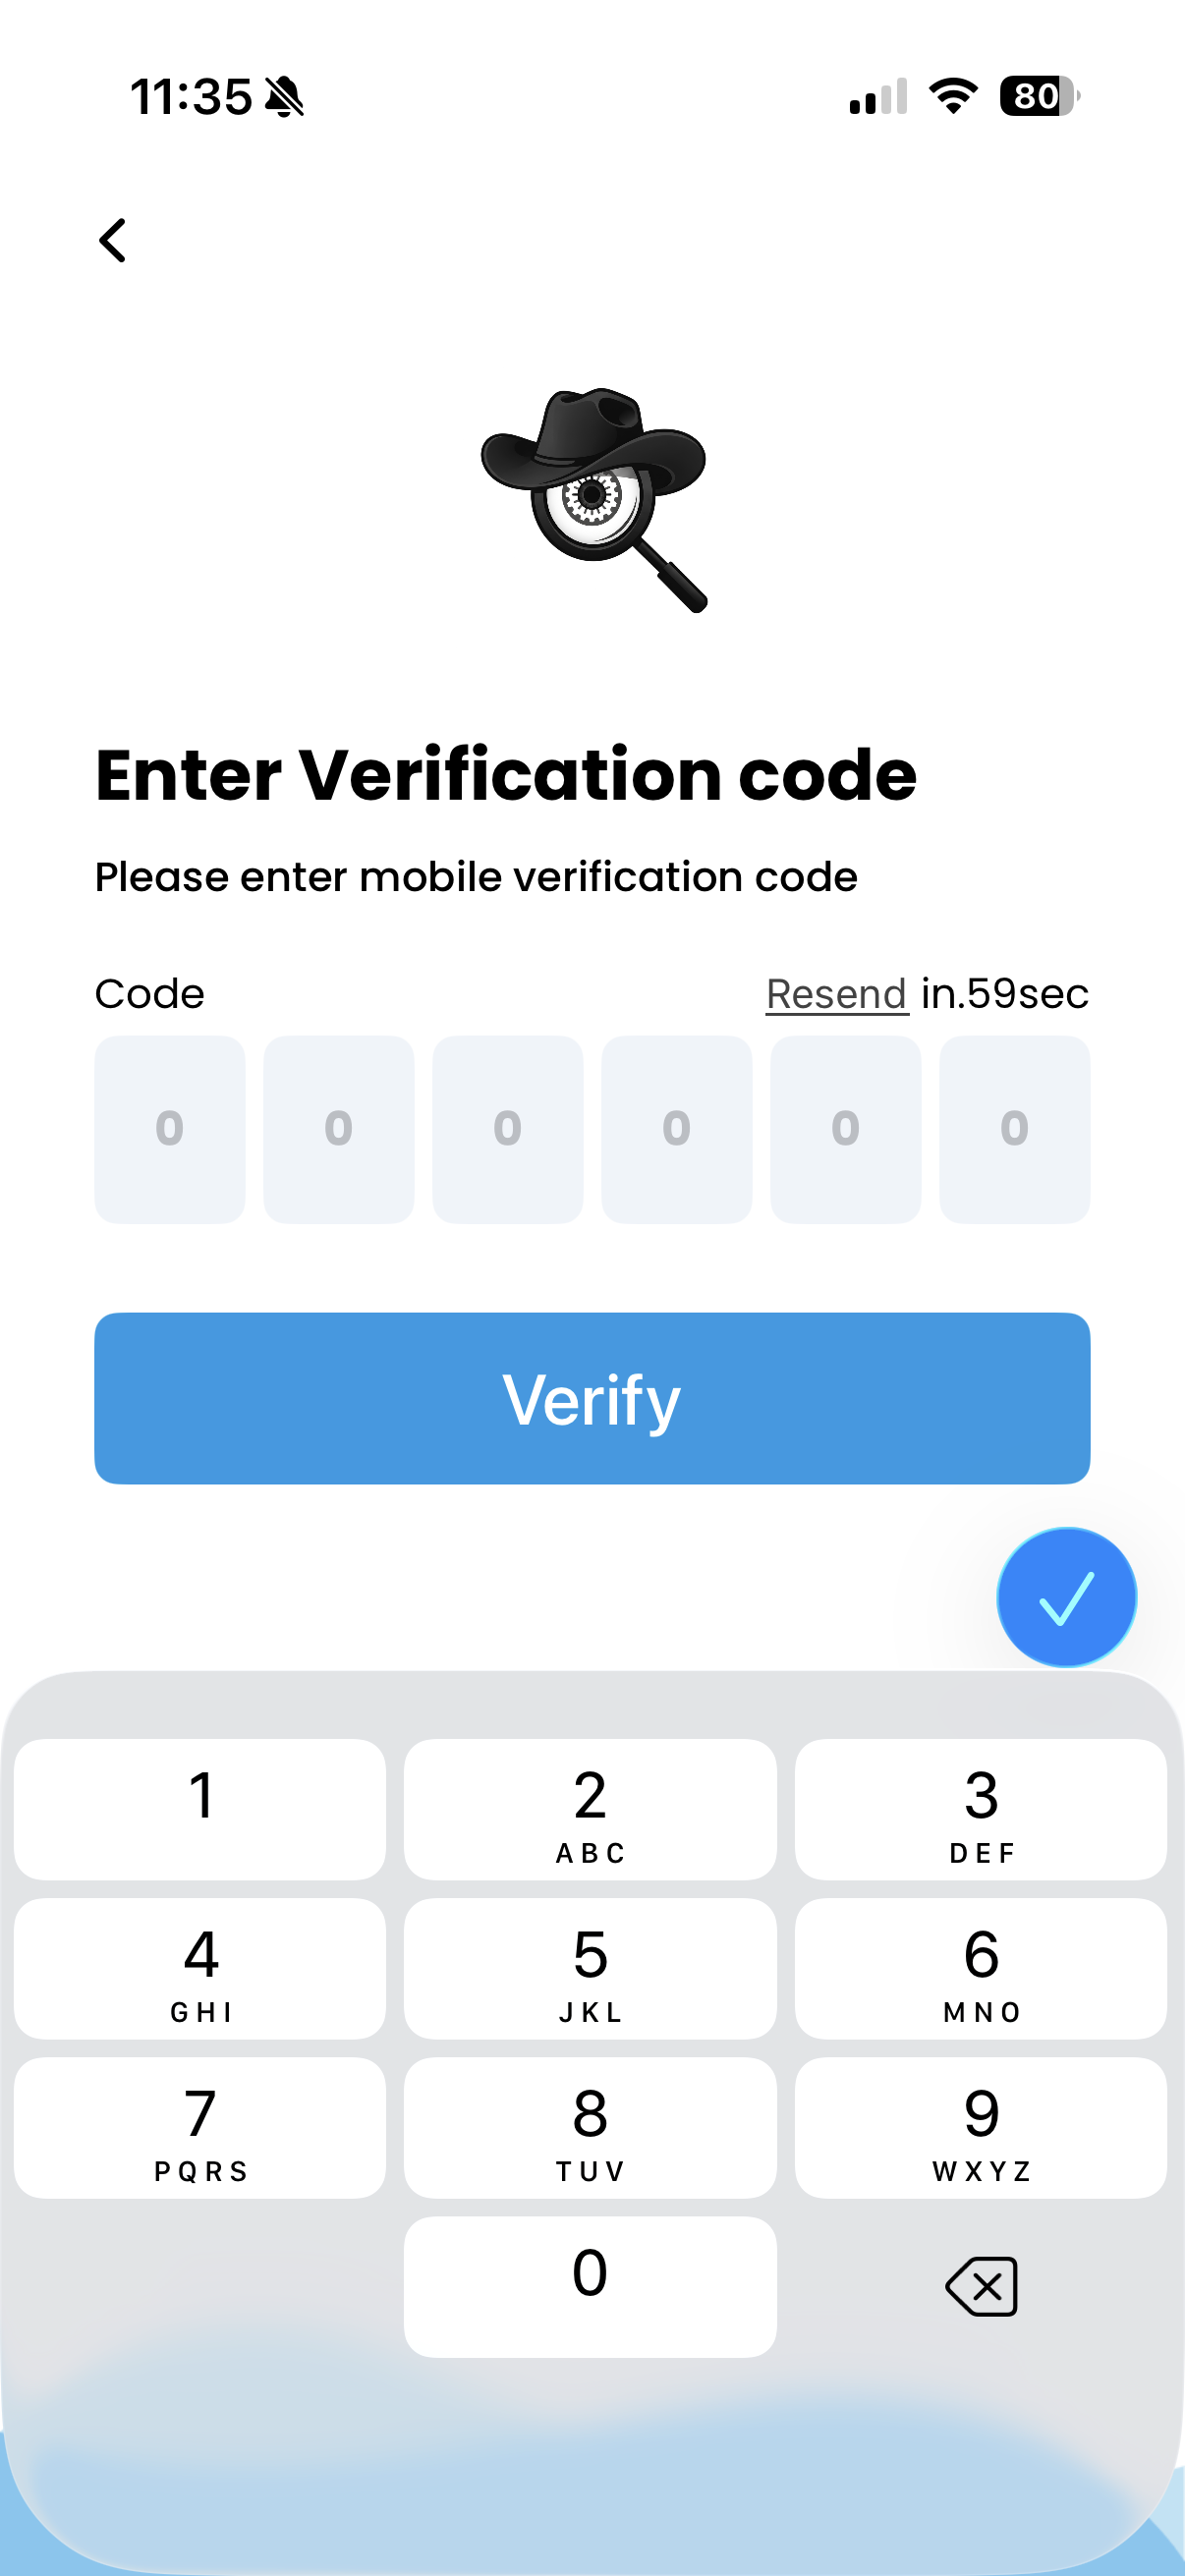
A text message will be received with the 6 digit pin for login. While still in testing mode, you might be allowed to login with all zeros: 000000
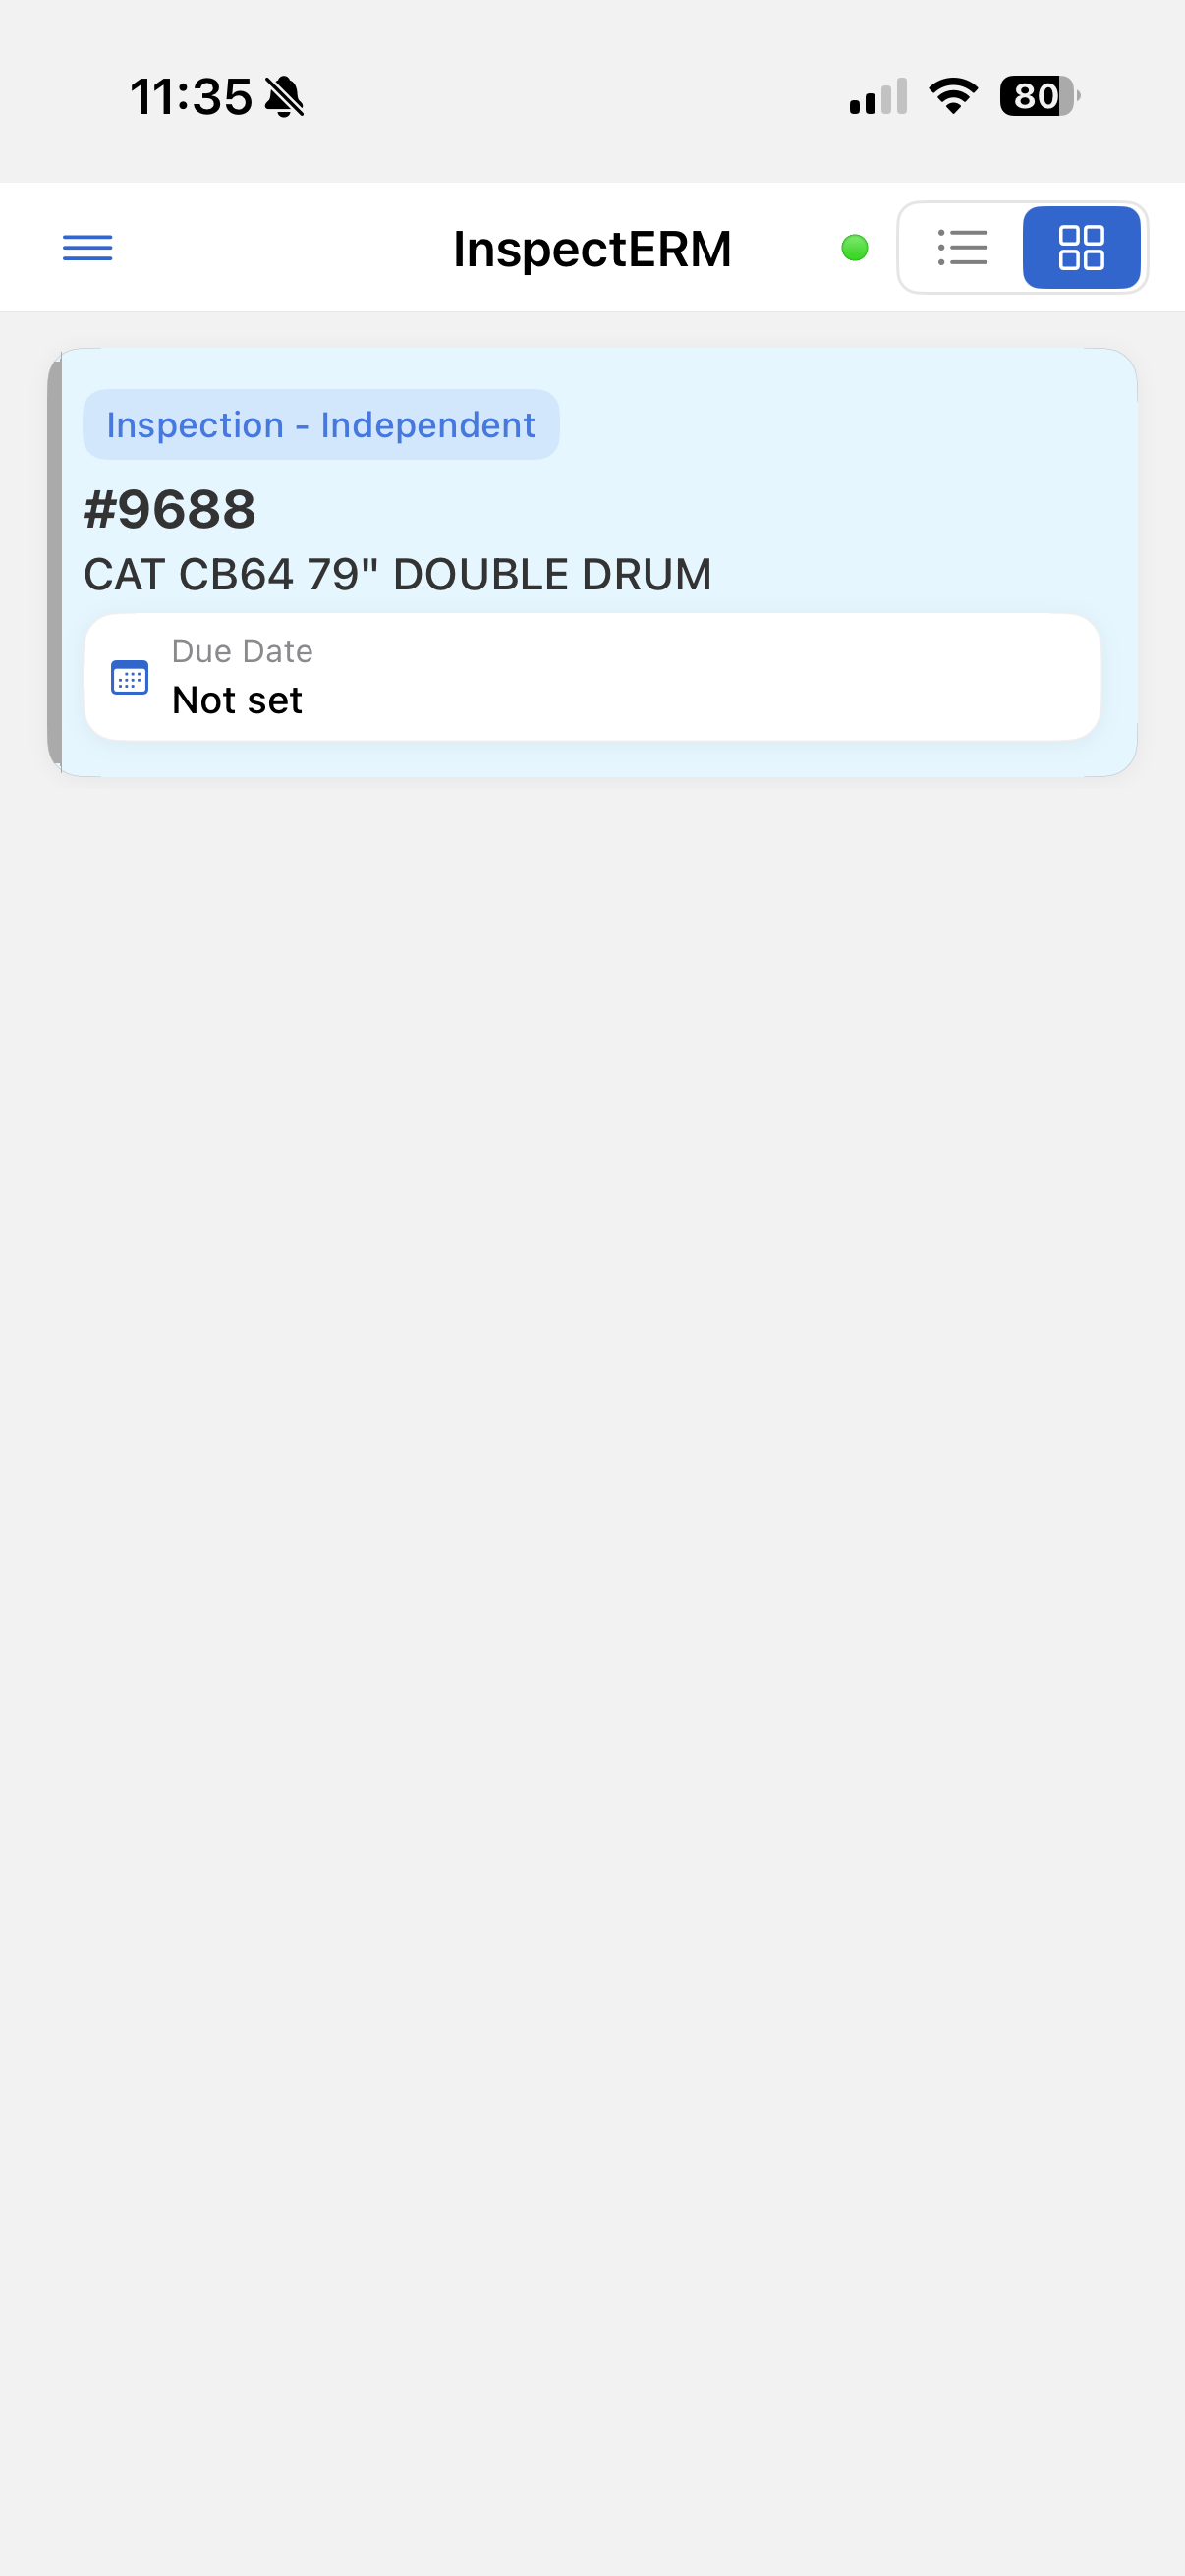
Once logged in, any Ready work which is assigned to the user (or assigned to All users) is shown:
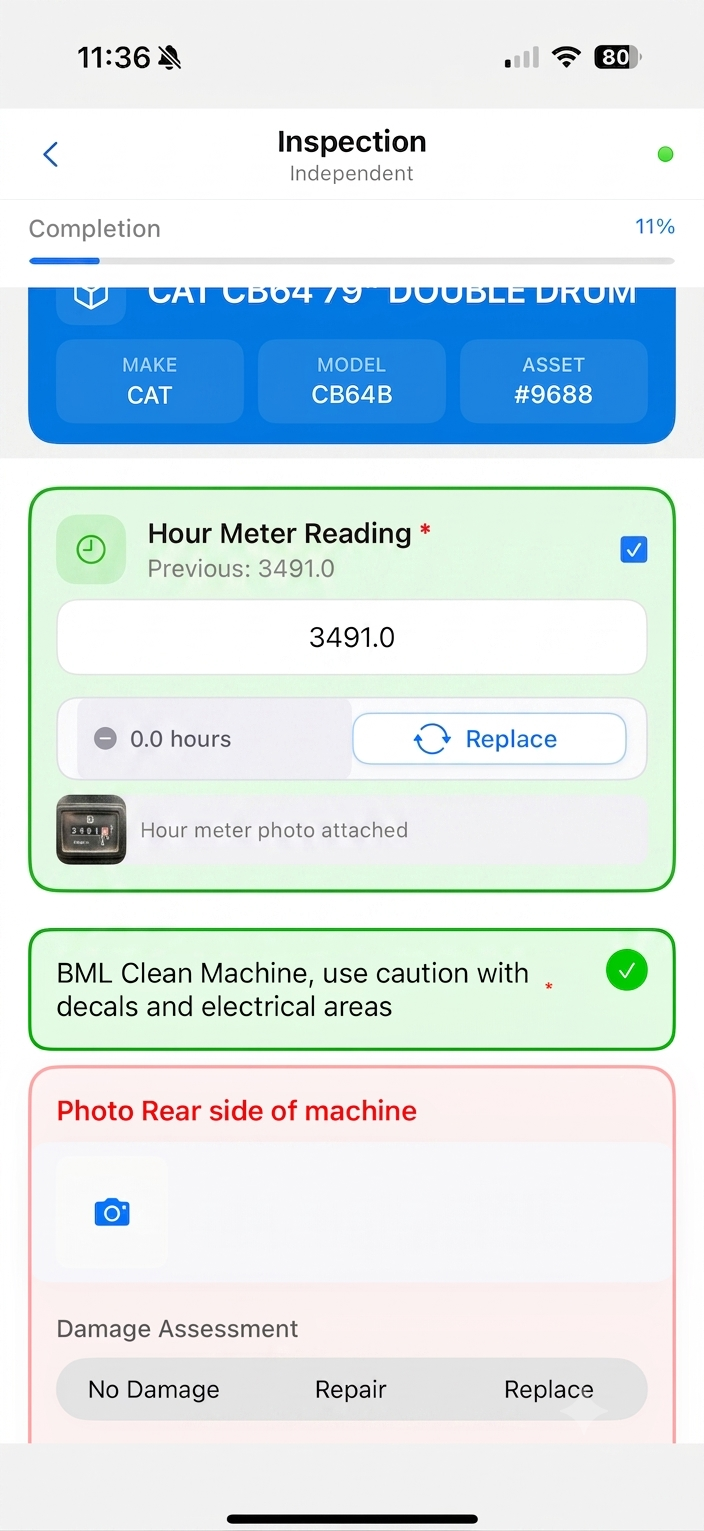
Open opening the inspection, the defined questions for the asset are shown based on what category it’s a part of:
Since this Asset has an Hour Meter, we need to verify it and take a picture as shown:
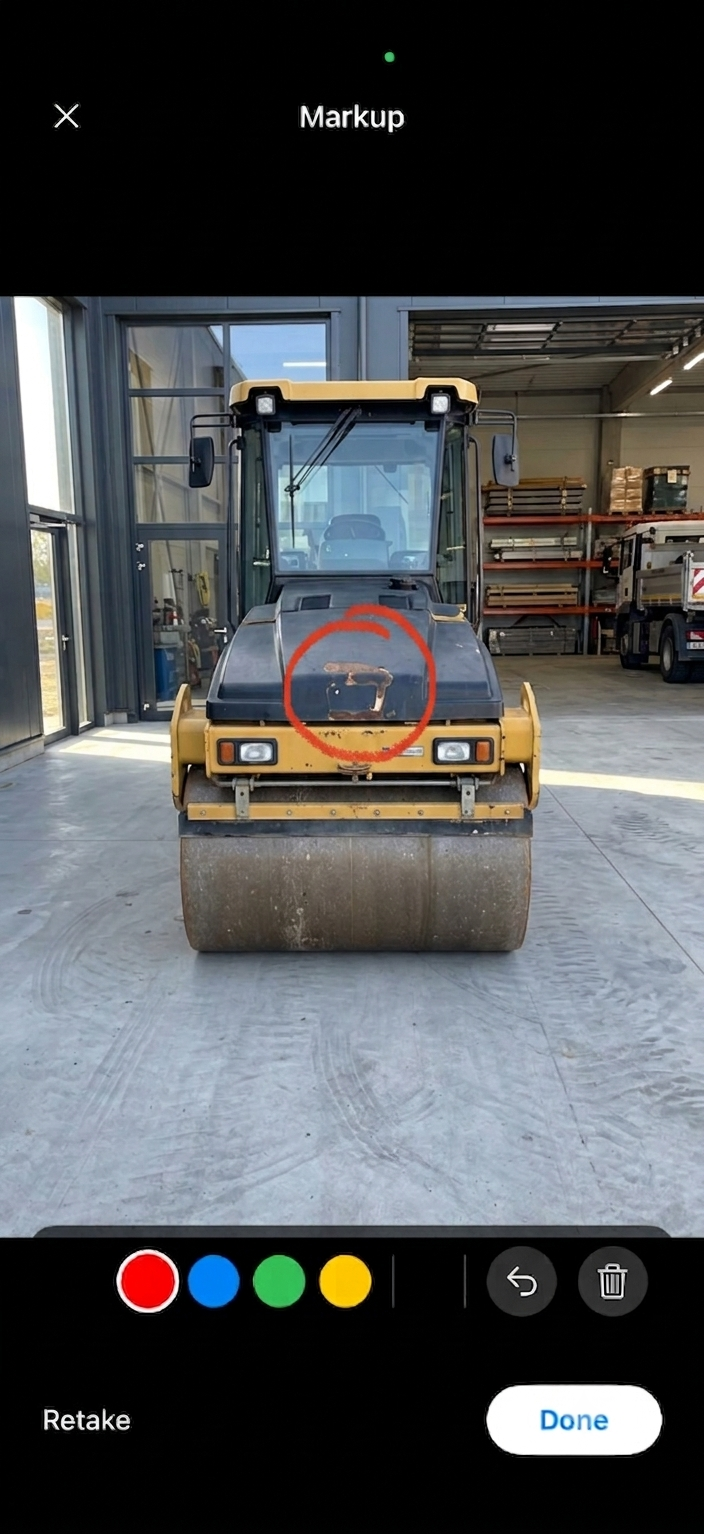
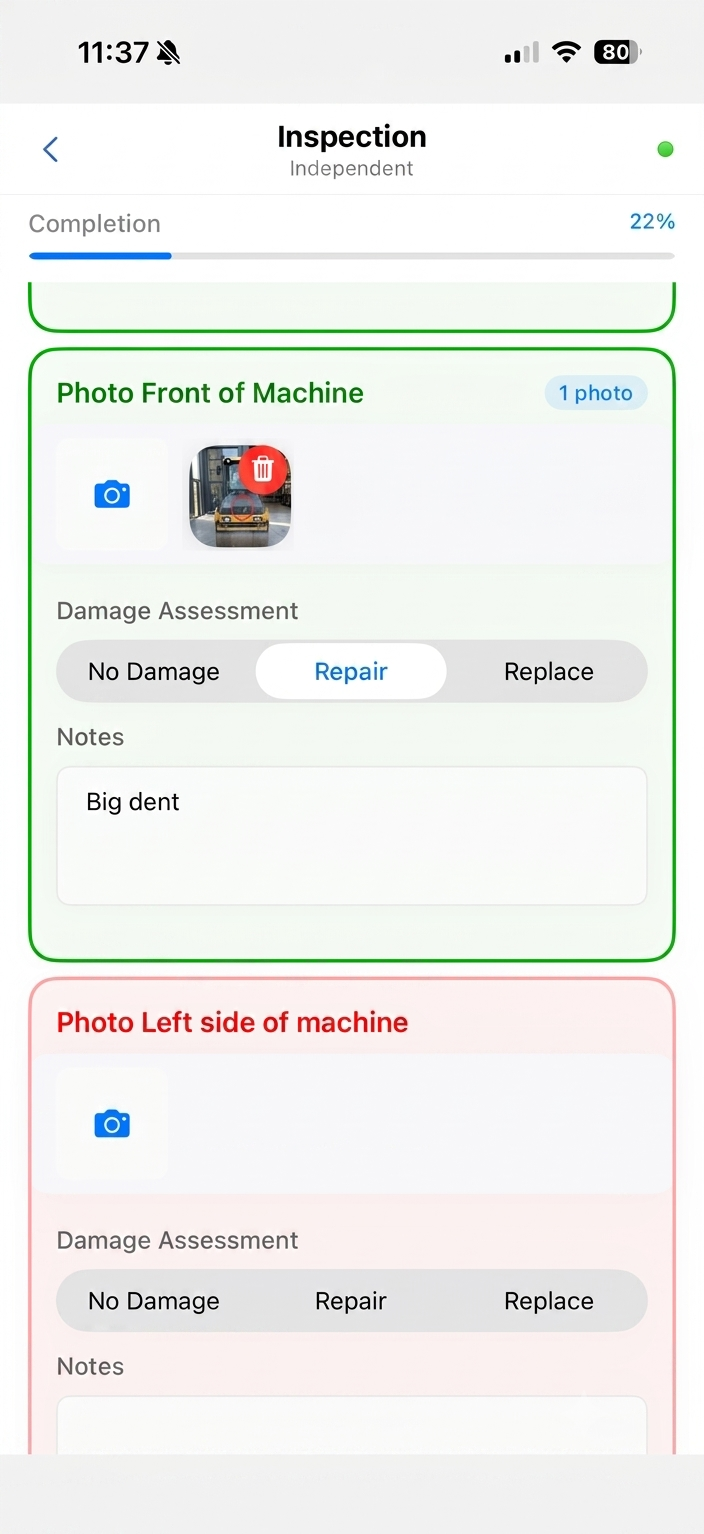
For a Photo of Front of Machine, we are required to take a picture. While taking the picture, we can highlight anything of interest. In this case, we draw a red circle around the damage on the front of the machine:
We mark it for Repair and fill in some notes. We can add as many pictures per question as appropriate.
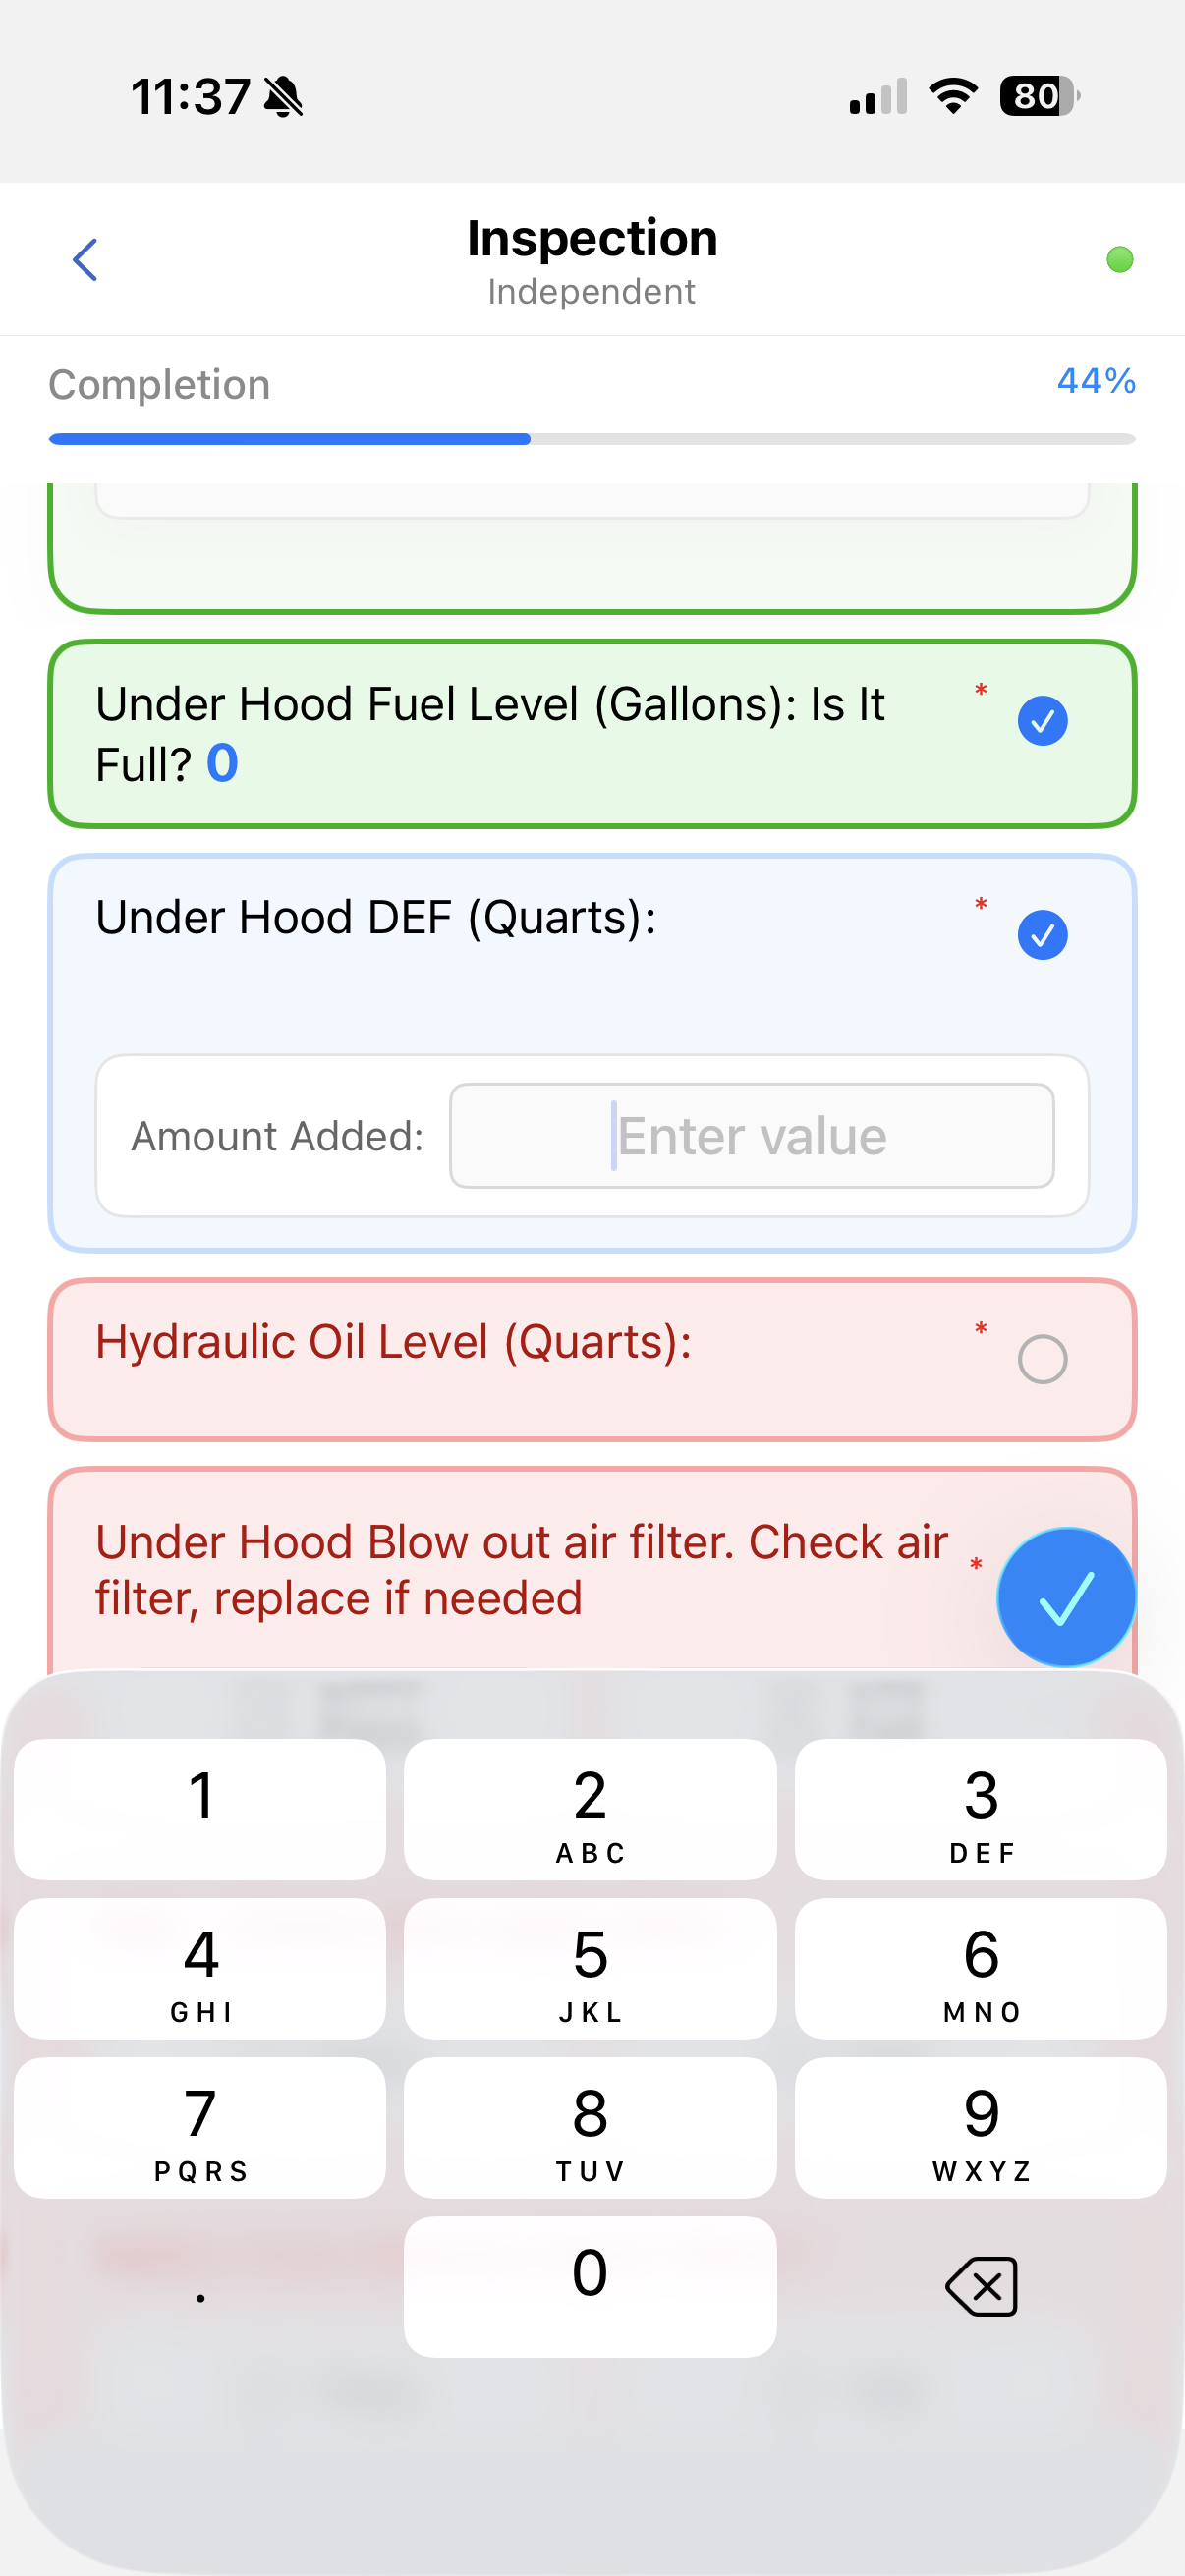
Some questions require the user to fill in how much of a fluid was added – the amount of DEF in this case:
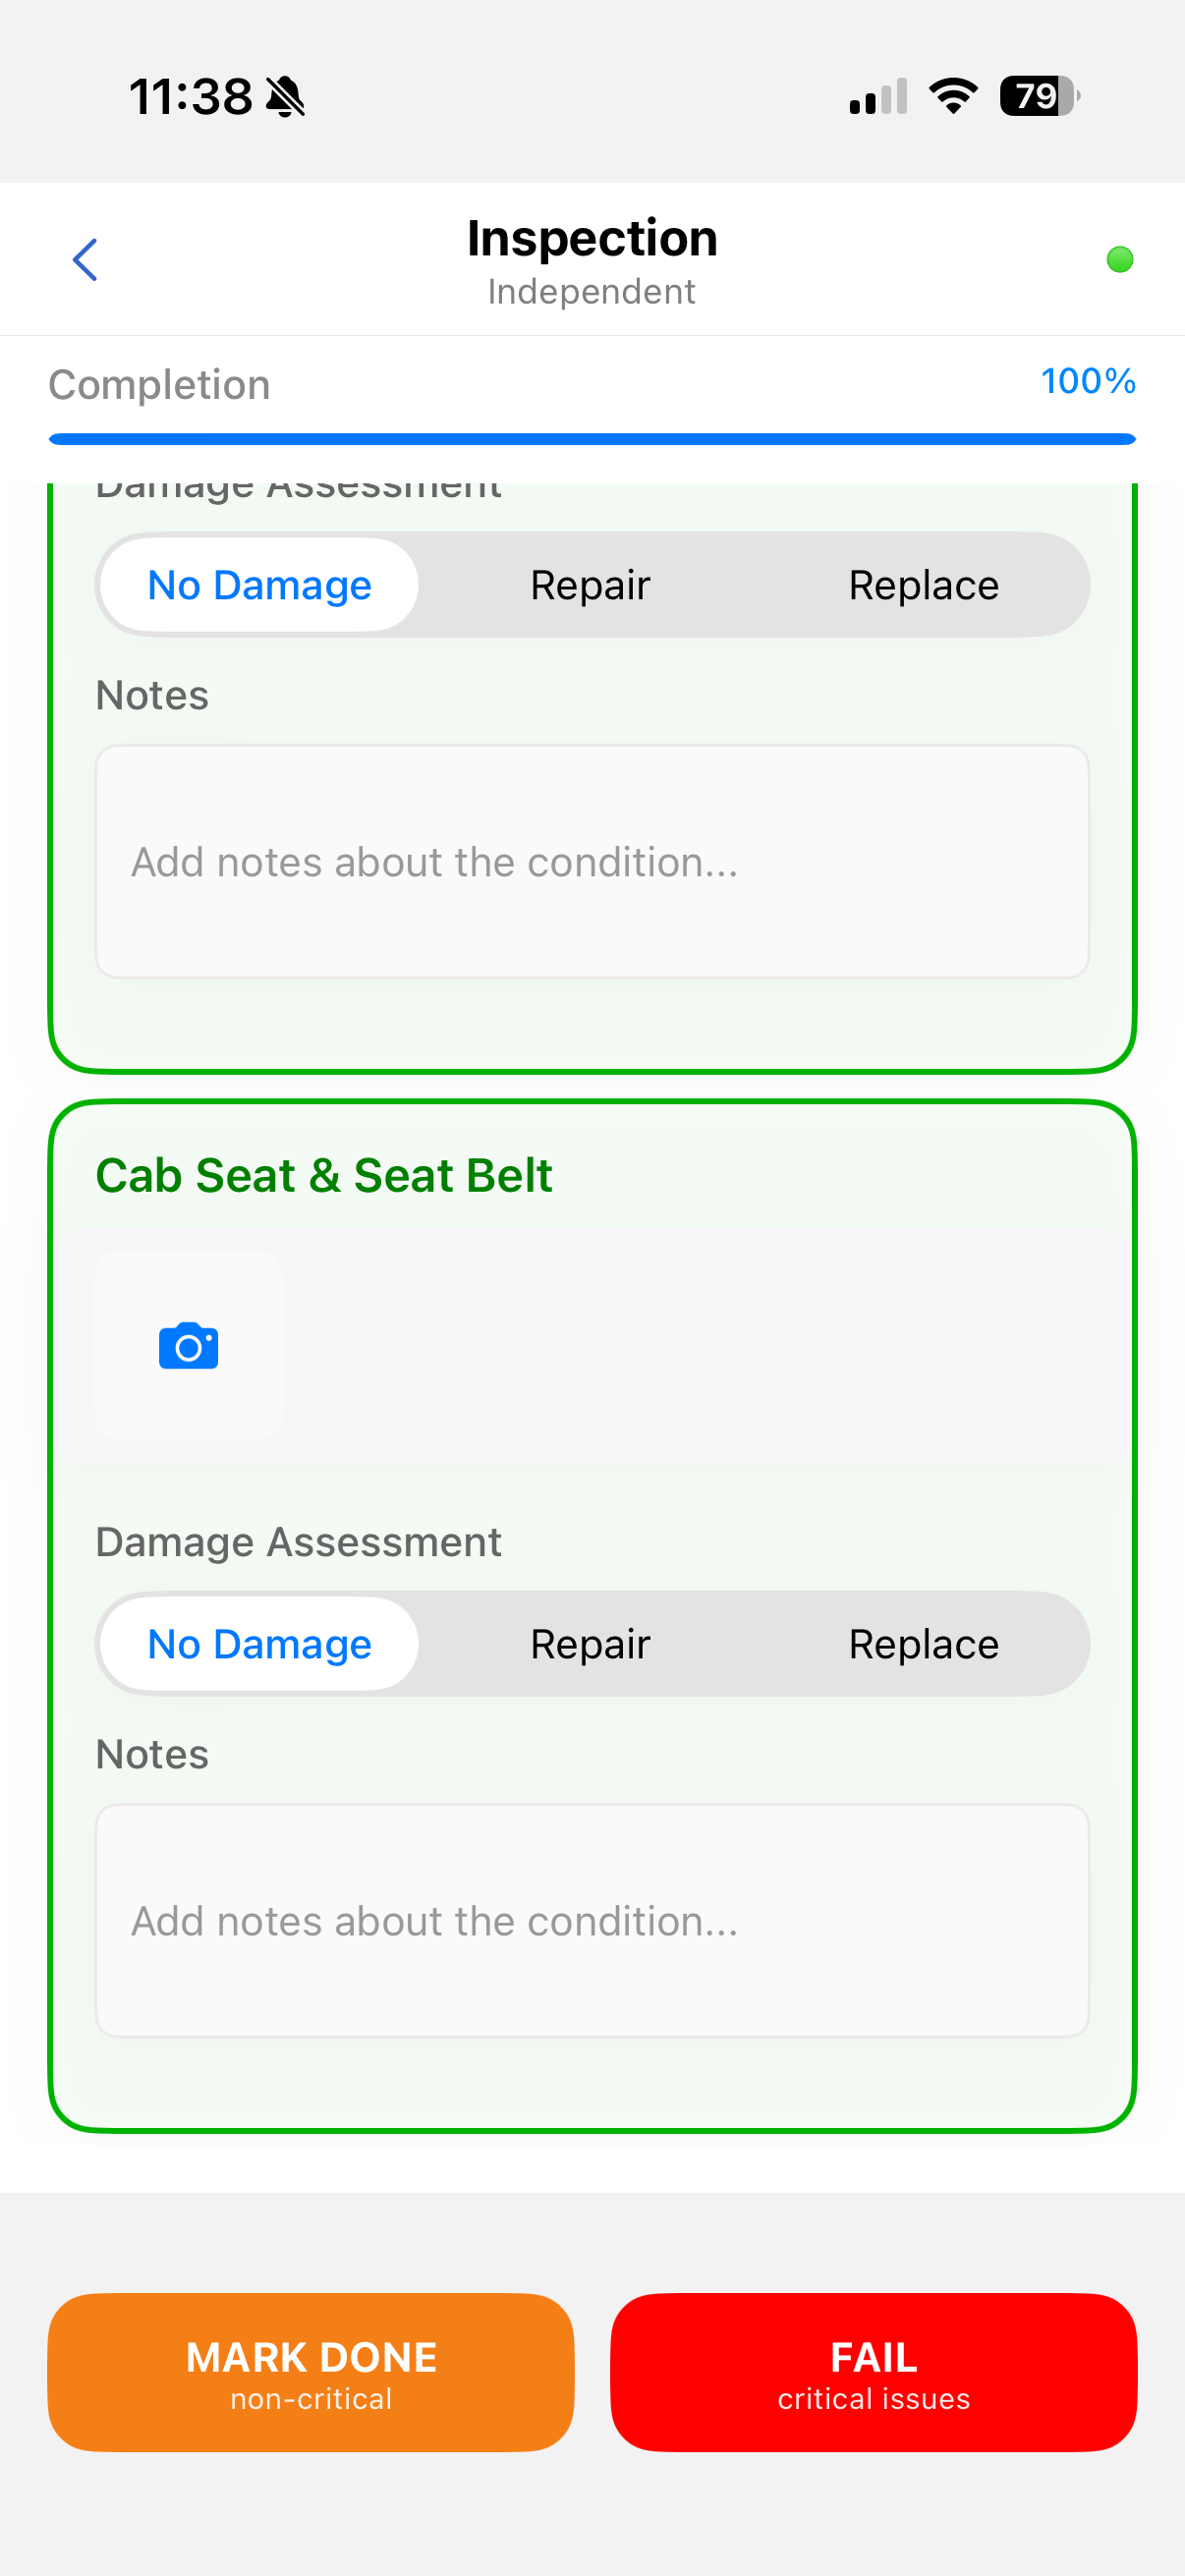
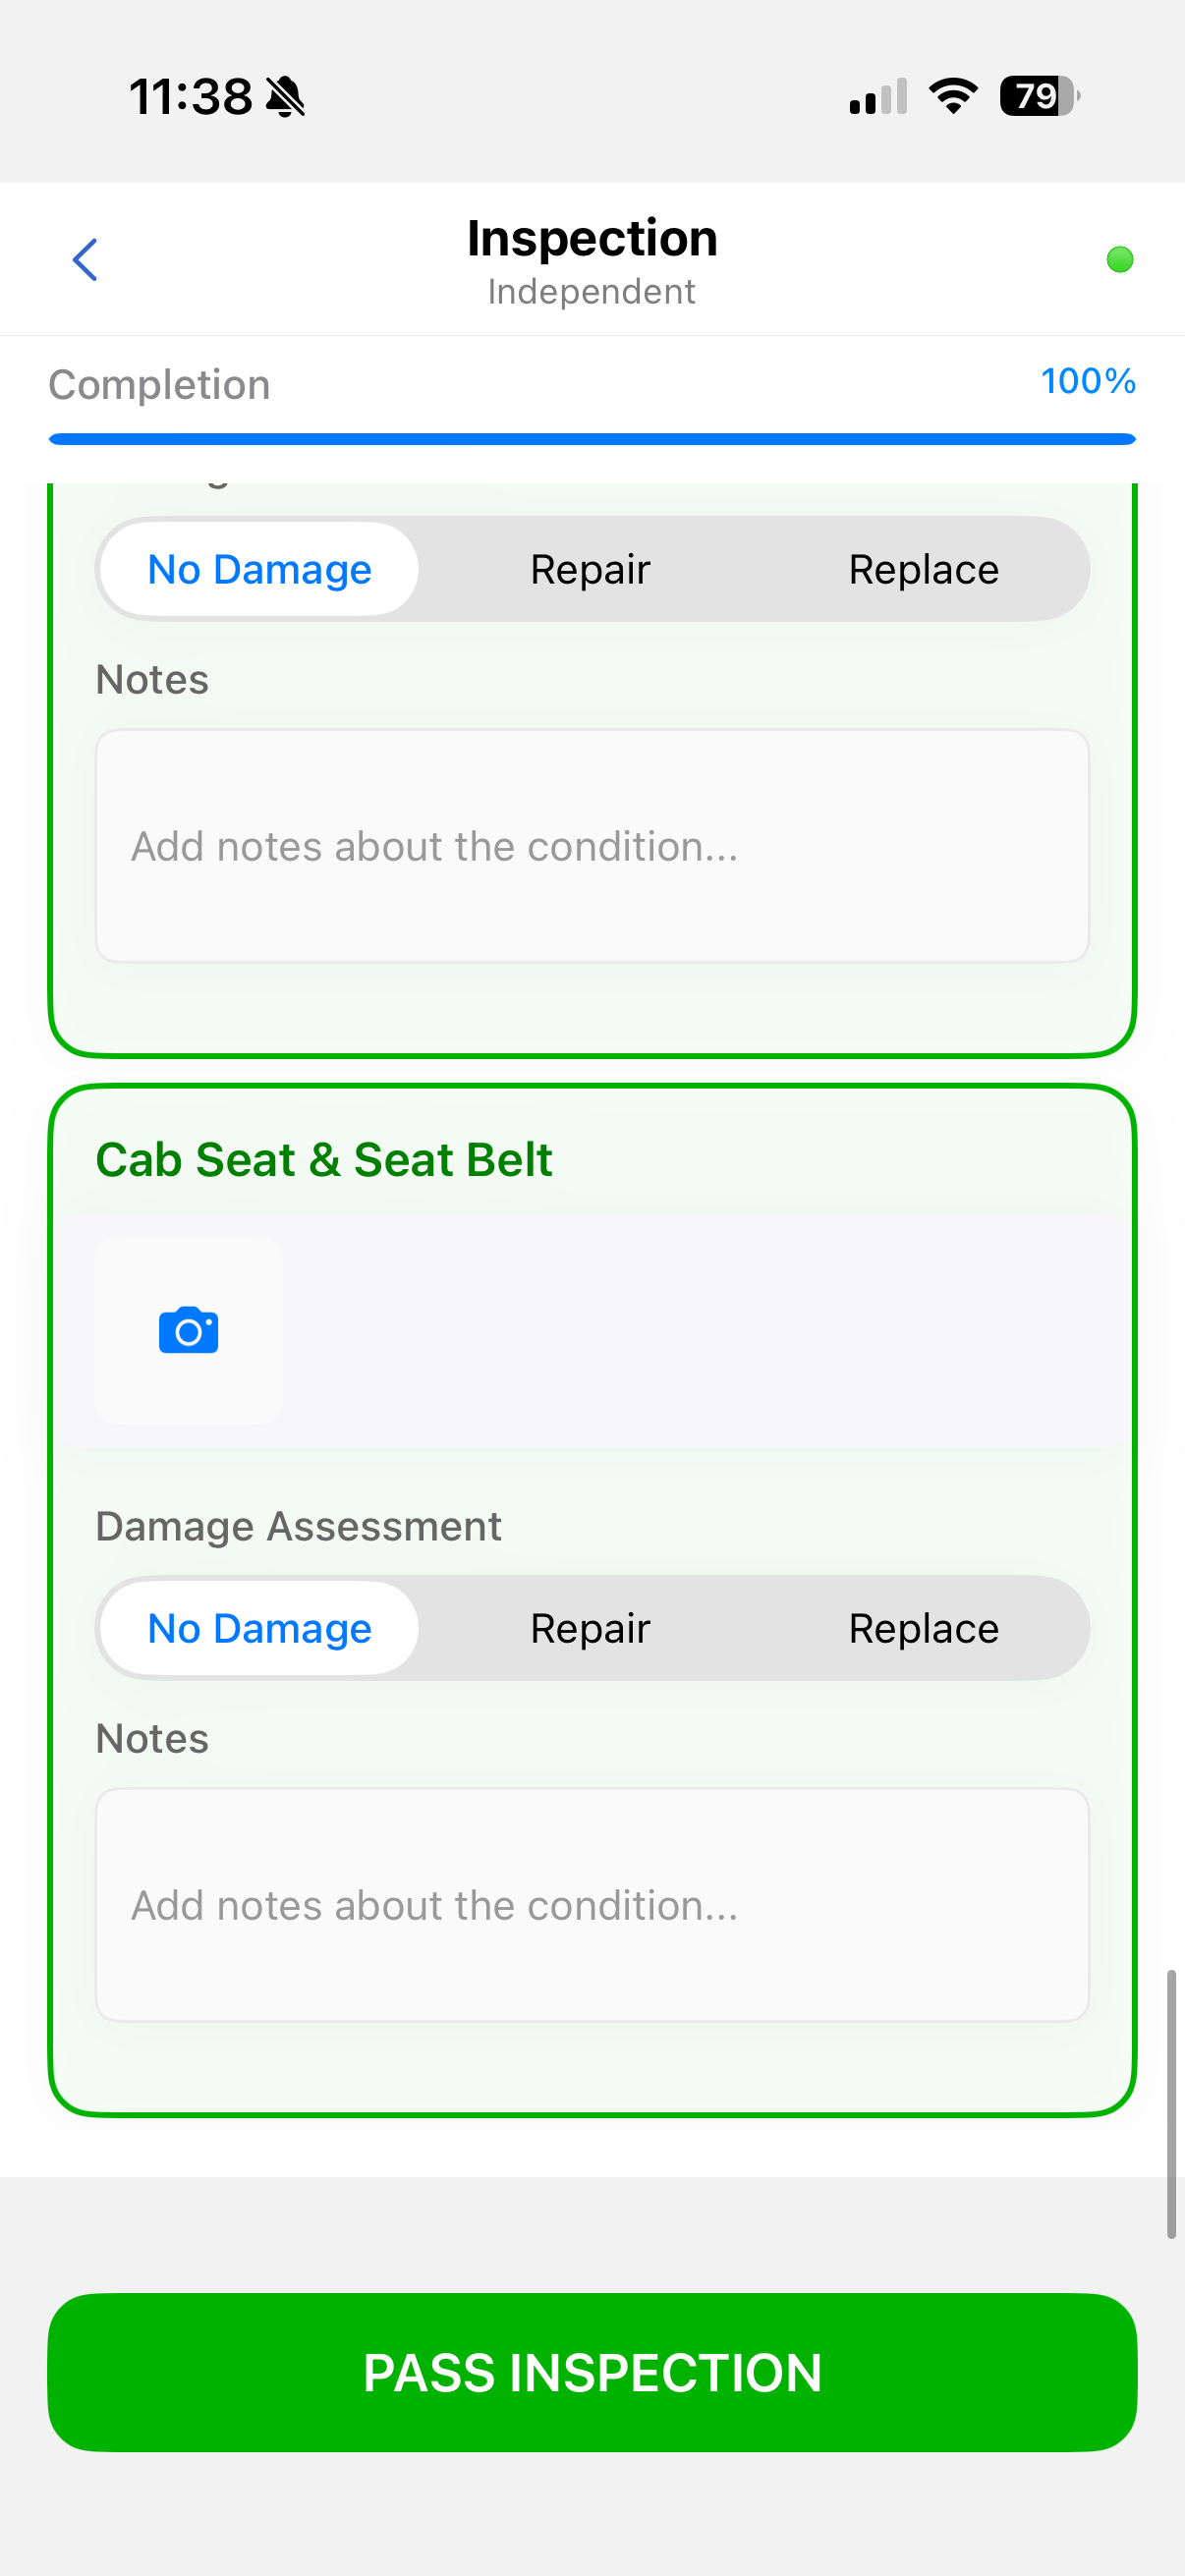
Once all questions have been completed, we can mark the inspection as Passed, Done (non-critical) or Failed (with critical issues):
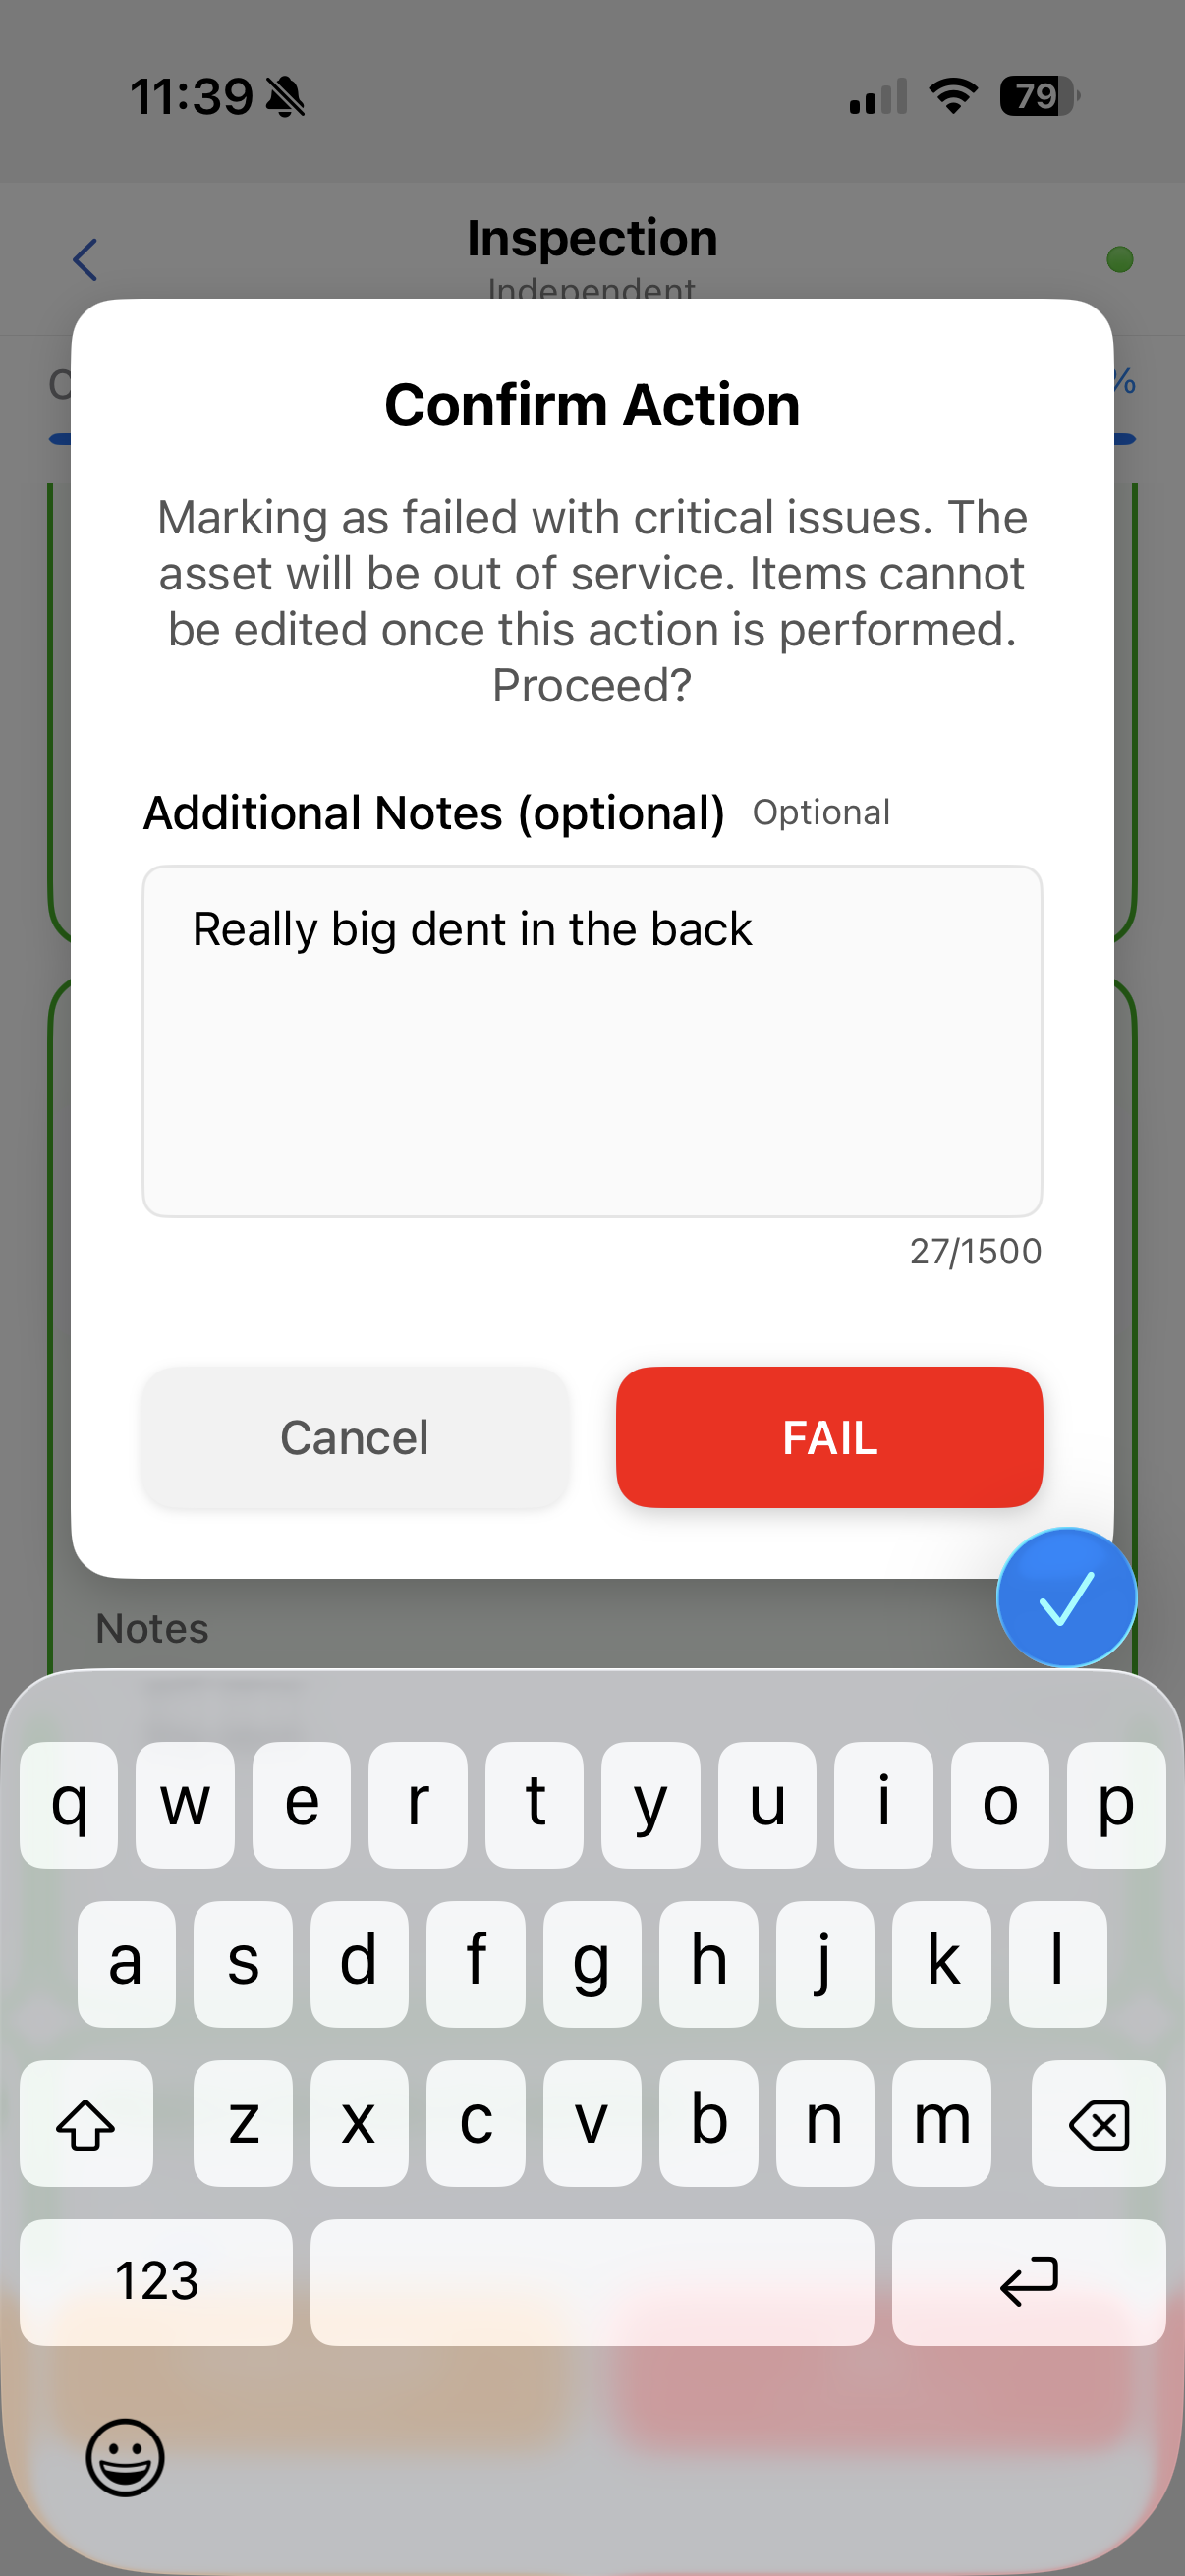
If the inspection is not marked as Passed, we need to fill in a reason:
6. Reports
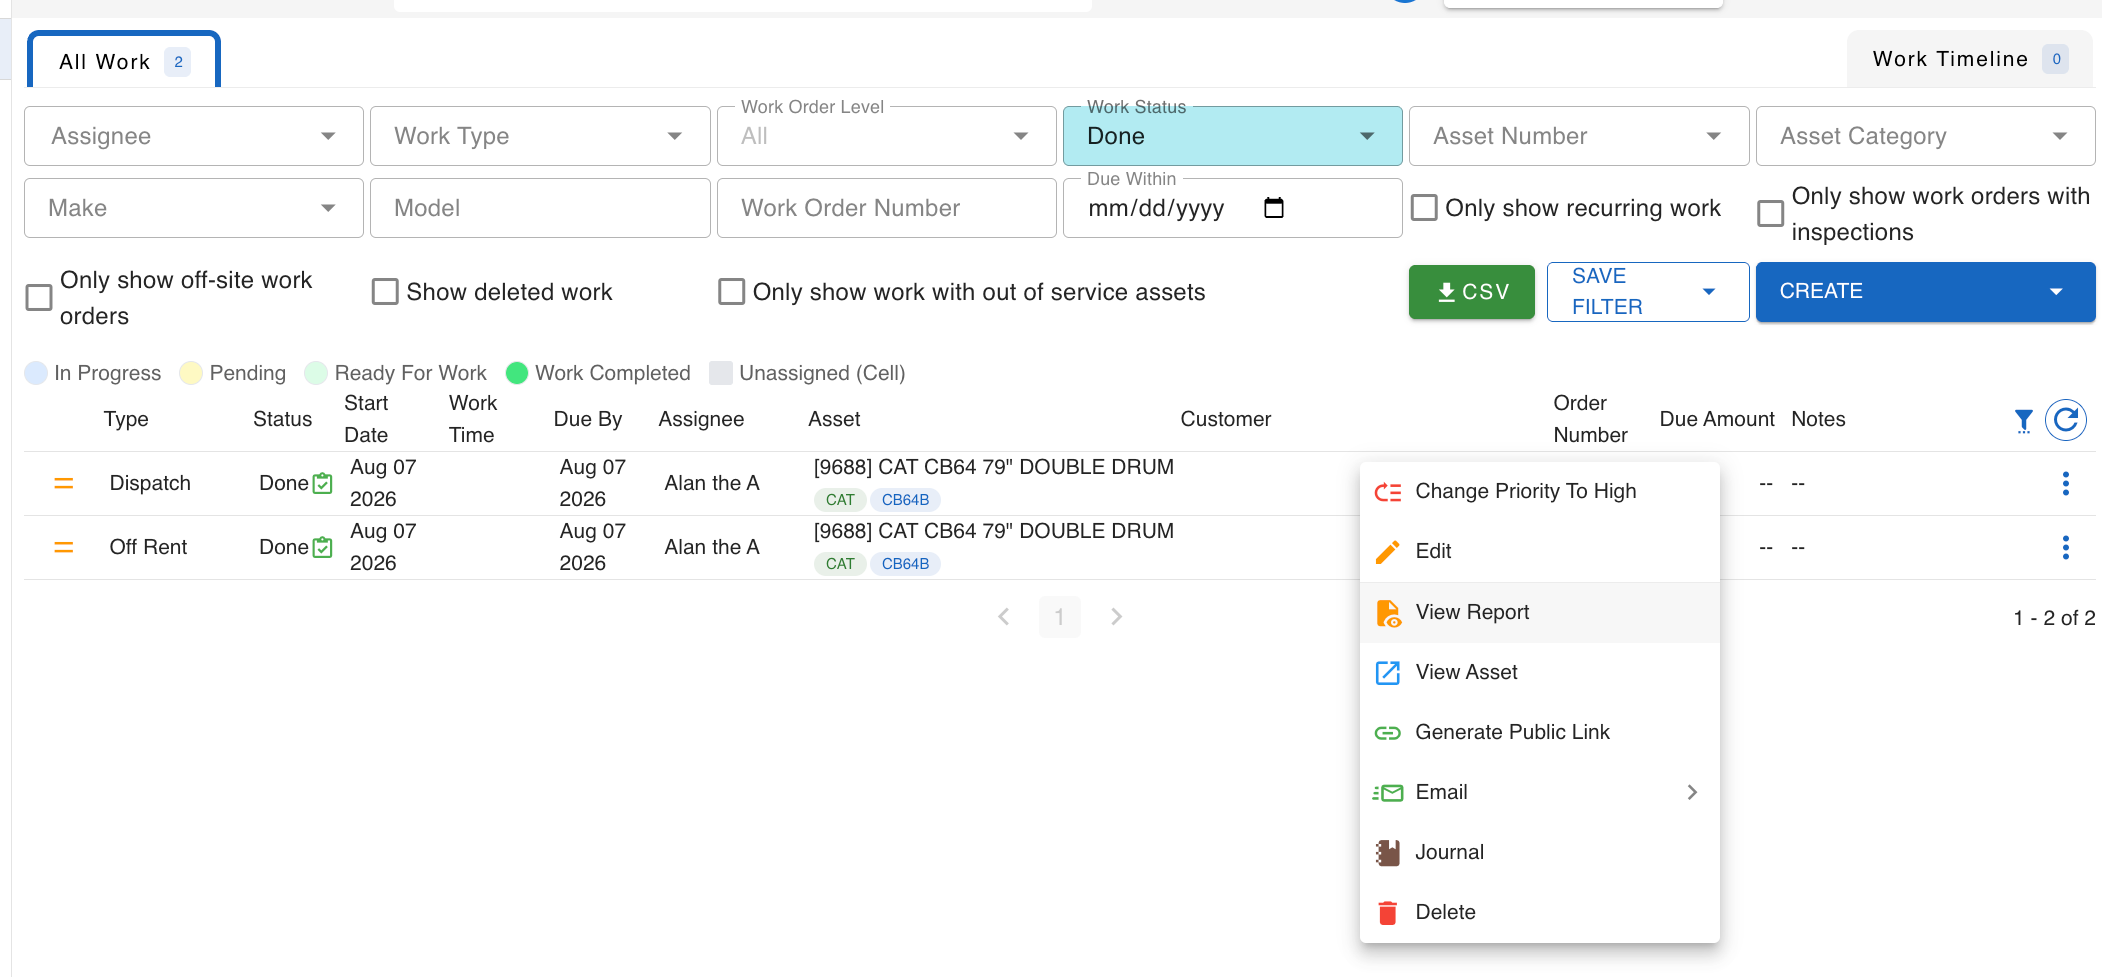
Per Inspection: A Report of an individual Inspection can be viewed from the context menu of the inspection. A full report can be Emailed or shared as a Public Link which has an expiration time based on the Platform Settings.
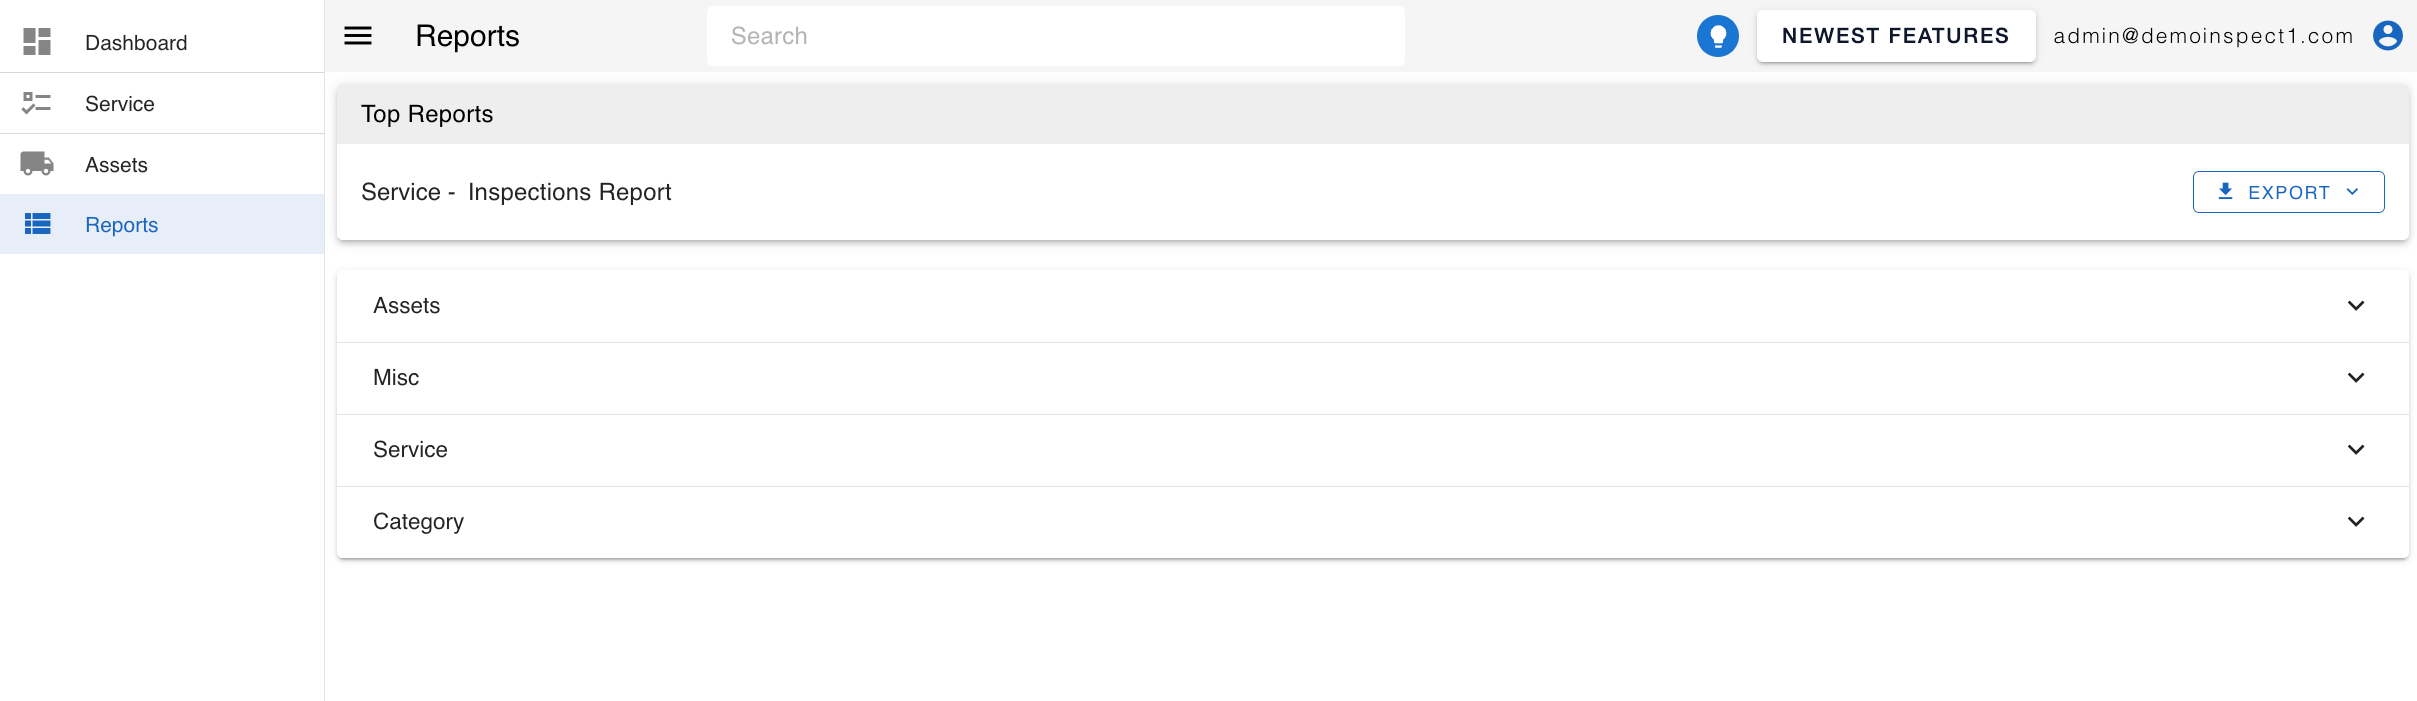
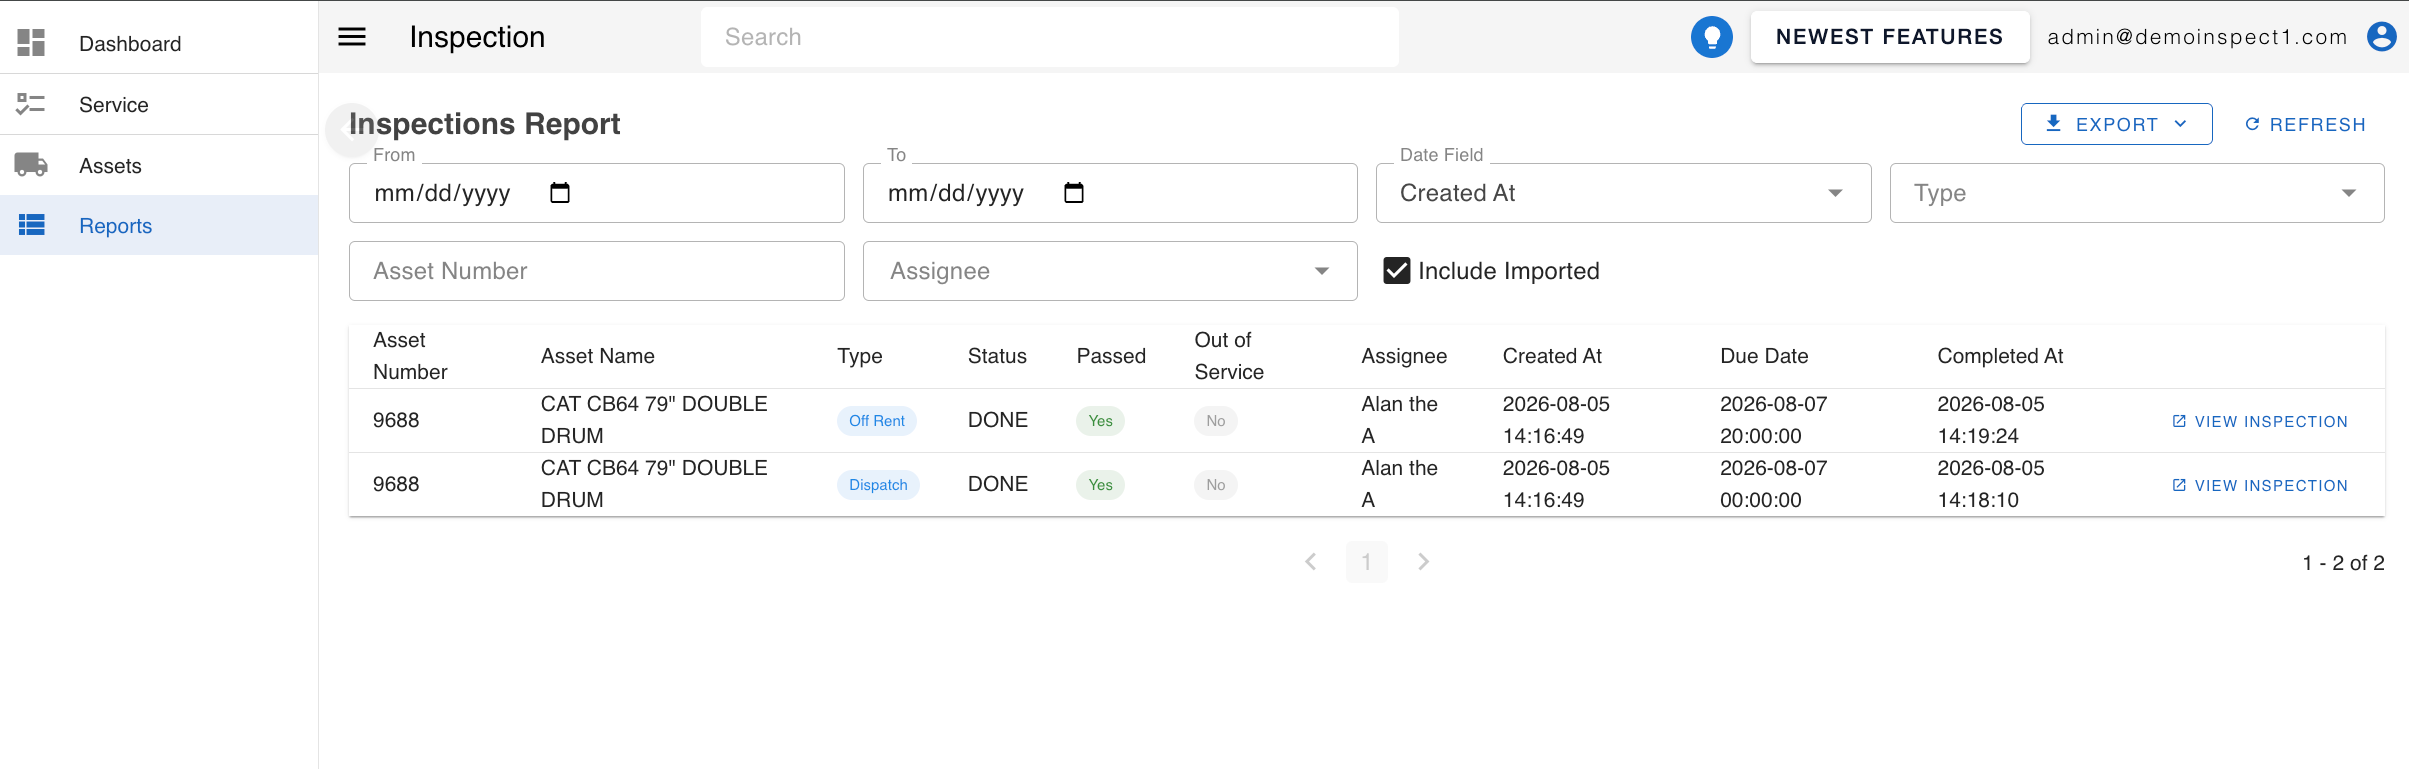
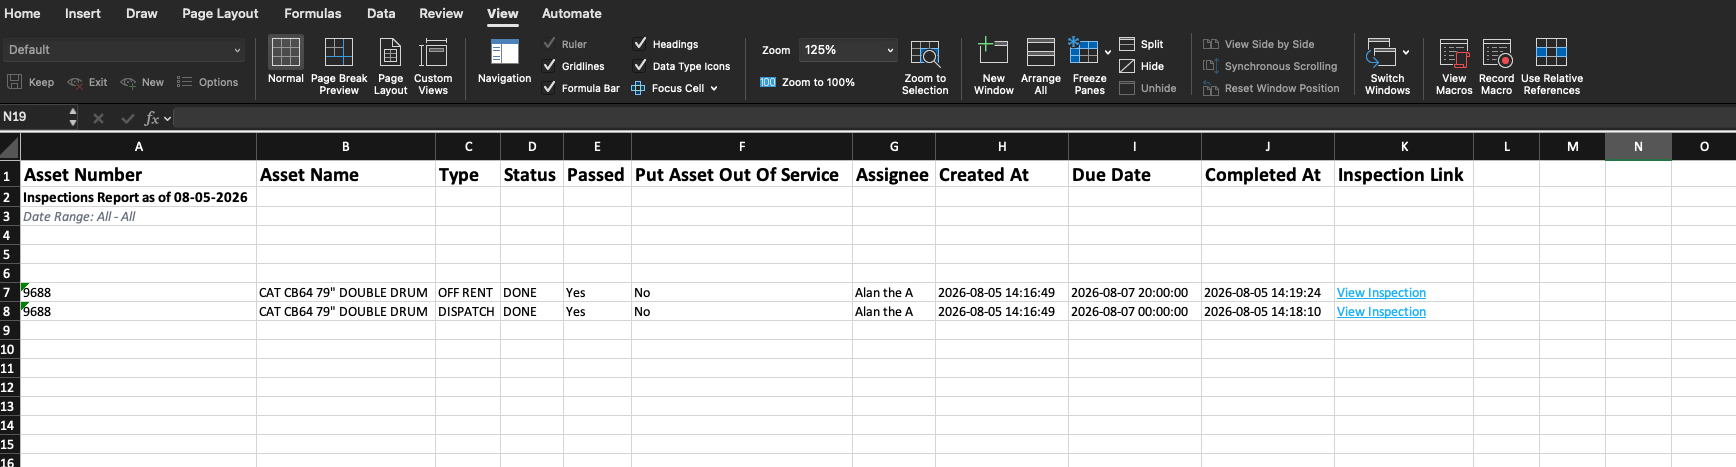
General: All inspections can be reported on and filtered. The Top Reports are shown on the Reports page. Opening the Service - Inspections Report, we can see the reports performed within the time window:
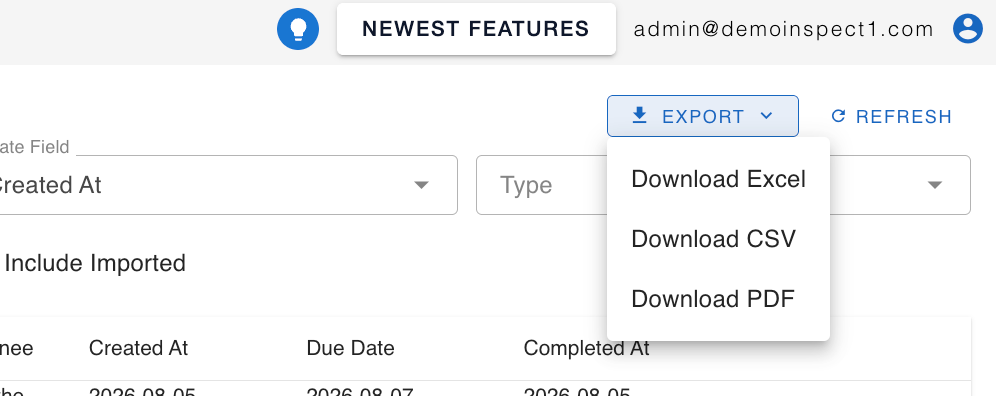
The report can be viewed on the web or exported in a variety of formats
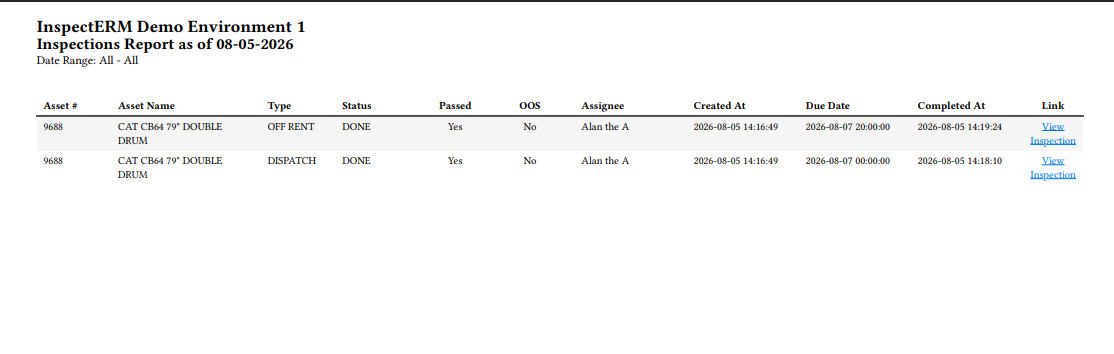
PDF:
XLSX:
Last updated